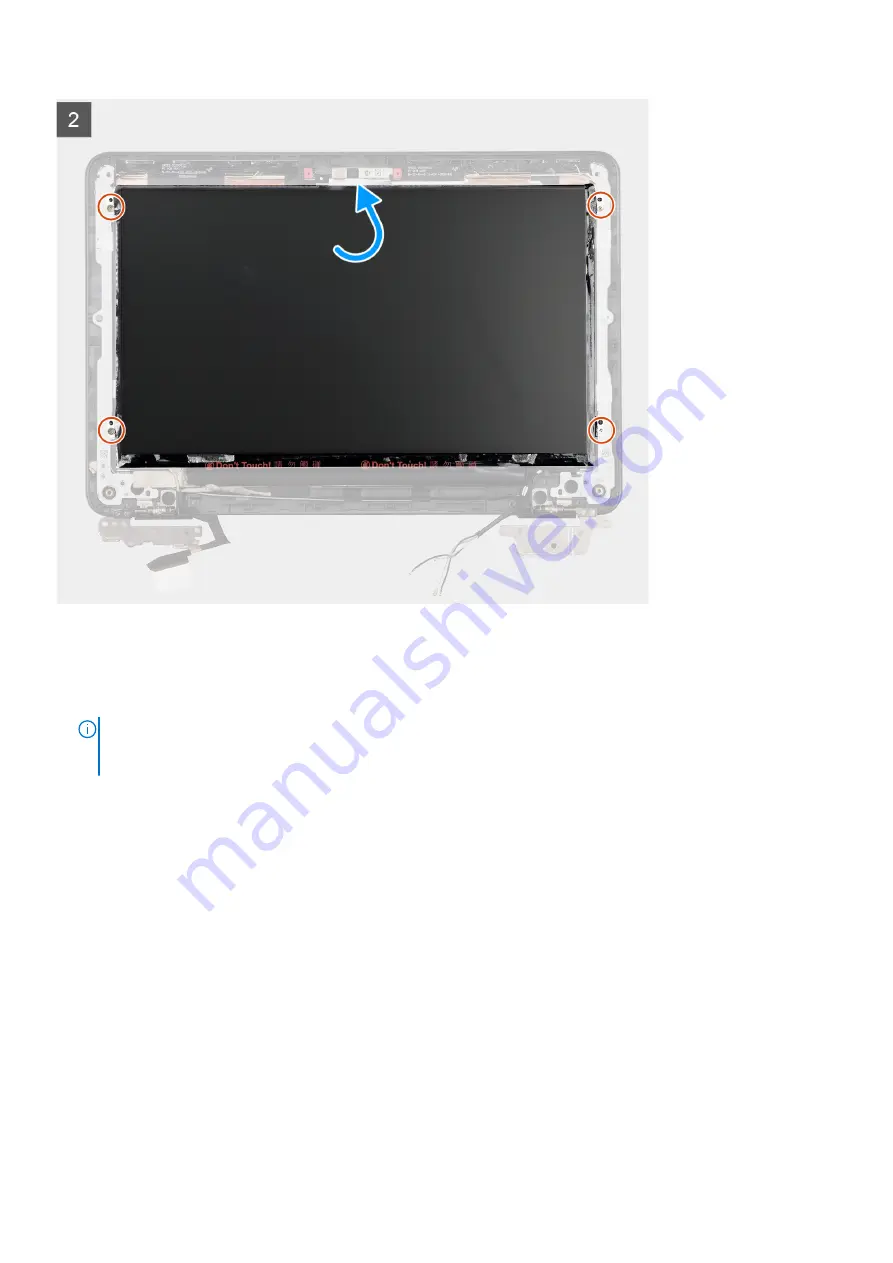
Steps
1. Connect the display cable to the connector on the back of the display panel.
2. Adhere the rubber spacer on the display cable.
3. Adhere the clear tape on the display cable connector.
NOTE:
For Chromebook 3110 systems shipped with WWAN, route the display cable along the routing channels at the
bottom-left side of the display back-cover and then adhere the piece of conductive tape to secure the display cable in
place.
4. Adhere the conductive tape to secure the display cable connector.
5. Flip the display panel to align it with the screw holders on the display assembly.
6. Replace the four screws (M2x3) to secure the display panel to the display assembly.
Next steps
1. Install the
2. Install the
.
3. Install the
for systems enabled with 4G LTE.
4. Install the
.
After working inside your computer
.
54
Removing and installing components
Содержание Chromebook 3110
Страница 15: ...Removing and installing components 15 ...
Страница 25: ...Removing and installing components 25 ...
Страница 28: ...28 Removing and installing components ...
Страница 30: ...30 Removing and installing components ...
Страница 33: ...Removing and installing components 33 ...
Страница 37: ...Removing and installing components 37 ...
Страница 44: ...44 Removing and installing components ...
Страница 49: ...Removing and installing components 49 ...
Страница 53: ...Removing and installing components 53 ...
Страница 67: ...Troubleshooting 67 ...


