background image

If you do not have distinctive ring service, then set the printer to receive faxes manually (Auto Answer Off). This setting
lets you receive both voice calls and fax calls, but works best if you use voice mail more often. You need to turn off
voice mail whenever you are expecting a fax.

How do I change the resolution of the documents that I fax?

The resolution, or fax quality, of the documents that you send may affect fax transmission. The receiving fax machine
may not support high resolutions and may not be able to receive your fax. You can fix this by enabling Auto Fax
Conversion, but the automatic conversion may result in an unreadable fax, especially if the original document is
already blurred.

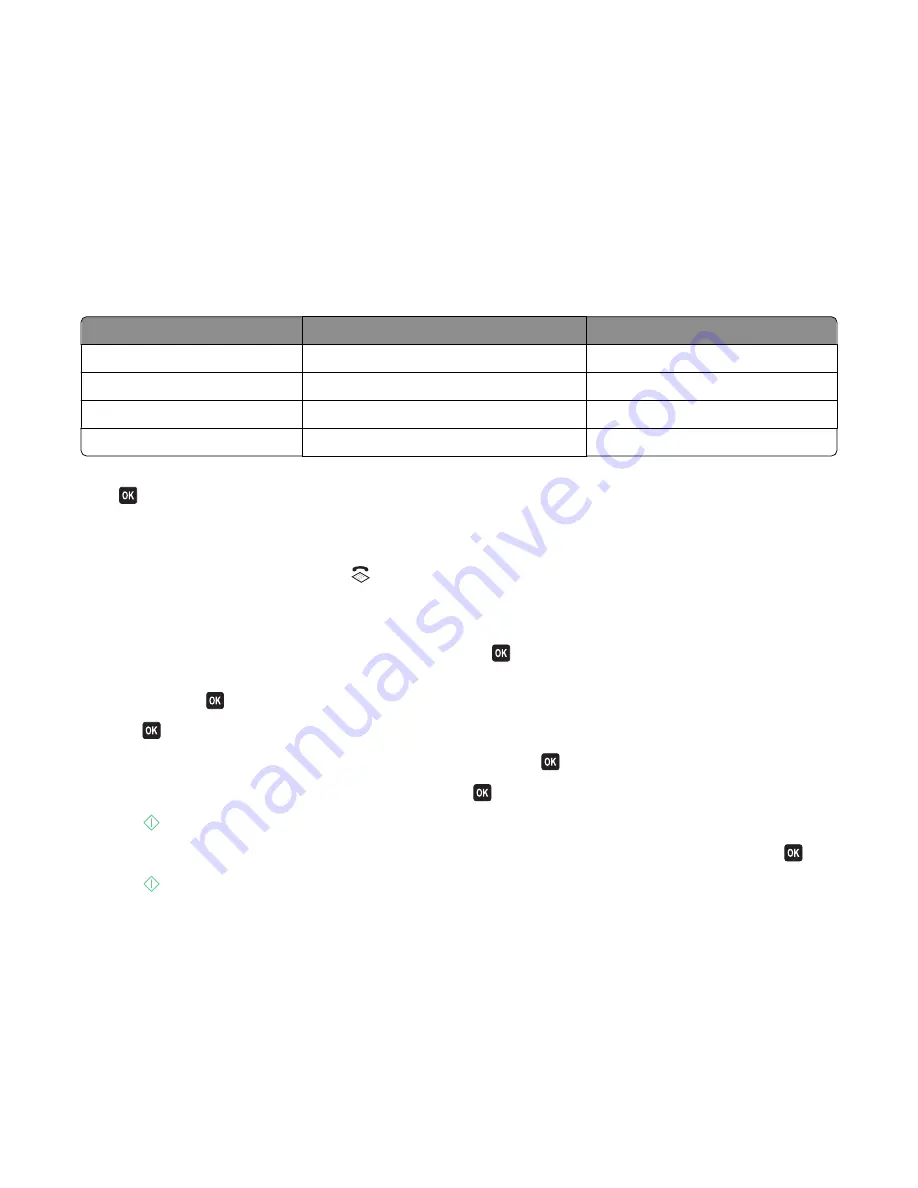
Choose a fax quality that best suits the capacity of the receiving fax machine and the quality of the original document.

Quality

Black resolution

Color resolution

Standard

200 x 100

200 x 200

Fine

200 x 200

200 x 200

Superfine

300 x 300

200 x 200

Ultrafine

300 x 300 (half-toned)

200 x 200

When sending a fax, after entering the fax number, press the arrow buttons to select a fax quality, and then
press 

.

How do I send a fax at a scheduled time?

1

From the printer control panel, press 

.

2

Enter the fax number of the recipient, or press 

Address Book

 to select a number from the Speed Dial or Group

Dial list.

3

If you want to send the fax to a single recipient, then press 

.

If you want to send a fax to a group of numbers (broadcast fax), then press the arrow buttons to scroll to 

Yes

,

and then press 

.

4

Press 

 to scroll to 

Schedule Fax

.

5

Press the arrow buttons to scroll to 

Send Later

, and then press 

.

6

Enter the time you want to send the fax, and then press 

.

7

Press 

 to start scanning the document.

8

If the printer is not set to the 24-hour mode, press the arrow buttons to select 

AM

 or 

PM

, and then press 

.

9

Press 

 to save the scheduled fax.

The printer sends the fax at the designated time. Do 

not

 turn off the printer or unplug it from the telephone line

before the scheduled time.

How do I send a fax using a phone calling card?

1

Press 

Dialtone

.

You should hear the dial tone of the telephone line.

2

Enter the calling card information, and then when you are connected to the telephone carrier, follow the prompts.

Faxing

77

Содержание 2dw

Страница 1: ...Dell V515w User s Guide April 2009 www dell com support dell com Machine type s 4443 Model s 2dw 6dw ...

Страница 2: ...bidden Trademarks used in this text Dell and the DELLlogoaretrademarks of DellInc Microsoftand Windows areregistered trademarksofMicrosoftCorporation Other trademarksandtradenames may be used in this document to refer to the entities claiming the marks and names of their products Dell Inc disclaims any proprietary interest in trademarks and trade names other than its own ...

Страница 3: ...control panel 16 Using the printer menus 18 Changing temporary settings into new default settings 20 Changing the Power Saver timeout 21 Resetting to factory settings 21 Saving energy with Eco Mode 22 Using the printer software 23 Minimum system requirements 23 Using the Windows printer software 23 Updating the printer software Windows only 25 Reinstalling the printer software 25 Loading paper and...

Страница 4: ... control panel 49 Repeating an image on one page 50 Copying multiple pages on one sheet 50 Making a duplex copy manually 50 Canceling copy jobs 51 Scanning 52 Tips for scanning 52 Scanning to a local or network computer 52 Scanning to a flash drive or memory card 53 Scanning photos into an editing application 53 Scanning documents into an editing application 54 Scanning directly to e mail 54 Scann...

Страница 5: ...99 Cleaning the scanner glass 100 Troubleshooting 101 Before you troubleshoot 101 Using the Service Center to solve printer problems 101 If Troubleshooting does not solve your problem 101 Setup troubleshooting 101 Jams and misfeeds troubleshooting 106 Print troubleshooting 108 Copy and scan troubleshooting 110 Fax troubleshooting 112 Memory card troubleshooting 118 Wireless troubleshooting 119 Ind...

Страница 6: ...6 ...

Страница 7: ...o not subject the power cord to abrasion orstress Do not pinchthe powercord betweenobjects such as furniture and walls If any of these things happen a risk of fire or electrical shock results Inspect the power cord regularly for signs of such problems Remove the power cord from the electrical outlet before inspecting it Refer service or repairs other than those described in the user documentation ...

Страница 8: ...fter the printer is left idle for 10 minutes Eco Mode is enabled by default in your printer Select thelowest PowerSavertimeout The Power Saver feature putsthe printer in a minimum powerstandby mode after the printer has been idle for a set amount of time the Power Saver timeout Share your printer Wireless network printers allow you to share a single printer among multiple computers thus conserving...

Страница 9: ...re you looking for Find it here Initial setup instructions Connecting the printer Installing the printer software Setup documentation The setup documentation came with the printer Additional setup and instructions for using the printer Selecting and storing paper and specialty media Loading paper Performing printing copying scanning and faxing tasks depending on your printer model Configuring prin...

Страница 10: ...g information ready when you contact support so that they may serve you faster Service Tag Express Service Code Note The ServiceTag and Express ServiceCode appear on labels located on your printer Software and Drivers Certified drivers for your printer and installers for Dell printer software Readme files Last minute technical changes or advanced technical reference material for experienced users ...

Страница 11: ...e printer 8 Automatic Document Feeder ADF paper guide Keep paper straight when feeding it into the ADF Note Adjust the paper guide on the ADF tray to the width of the original document 9 ADF output tray Hold documents as they exit from the ADF 10 ADF tray Load original documents in the ADF Recommended for scanning copying or faxing multiple page documents Note Donot load postcards photos smallitem...

Страница 12: ...e for the printer and if this connection method is supported in your country or region Note Remove the plug to access the port 6 LINE Port LINE Connect the printer to an active telephone line through a standard wall jack DSL filter or VoIP adapter to send and receive faxes 7 USB port Connect the printer to a computer using a USB cable Warning Potential Damage Do not touch the USB port except when ...

Страница 13: ...moving the old ones or the ink remaining in the printhead nozzles may dry out 1 Turn on your printer 2 Open the printer Note The printhead moves to the cartridge installation position 3 Press the release tab and then remove the used ink cartridge or cartridges 1 2 Note Do not reinstall used ink cartridges once you remove them from the printhead Ordering and replacing supplies 13 ...

Страница 14: ...ds available at www dell com supplies For best results use only Dell ink cartridges Item Licensed cartridge1 Regular cartridge Black cartridge Series 21 Series 21R Black cartridge high yield2 Series 23 Series 23R Color cartridge Series 21 Series 21R Color cartridge high yield2 Series 23 Series 23R 1 Licensed for a single use only After use return this cartridge to Dell for remanufacturing refillin...

Страница 15: ... All Programs or Programs and then select the printer program folder from the list 3 Select Printer Home 4 Choose your printer from the printer drop down list 5 Click Order supplies in the Maintenance tab 6 Click 7 Follow the instructions on the computer screen Ordering and replacing supplies 15 ...

Страница 16: ... on and off Switch to Power Saver mode Note When the printer is on press to switch to Power Saver mode Press and hold for three seconds to turn off the printer 2 Copy button Access the copy menu and make copies 3 Scan button Access the scan menu and scan documents 4 Fax button Access the fax menu and send faxes 5 Photo button Access the photo menu and print photos Using the printer control panel b...

Страница 17: ...ne 10 Setup button Access the setup menu and change printer settings Note The Copy Scan Fax and Photo button lights are off when this button is selected 1 2 3 4 5 7 6 Use the To 1 Address Book Access fax numbers from a saved list of numbers 2 Redial Pause In Fax mode Insert a three second pause in a fax number to wait for an outside line or get through an automated answering system Enter a pause o...

Страница 18: ...Navigate an automated answering system Select letters when creating a Speed Dial list Type numbers to enter or edit the date and time shown on the display Using the printer menus Copy menu Scan menu Fax menu PictBridge menu1 Copies Quality Lighter Darker Resize Original Size Photo Reprint Collate Pages per Sheet Copies per Sheet Content Type ID Card Copy Scan to Computer Application Quality Origin...

Страница 19: ...ad Deep Clean Printhead Align Printer Print Test Page Replace Printhead Device Setup Language Country Region Date Time Host Fax Settings Button Beep Power Saver Auto Screen Dim Eco Mode Clear Settings Timeout Network Setup1 Print Setup Page Wi Fi Protected Setup Wireless Information TCP IP File Print Reset Network Adapter Defaults Fax Setup Address Book Reports Ringing and Answering Fax Printing D...

Страница 20: ...uality To change the temporary settings into new default settings 1 From the printer control panel press 2 Press the arrow buttons to scroll to Defaults and then press 3 Press the arrow buttons to scroll to Set Defaults and then press Use Current appears on the display 4 Press again to select Use Current 5 Press until you exit Setup or press another mode button To disable the settings timeout feat...

Страница 21: ...lt settings will delete all the printer settings you have previously selected Using the printer control panel menus 1 From the printer control panel press 2 Press the arrow buttons to scroll to Defaults and then press 3 Press the arrow buttons to scroll to Set Defaults and then press 4 Press the arrow buttons to scroll to Use Factory and then press 5 When prompted to set the initial settings of yo...

Страница 22: ...usingEco Mode thentheEco Modesettingsoverrideanychangesyoumaymaketo individualsettings that are part of Eco Mode Eco Mode is enabled by default To change the Eco Mode setting 1 From the printer control panel press 2 Press the arrow buttons to scroll to Device Setup and then press 3 Press the arrow buttons to scroll to Eco Mode 4 Select the Eco Mode setting and then press 5 Press until you exit Set...

Страница 23: ... The following table provides an overview of various software programs and what they can help you do If you did not install these additional programs during initial installation then reinsert the installation software CD runtheinstallationsoftware andthenselectInstallAdditionalSoftware from theSoftwareAlreadyInstalledscreen Printer software Use the To Dell Printer Home referred to as Printer Home ...

Страница 24: ...program is installed automatically with the printer software if the printer has wireless capability Dell Service Center referred to as Service Center Troubleshoot the printer Access the printer maintenance functions Contact technical support Notes This program is installed automatically with the printer software You may be prompted to install this program from the Web depending on your printer mod...

Страница 25: ...r Programs and then select the printer program folder from the list 3 Select the uninstall option 4 Follow the instructions on the computer screen to remove the software 5 Once the uninstall process in complete restart your computer Installing the printer software Note If you installed the printer software on this computer before but need to reinstall the software then uninstall the current softwa...

Страница 26: ...the printer The paper should be flat against the paper support and the edges should be flush against both paper guides Paper and specialty media guidelines Load up to Make sure that 100 sheets of plain paper The paper guides rest against the edges of the paper Youload letterhead paper with theprintside faceupand the top of the letterhead going into the printer first Loading paper and original docu...

Страница 27: ... paper guides rest against the edges of the envelopes You print the envelopes with Landscape orientation Note If you are mailing within Japan then the envelope can be printed in Portrait orientation with the stamp in the lower right corner or in Landscape orientation with the stamp in the lower left corner If you are mailing internationally then print in Landscape orientation with the stamp in the...

Страница 28: ...st against the edges of the transfer You select Automatic Normal or Photo print quality 50 transparencies The rough side of the transparencies is faceup The paper guides rest against the edges of the transparencies Saving paper default settings You can set the default paper size paper type and photo print size for the documents and photos that you print Note These default settings apply only to pr...

Страница 29: ...ents on the scanner glass 1 Open the top cover and place the document facedown on the scanner glass 2 Close the top cover Loading original documents into the ADF You can load up to 35 sheets of an original document into the ADF for scanning copying and faxing You can load A4 letter or legal size paper into the ADF 1 Adjust the paper guide on the ADF tray to the width of the original document 2 Loa...

Страница 30: ...3 The document feeds into the ADF Loading paper and original documents 30 ...

Страница 31: ...int the type of paper to use and how the pages should print d Click OK to close any printer software dialogs e Click OK or Print Collating printed copies If you print multiple copies of a document then you can choose to print each copy as a set collated or to print the copies as groups of pages not collated Collated Not collated Notes The collate option is available only when you are printing mult...

Страница 32: ...p 3 From the Layout list of the Advanced tab select Pages per sheet 4 Select the number of page images to print on each page If you want each page image to be surrounded by a border then select Print Page Borders 5 Click OK to close any printer software dialogs 6 Click OK or Print Printing documents from a memory card or flash drive To enable the File Print function The printer must be connected t...

Страница 33: ...ocument Notes You may be prompted to enter a PIN if the computer requires it Enter the PIN using the keypad To assign a computer name and a PIN to the computer see the Help for the printer software associated with your operating system Printing specialty documents Printing envelopes 1 Load the envelopes in the printer 2 Send the print job a With a document open click File Print b Click Properties ...

Страница 34: ...nst the edges of the label sheet Use full label sheets Partial sheets with areas exposed by missing labels may cause labels to peel off during printing resulting in a paper jam Note Labels require more drying time Remove each label sheet as it exits and then allow it to dry to avoid ink smudging Printing on custom size paper Before beginning these instructions load the custom size paper in the pri...

Страница 35: ...lly 5 Click OK The printer prints the odd numbered pages and the instruction sheet 6 Flip and reload the paper following the directions on the instruction sheet to complete the print job Note To return to single sided printing return to the Advanced tab From the 2 Sided Printing section select Off from the drop down menu Printing 35 ...

Страница 36: ...ter For more information see Supported memory cards and file types on page 37 Notes The flash drive uses the same port that is used for a PictBridge camera cable An adapter may be necessary if your flash drive does not fit directly into the port Warning Potential Damage Do not touch any cables any network adapter any connector the memory device or the printer in the areas shown while actively prin...

Страница 37: ...ument files are stored in the memory device then press the arrow buttons to select Photos 4 Press the arrow buttons to scroll to Easy Photo or Print Photos and then press Notes Select Easy Photo if you want to print photos quickly Select Print Photos if you want to customize the photos before printing them 5 Press the arrow buttons to select a photo printing option and then press Note You can choo...

Страница 38: ...ra set to mass storage mode If document files and image files are stored on the memory device then press the arrow buttons to scroll to Photos Press 4 Transfer or print the photos If the printer is using a USB connection FastPicslaunchesautomaticallywhenyouinsertthememorydevice Followthe instructionsonthecomputer screen to transfer the photos to the computer or to print If the printer is using a W...

Страница 39: ... USB mode If the camera USB selection is incorrect then the camera is detected as a flash drive or an error message will be displayed on the printer control panel For more information see the camera documentation The printer reads only one memory device at a time Warning Potential Damage Do not touch the USB cable any network adapter any connector or the printer in the area shown while actively pr...

Страница 40: ... sheet prints 7 Followtheinstructionsontheproofsheettoselectwhichphotostoprint thenumberofcopiesperphoto red eye reduction page layout print options and paper size Note When making selections make sure to fill in the circles completely 8 Load the proof sheet facedown on the scanner glass Scan Proof Sheet appears on the display Note If this option does not appear on the display then press the arrow...

Страница 41: ...urface with your fingers or sharp objects For best results remove each printed sheet individually from the paper exit tray and allow the prints to dry at least 24 hours before stacking displaying or storing Printing from a Bluetooth enabled device This printer is compliant with Bluetooth Specification 2 0 It supports the following profiles Object Push Profile OPP and Serial Port Profile SPP Check ...

Страница 42: ... use to send a print job to the printer To set up a connection between the printer and a Bluetooth enabled device 1 Insert a USB Bluetooth adapter into the USB port located on the front of the printer Bluetooth Dongle Connected appears on the display Note A Bluetooth adapter is not included with the printer 2 From the printer control panel press 3 Press the arrow buttons to scroll to Bluetooth Set...

Страница 43: ...t the security level and then press Select Low to allow Bluetooth devices to connect and send print jobs to your printer without requiring users to enter a pass key Select High to require users to enter a four digit numeric pass key on the Bluetoothdevice before connecting and sending print jobs to the printer 6 The Bluetooth Pass Key menu appears on the display if you set the security level to Hi...

Страница 44: ...ons For more information see Setting up a connection between your printer and a Bluetooth enabled device on page 41 3 Set up the Bluetooth device to print to the printer For more information see the documentation for your Bluetooth device 4 See the documentation for your Bluetooth device to begin printing Note If the Bluetooth Security Level on the printer is set to High you must enter a pass key ...

Страница 45: ...folder opens 4 Right click the printer and then select Printing Preferences 5 Select Quick Print as the printing mode Changing the printing mode for a single print job 1 With a document open click File Print 2 Click Properties Preferences Options or Setup 3 Select Automatic Quick Print Normal or Best Note Printing in Draft mode uses less ink and is ideal for printing text documents Pausing print j...

Страница 46: ...ntercontrolpanel press Tocancelaprintjobfromthecomputer dothefollowing 1 Click or click Start and then click Run 2 In the Start Search or Run box type control printers 3 Press Enter or click OK The printer folder opens 4 Right click the printer and then select Open 5 Cancel the print job If you want to cancel a particular print job then right click the document name and then select Cancel If you w...

Страница 47: ...o not load postcards photos small items transparencies photo paper or thin media such as magazine clippings into the ADF Place these items on the scanner glass Making copies 1 Load paper 2 Load an original document faceup into the ADF or facedown on the scanner glass 3 From the printer control panel press 4 Press the arrow buttons to select the number of copies and then press the Color Black butto...

Страница 48: ...u select Custom Resize then press and then press the arrow buttons to select the desired custom percent value Press to save the setting If you select Borderless then the printer will reduce or enlarge the document or photo as necessary to print a borderless copy on the paper size that you selected For best results with this resize setting use photo paper and set the paper type to Photo or let the ...

Страница 49: ...ges not collated Collated Not collated 1 Load paper 2 Load an original document faceup into the ADF or facedown on the scanner glass 3 From the printer control panel press 4 Press the arrow buttons to select the number of copies and then press 5 Press until Collate appears 6 Press the arrow buttons to scroll to On 7 Press to save the image to the printer memory 8 When asked if you want to scan ano...

Страница 50: ...or facedown on the scanner glass 3 From the printer control panel press 4 Press until Pages per Sheet appears 5 Pressthe arrowbuttons to select the numberof pagesthatyou want to copyon a sheetof paper You may choose to copy one two or four page images on a sheet Note If you are copying four pages in landscape format scan pages 3 and 4 first and then scan pages 1 and 2 6 Press to save the image of ...

Страница 51: ...copying a one sided document then load the next page faceup into the ADF or facedown on the scanner glass If you are copying a two sided document then flip the original document and then reload it faceup into the ADF or facedown on the scanner glass 7 Remove the paper from the paper exit tray and then reload the paper to print the other side of the document 8 Press Canceling copy jobs To cancel a ...

Страница 52: ... glass Select the PDF file type if you want to scan multiple pages and save them as one file Scanning to a local or network computer 1 Load an original document faceup into the ADF or facedown on the scanner glass 2 From the printer control panel press 3 Press the arrow buttons to scroll to Computer or Network and then press 4 Press the arrow buttons to select the name of a local or network comput...

Страница 53: ... the file you scanned has been saved Scanning photos into an editing application Using the printer control panel 1 Load the photo or photos facedown on the scanner glass 2 From the printer control panel press 3 Press the arrow buttons to scroll to Computer or Network and then press 4 Press the arrow buttons to select the name of a local or network computer and then press The local or network compu...

Страница 54: ...gnition OCR application allows you to edit an original text document that has been scanned In order for this to work you must have an OCR application stored on a local or network computer and you must be able to choose it from the list of applications when you set up the scan When selecting settings for the scan Select to scan to the local computer or network computer where the OCR is installed Se...

Страница 55: ...er drop down list 6 Click PDF Scanning starts and the scan progress dialog appears 7 Save the document as a PDF Scanning FAQ How can I improve the quality of a scan Make sure your original documents are in good condition Make sure the application that receives the scanned document is appropriate For example if you are scanning a photo to edit it then make sure you choose a photo editing applicatio...

Страница 56: ...e If you do not see the application you want on the list or if you install new applications on your computer then update the application list in the printer Updating the application list 1 From the printer control panel press 2 Press the arrow buttons to scroll to Computer or Network 3 Select a local or network computer to receive the scan and then press 4 Select REFRESH from the list of scan appl...

Страница 57: ...enario 1 Standard telephone line Check the scenarios below and follow the setup that is applicable to your telephone line Setup 1 Printer is connected to a dedicated fax line EXT LINE EXT LINE Tips for this setup You can set the printer to receive faxes automatically Auto Answer On or manually Auto Answer Off If you want to receive faxes automatically Auto Answer On then you may set the printer to...

Страница 58: ...be to a distinctive ring service then you need to set the printer to receive faxes automatically Auto Answer On Set the printer to pick up calls two rings after the answering machine For example if the answering machine picks up calls after four rings then set the printer to pick up after six rings This way the answering machine picks up calls first and your voice calls are received If the call is...

Страница 59: ...ake sure that you set the correct ring pattern for the printer Otherwise the printer will not receive faxes even if you have set it to receive faxes automatically If you have only one telephone number on your line or if you do not have distinctive ring service then you need to set the printer to receive faxes manually Auto Answer Off When you answer the telephone and you hear fax tones press 9 or ...

Страница 60: ...interference between the two channels and ensure a quality connection you need to install a DSL filter for the analog devices fax machine telephone answering machine in your network Interference causes noise and static onthe telephone failed and poorquality faxesfor the printer and slow Internet connection on yourcomputer To install a filter for the printer 1 Connect the line port of the DSL filte...

Страница 61: ...he VoIP adapter is active plug an analog telephone into the phone port and then listen for a dial tone If you hear a dial tone then the port is active If you need two phone ports for your devices but do not want to pay extra then do not plug the printer into the second phone port You can use a phone splitter Plug the phone splitter into the Phone Line 1 or Phone Port and then plug the printer and ...

Страница 62: ... make sure that the phone port on the cable modem is active plug an analog telephone into the phone port and then listen for a dial tone If you hear a dial tone then the port is active If you need two phone ports for your devices but do not want to pay extra then do not plug the printer into the second phone port You can use a phone splitter Plug the phone splitter into the Phone Line 1 or Phone P...

Страница 63: ...etup Differentcountrieshave different typesof telephone walljacks The mostcommon walljack isthe Registered Jack 11 RJ 11 the standard adopted by most countries You need to have an RJ 11 plug or a telephone cable that has an RJ 11 connector so you can connect a device to an RJ 11 wall jack The fax ports on the back of the printer and the telephone cable that comes with the printer have RJ 11 connec...

Страница 64: ...to the wall jack You can also connect an additional device telephone or answering machine to the same telephone line If the additional device does not have an RJ 11 connector then connect it directly to the wall jack Do not remove the wrap plug from the port of the printer Note The printer may not come with an RJ 11 adapter in your country or region EXT LINE EXT LINE Faxing 64 ...

Страница 65: ...edtoplugalldevicesintothewalljack Youcannotplugatelephoneoranswering machine into the port of the printer This is called serial connection Austria Germany Portugal Belgium Ireland Spain Denmark Italy Sweden France Netherlands Switzerland Finland Norway United Kingdom Warning Potential Damage If your country is on the list then do not remove the wrap plug from the port of the printer It is necessar...

Страница 66: ... EXT LINE Connecting the printer to a wall jack in Germany The German wall jack has two kinds of ports The N ports are for fax machines modems and answering machines The F port is for telephones N F N Faxing 66 ...

Страница 67: ...tsender information so make sure that you enter this information in your printer Setting the fax header 1 From the printer control panel press 2 Press the arrow buttons to scroll to Fax Setup and then press 3 Press the arrow buttons to scroll to Dialing and Sending and then press 4 Press again to select Your Fax Name 5 Use the keypad to enter your name or your company name and then press 6 Press t...

Страница 68: ...e opening the fax software to configure the fax settings make sure that The printer is properly connected to the telephone line The printer is turned on and connected to the computer The printer is not in Power Saver mode If the printer isinPower Saver mode then press to wake up the printer 1 Click or Start 2 Click All Programs or Programs and then select the printer program folder from the list 3...

Страница 69: ...ress to receive faxes manually Set the Caller ID pattern that you want Some countries or regions have multiple patterns Fax Printing Set the printer to print incoming faxes to fit a page Set the fax footer Dialing and Sending Set your fax name and fax number Adjust the dialing volume Set the dial method redial time number of redial attempts dialing prefix and fax sending speed Convert sent faxes i...

Страница 70: ...to import contactsfromthe phone bookson yourcomputerthat are supported by the fax software In addition to the software Address Book you may also have phone books of the mail clients installed on your computer such as Microsoft Outlook 8 Click OK For more information click Help or to view the help information for the fax software Creating a contact list using the printer control panel 1 From the pr...

Страница 71: ...er without an ADF load original documents or photos on the scanner glass Use the scanner glass for single pages small items such as postcards or photos transparencies photo paper or thin media such as magazine clippings Tips for sending faxes Before you send a fax Make sure that the printer is on and connected to a working telephone DSL or VoIP line The line is working if you hear a dial tone Load...

Страница 72: ...and connected to a working telephone DSL or VoIP line The line is working if you hear a dial tone If you set the printer to receive faxes manually Auto Answer Off then make sure that the ringer volume is not set to Off If you have set the printer to receive faxes automatically Auto Answer On then load paper in the printer Receiving faxes automatically 1 Make sure that Auto Answer is on a From the ...

Страница 73: ...eceive faxes automatically Receiving a fax manually 1 Turn off Auto Answer a From the printer control panel press b Press the arrow buttons to scroll to Fax Setup and then press c Press the arrow buttons to scroll to Ringing and Answering and then press d Press again to select Auto Answer e Press the arrow buttons to scroll to Off and then press 2 When the telephone rings and you hear fax tones wh...

Страница 74: ...s then your fax number is the number that you assigned to the printer Make sure that you enter the correct distinctive ring pattern for that number in the fax software or in the Fax Setup menu of the printer control panel If you have more than one telephone line thenmake sure that you enterthe number forthe line on whichthe printer is connected What is my dialing prefix The dialing prefix is the n...

Страница 75: ...mberhasa designated ring pattern a single ring a double ring a triple ring The differentring patterns let you know what telephone number was dialed and what device you should use to answer the call Assign one of your telephone numbers to the printer as the fax number and then set the printer to answer the ring pattern of that number If the pattern is set incorrectly then the printer rings but it n...

Страница 76: ... the arrow buttons to select a dial volume setting and then press Adjusting the ringer volume 1 Press to scroll back to the Fax Setup menu and then press 2 Press the arrow buttons to scroll to Ringing and Answering and then press 3 Press the arrow buttons to scroll to Ringer Volume and then press 4 Press the arrow buttons to select a ringer volume setting and then press How can I make sure that th...

Страница 77: ...er entering the fax number press the arrow buttons to select a fax quality and then press How do I send a fax at a scheduled time 1 From the printer control panel press 2 Enter the fax number of the recipient or press Address Book to select a number from the Speed Dial or Group Dial list 3 If you want to send the fax to a single recipient then press If you want to send a fax to a group of numbers ...

Страница 78: ...1 From the printer control panel press 2 Press the arrow buttons to scroll to Fax Setup and then press 3 Press the arrow buttons to scroll to Reports and then press 4 Press again 5 To setwhento printfaxactivity reports pressthearrowbuttonsto choose whethertoprintthefaxactivity reports after 40 faxes or on request only 6 To print fax activity reports press the arrow buttons to scroll to Print Repor...

Страница 79: ...fax number and then press to save d Use the keypad to enter the name of the person that you want to block e Repeat steps 2b through 2d until you have added all the numbers that you want to block You can block up to 50 numbers 3 Block unidentified faxes faxes without a Caller ID number a Press the arrow buttons to scroll to Block No ID and then press b Press the arrow buttons to scroll to On and th...

Страница 80: ...rk from the street or from your neighbors homes WEP WEP Wireless Equivalent Privacy is the most basic and the weakest type of wireless security WEP security relies on a series of characters called the WEP key Every device on the wireless network must use the same WEP key WEP security can be used on both ad hoc and infrastructure networks A valid WEP key has Exactly 10 or 26 hexadecimal characters ...

Страница 81: ...ssphrase that allows other devices to communicate on the network if encryption was used to secure your network You can locate your network WEP key or WPA passphrase by accessing your wireless access point or router and checking the security information If your wireless access point wireless router is using Wired Equivalent Privacy WEP security the WEP key should be Exactly 10 or 26 hexadecimal cha...

Страница 82: ...ick Start and then click Run b In the Start Search or Run box type D setup exe where D is the letter of your CD or DVD drive 3 Follow the instructions on the computer screen for installing a configured printer on a new computer Interpreting the colors of the Wi Fi indicator light The colors of the Wi Fi indicator light show the network status of the printer Off means one of the following The print...

Страница 83: ...creen From the list that appears in the Choose your wireless network dialog select your network and then click Continue If your wireless network does not appear in the list a Select Unlisted Network and then click Continue b Enter the details about your wireless network Note YourWEP WPA orWPA2 keymaybe obtained from the bottom of the box the user sguide thatcame with the box or from the box Web pa...

Страница 84: ...ings Advanced wireless setup Creating an ad hoc wireless network The recommended way to set up your wireless network is to use a wireless access point wireless router A network set up this way is called an infrastructure network If you have an infrastructure network you should configure the printer for use on that network Note The printer can communicate on only one wireless network at a time Conf...

Страница 85: ...up software 9 When the available networks are displayed provide the network name and the security information you created in step 6 The installer will configure the printer for use with your computer 10 Store a copy of your network name and security information in a safe place for future reference In Windows XP 1 Click Start 2 Click Control Panel 3 Click Network and Internet Connections 4 Click Ne...

Страница 86: ... then click Connect If the network does not appear wait a minute and then click Refresh network list 24 Insert the installation software CD and follow the directions for wireless installation Note Do not connect the installation or network cables until instructed to do so by the setup software 25 When the available networks are displayed provide the network name and the security information you cr...

Страница 87: ...ter See related topics on troubleshooting specific connection types if you encounter difficulties during configuration Using the printer wirelessly 1 Click or Start 2 Click All Programs or Programs and then select the printer program folder from the list 3 Select Printer Home 4 Click the Settings tab 5 Click the Wireless setup utility link 6 Follow the instructions on the computer screen to set up...

Страница 88: ... 2 on page 87 The name should be in the form server printer g Click OK h Click Close on the Printer Ports dialog i Make sure the new port is selected on the Ports tab and then click Apply The new port is listed with the printer name j Click OK Networking FAQ What is Wi Fi Protected Setup Wi Fi Protected Setup WPS is a product certification that provides simple and secure configuration WPS assists ...

Страница 89: ...oadcast for security reasons If the SSID of your wireless network is not broadcast it cannot be detected automatically and will not show up in the list of available wireless networks You must enter the network information manually in this situation An SSID can contain up to 32 alphanumeric characters Where do I find my SSID You can find the SSID for the wireless network by viewing the settings on ...

Страница 90: ...figured For desktop computers laptops and printers to communicate with each other over a network they must be connected by cables and or have wireless network adapters built in or installed in them There are many different ways a network can be set up Four common examples appear below Note The printers in the following diagrams represent printers with internal print servers built into them so that...

Страница 91: ...without Internet access A computer is directly connected to a printer without going through a wireless router This configuration is referred to as an ad hoc network The network has no connection to the Internet Note Most computers can connect to only one wireless network at a time If you access the Internet over a wireless connection you will lose Internet access if you are connected to an ad hoc ...

Страница 92: ...n allows you to configure the printer for a networked or locally attached installation 1 Attach the large rectangular connector to any USB port on your computer USB ports may be on the front or the back of the computer and may be horizontal or vertical 2 Attach the small square connector to the printer 3 Continue following the on screen instructions How are infrastructure and ad hoc networks diffe...

Страница 93: ...oint Yes Same channel Yes including the wireless access point Yes We recommend setting up a network in infrastructure mode using the installation CD that came with the printer Infrastructure mode is the recommended setup method because it provides Increased network security Increased reliability Faster performance Easier setup Finding the signal strength Wireless devices have built in antennas tha...

Страница 94: ...rs This distance could be longer or shorter depending upon the layout of the network and the limitations of the access point REMOVE OBSTACLES BETWEEN THE ACCESS POINT AND THE PRINTER The wireless signal from your access point will pass through most objects Most walls floors furniture and other objects will not block the wireless signal However there are materials that are too dense for the signal ...

Страница 95: ...will be displayed e Write down the SSID Note Make sure you copy it exactly including any capital letters 2 Print the printer network setup page In the Wireless section look for SSID 3 Compare the SSID of the computer and SSID of the printer If the SSIDs are the same then the computer and the printer are connected to the same wireless network If the SSIDs are not the same then run the utility again...

Страница 96: ... When installing the printer on a network make sure you select the printer with the correct MAC address The MAC address label is located inside the printer MAC XX XX XX XX XX XX The MAC address of the internal print server is a series of letters and numbers Other devices sometimes use a type of MAC address called Universally Administered Address UAA MAC XX XX XX XX XX XX UAA XX XX XX XX XX XX Note...

Страница 97: ...and then click Run 2 In the Start Search or Run box type cmd 3 Press Enter or click OK The Command Prompt window opens 4 Type ipconfig and then press Enter The IP address appears as four sets of numbers separated by periods such as 192 168 0 100 How to locate a printer IP address You can locate the printer IP address by viewing the printer network setup page How are IP addresses assigned An IP add...

Страница 98: ...drop down list 5 From the Maintenance tab click Check ink levels Aligning the printhead If the characters or lines on your printer image appear jagged or wavy then you may need to align the printhead Using the printer control panel 1 Load plain paper 2 From the printer control panel press 3 Press the arrow buttons to scroll to Maintenance and then press 4 Press the arrow buttons to scroll to Align...

Страница 99: ...ntrol panel press 2 Press the arrow buttons to scroll to Maintenance and then press 3 Press the arrow buttons to scroll to Clean Printhead or Deep Clean Printhead and then press 4 Press to clean the printhead nozzles A cleaning page prints Using the printer software 1 Click or Start 2 Click All Programs or Programs and then select the printer program folder from the list 3 Select Printer Home 4 Fr...

Страница 100: ...nterior may cause damage to your printer 5 Make sure the paper support and paper exit tray are dry before beginning a new print job Cleaning the scanner glass 1 Dampen a clean lint free cloth with water 2 Gently wipe the scanner glass clean Note Make sure all ink or corrective fluid on a document is dry before placing the document on the scanner glass Maintaining the printer 100 ...

Страница 101: ...r back on Using the Service Center to solve printer problems The Service Center provides step by step troubleshooting help and contains links to printer maintenance tasks and customer support To open the Service Center use one of these methods Method 1 Method 2 If it appears on an error message dialog click the For additional assistance use the Service Center link 1 Click or Start 2 Click All Prog...

Страница 102: ...Defaults and then press 3 Press the arrow buttons to scroll to Set Defaults and then press 4 Press the arrow buttons to scroll to Use Factory and then press 5 Complete the initial printer setup CHANGE THE LANGUAGE USING A BUTTON COMBINATION IF YOU CANNOT READ THE CURRENT LANGUAGE 1 Turn the printer off 2 Press and hold down and and then press to turn the printer on The printer resets and starts th...

Страница 103: ...encountered problems while installing or if your printer does not appear in the list in the Printers folder or as a printer option when sending a print job then try removing and reinstalling the software Before you reinstall the software do the following MAKE SURE THAT YOUR COMPUTER MEETS THE MINIMUM SYSTEM REQUIREMENTS LISTED ON THE PRINTER BOX TEMPORARILY DISABLE SECURITY PROGRAMS IN WINDOWS BEF...

Страница 104: ...RE THE INK CARTRIDGES ARE INSERTED CORRECTLY 1 Turn the printer on and then open the printer 2 Make sure the cartridges are inserted correctly The cartridges should click firmly into the matching color slot of the printhead 3 Close the printer SELECT YOUR PRINTER FROM THE PRINT DIALOG BEFORE SENDING THE PRINT JOB MAKE SURE THE PRINT JOB IS NOT PAUSED MAKE SURE YOUR PRINTER IS SET AS THE DEFAULT PR...

Страница 105: ...ign Printer and the press An alignment page prints Note Do not remove the alignment page until printing is finished Printer is busy or does not respond If the Before you troubleshoot checklist does not solve the problem then try one or more of the following MAKE SURE THE PRINTER IS NOT IN POWER SAVER MODE If the power light is blinking on and off slowly then the printer is in Power Saver mode Pres...

Страница 106: ...The USB port is marked with a USB symbol MAKE SURE THE USB PORT IS ENABLED IN WINDOWS 1 Click or click Start and then click Run 2 In the Start Search or Run box type devmgmt msc 3 Press Enter or click OK The Device Manager opens 4 Click the plus sign beside Universal Serial Bus controllers If USB Host Controller and USB Root Hub are listed then the USB port is enabled For more information see the ...

Страница 107: ... printer back on Paper jam in the paper support Note The parts inside the printer are sensitive Avoid unnecessarily touching these parts while clearing jams 1 Press to turn off the printer 2 Firmly grasp the paper and then gently pull it out Note Be careful not to tear the paper while removing it 3 Press to turn the printer back on Paper jam in the ADF selected models only 1 Press the button and l...

Страница 108: ... your paper or specialty media REMOVE EACH PAGE AS IT IS PRINTED ADJUST THE PAPER GUIDES TO FIT THE LOADED PAPER Print troubleshooting Poor quality at the edges of the page on page 108 Streaks or lines on printed image on page 109 Print speed is slow on page 109 Computer slows down when printing on page 110 Poor quality at the edges of the page If the Before you troubleshoot checklist does not sol...

Страница 109: ... THE PRINTHEAD CLEAN OR DEEP CLEAN THE PRINTHEAD NOZZLES Note If these solutions do not remove the streaks or lines on the printed image then contact technical support Print speed is slow If the Before you troubleshoot checklist does not solve the problem then try one or more of the following MAXIMIZE COMPUTER PROCESSING SPEED Close all applications not in use Minimize the number and size of graph...

Страница 110: ...ge 111 Scanning takes too long or freezes the computer on page 111 Cannot scan to a computer over a network on page 111 Copier or scanner does not respond If the Before you troubleshoot checklist does not solve the problem then try one or more of the following SET YOUR PRINTER AS THE DEFAULT PRINTER REMOVE AND REINSTALL THE PRINTER SOFTWARE Scanner unit does not close 1 Lift the scanner unit 2 Rem...

Страница 111: ...en try one or more of the following CHECK THE USB CONNECTION 1 Check the USB cable for any obvious damage If the cable is damaged then use a new one 2 Firmly plug the square end of the USB cable into the back of the printer 3 Firmly plug the rectangular end of the USB cable into the USB port of the computer The USB port is marked with a USB symbol RESTART THE COMPUTER Scanning takes too long or fr...

Страница 112: ...ial tone by plugging an analog telephone into the port of the printer If you do not hear a dial tone then use the checklist below Listen for a dial tone after checking each item Ifyou hear a dial tone but stillhave problemssendingandreceivingfaxes then see theother topicsinthis section Connection checklist Make sure that the printer and other devices on the line if applicable are set up and config...

Страница 113: ... press 3 Press the arrow buttons to scroll to Dialing and Sending and then press 4 Press the arrow buttons to scroll to Max Send Speed and then press 5 Select a sending speed and then press SET THE PRINTER TO SCAN THE ORIGINAL DOCUMENT BEFORE DIALING THE NUMBER The printer does not automatically redial if you set it to scan the original document after dialing the number Settheprinterto scanbefored...

Страница 114: ...s to scroll to Dialing and Sending and then press 4 Press the arrow buttons to scroll to Auto Fax Convert and then press 5 Check to see if automatic fax conversion is set to On If it is not set to On press the arrow buttons to select On and then press MAKE SURE THAT THE DIAL PREFIX SETTING IS CORRECT The dialing prefix is the number or series of numbers that you press before you can dial the actua...

Страница 115: ...converts digital signals into analog signals MAKE SURE THAT THE PRINTER MEMORY IS NOT FULL The printer saves an incoming fax to the printer memory before it prints the fax If the printer runs out of ink or runs out of paper while receiving the fax then the printer saves the fax so you can print it later However if the printer memory is full then the printer may not be able to receive more incoming...

Страница 116: ...NTER IS CONNECTED TO THE COMPUTER MAKE SURE THAT THE PRINTER IS NOT IN POWER SAVER MODE Fax error messages on the printer control panel Error Message What it indicates Possible solutions Remote Fax Error The receiving fax machine cannot receive the fax The error on the receiving end could be due to several factors Resend the fax There may have been a problem with the quality of the connection Decr...

Страница 117: ... thephonecable tothe port on the back of the printer Digital line detected The printer is connected to a digital line The printer is an analog device and must be connected to an analog line To connect the printer to a digital line you must use a digital lineconverter or a filter For more information see the Setting up the printer to fax section Failed to Connect Phone Line Error Phone Line Not Con...

Страница 118: ...appens when a memory card is inserted on page 118 Cannot print documents from a memory card or flash drive on page 119 Photos do not transfer from a memory card across a wireless network on page 119 Memory card troubleshooting checklist Before you troubleshoot use the following checklist to solve most memory card problems Make sure that the memory card you are using can be used in the printer Make...

Страница 119: ...a USB symbol CHECK THE NETWORK CONNECTION If the printer and computer are connected over a network then make sure that the correct host and device are communicating Select the printer from the computer or the computer from the printer Photos do not transfer from a memory card across a wireless network If the Memory card troubleshooting checklist does not solve the problem then try one or more of t...

Страница 120: ...n Your WEP key or WPA passphrase is correct if your network is secure Log into the wireless access point wireless router and check the security settings A security key is like a password All devices on the same wireless network using WEP WPA or WPA2 share the same security key If you are not sure if your security information is correct run the wireless setup again The printer and the computer are ...

Страница 121: ...eet MOVE YOUR ACCESS POINT AWAY FROM OTHER ELECTRONIC DEVICES There may be temporary interference from electronic devices such as microwave ovens or other appliances cordless phones baby monitors and security system cameras Make sure your access point is not positioned too closely to these devices MAKE SURE THAT YOUR COMPUTER AND PRINTER ARE CONNECTED TO THE SAME WIRELESS NETWORK If the printer is...

Страница 122: ...g Wi Fi Protected Access WPA security then the WPA passphrase should be From 8 to 63 ASCII characters ASCII characters in a WPA passphrase are case sensitive or Exactly 64 hexadecimal characters Hexadecimal characters are A F a f and 0 9 Note If you do not know this information then see the documentation that came with the wireless network or contact the person who set up your wireless network DIS...

Страница 123: ...g a different USB cable If you are using a cable longer than 10 feet then try using a shorter cable MAKE SURE THAT YOU ARE USING THE CORRECT CD FOR YOUR PRINTER MODEL Comparetheprintermodelonthe CDto theprintermodelontheprinter Thenumbersshouldeithermatchexactly or be within the same series If you have any doubts look for an updated version of the printer software on our Web site For more informat...

Страница 124: ...installation to work Cannot print and there is a firewall on the computer Third party non Microsoft firewalls can interfere with wireless printing If the printer and computer are configured correctly and the wireless network is working but the printer will not print wirelessly then a firewall could be the problem If there is a firewall other than the Windows firewall on the computer try one or mor...

Страница 125: ... and Faxes window and try printing again SELECT THE WIRELESS PRINTER You may need to select the wireless printer from your computer to use the printer wirelessly 1 Click or click Start and then click Run 2 In the Start Search or Run box type control printers 3 Press Enter or click OK The printer folder opens 4 Right click the printer in the folder with the matching name and model number followed b...

Страница 126: ...nother network near you For example if you and your neighbor both use a manufacturer s default network name your printer could be connecting to your neighbor s network If you are not using a unique network name consult the documentation for your wireless access point wireless router to learn how to set a network name If you set a new network name you must reset the printer and computer SSID to the...

Страница 127: ...urn it on MOVE YOUR ACCESS POINT TO MINIMIZE INTERFERENCE There may be temporary interference from other devices such as microwave ovens or other appliances cordless phones baby monitors and security system cameras Make sure your access point is not positioned too closely to these devices MOVE THE COMPUTER AND OR PRINTER CLOSER TO THE WIRELESS ACCESS POINT WIRELESS ROUTER Move the computer and or ...

Страница 128: ...box type cmd c Press Enter or click OK The Command Prompt window opens d Type ipconfig and then press Enter The Default Gateway entry is typically the wireless access point The IP address appears as four sets of numbers separated by periods such as 192 168 2 134 2 Ping the access point a Click or click Start and then click Run b In the Start Search or Run box type cmd c Press Enter or click OK The...

Страница 129: ...If your wireless settings have changed you must run the printer wireless setup again Some reasons your settings may have changed include your having manually changed your WEP or WPA keys channel or other network settings or the access point having been reset to factory defaults Running the wireless setup again can also resolve issues due to misconfigurations thatoccurred whenconfiguring the printe...

Страница 130: ...the printer and the laptop to attach to the network there may be a problem with your wireless network Make sure that the laptop and printer have both received IP addresses 1 Click or click Start and then click Run 2 In the Start Search or Run box type cmd 3 Press Enter or click OK The Command Prompt window opens 4 Type ipconfig and then press Enter The IP address appears as four sets of numbers se...

Страница 131: ...ss Enter or click OK The printer folder opens 4 Right click the printer and then select Properties from the menu 5 Click the Ports tab 6 Locate the selected port The selected port has a check beside it in the Port column 7 If the Description column of the selected port indicates that it is a USB port scroll through the list and select the port with Printer Port in the Description column Check the ...

Страница 132: ...s setup on the computer To check if the computer is currently connected to a VPN open your VPN Client software and check your VPN connections Ifyou do nothaveaVPNClientsoftwareinstalled checktheconnectionsmanuallyusingtheWindows VPN Client If you would like to have the ability to connect to your local network and to a VPN at the same time the system support person for the VPN must enable split tun...

Страница 133: ...on protocol built in to the wireless router to assign IP addresses to clients on the wireless network DHCP addresses are assigned when they are needed as whenanewdevice isaddedto the wirelessnetworkorwhenitispoweredon Wirelessdevicesmustsenda request to the router and receive an IP address in response so they can function on the network Because the router performs many other tasks besides assignin...

Страница 134: ... TYPE While it is possible to successfully mix 802 11b 802 11g and 802 11n devices on the same wireless network the faster devices will sometimes prevent the slower devices from communicating Wireless devices are designed to wait for a gap in wireless network communications before attempting to send information If newer faster devices are constantly using the wireless network then older slower dev...

Страница 135: ...ax setting 68 camera connecting 39 canceling copy job 51 print job 46 scan job 56 cannot delete documents from print queue 106 cannot print from a flash drive 119 cannot print over wireless network 121 cannot print through USB 106 cannot receive faxes 115 cannot run fax software 116 cannot scan to computer over a network 111 cannot send faxes 113 changing Power Saver timeout 21 changing printing m...

Страница 136: ...ion fax setting 68 error using memory card 118 Ethernet 95 exterior of the printer cleaning 99 e mailing scanned documents 54 F factory default settings resetting internal wireless print server 120 resetting to 21 failed faxes retrieving 79 fax confirmation page 78 printer memory 79 transmission report 78 fax activity report 78 fax blocking setting 68 fax error messages Digital Line Detected 117 F...

Страница 137: ... software 25 installing wireless printer additional computers 82 interference wireless network 94 internal wireless print server resetting to factory default settings 120 IP address 96 97 configuring 83 IP address assigning 97 iron on transfers 28 J jams and misfeeds troubleshooting paper jam in the ADF 107 paper jam in the paper support 107 paper jam in the printer 106 paper or specialty media 10...

Страница 138: ...os copying photos 47 making borderless copies 48 printing from digital camera using DPOF 41 printing using printer control panel 37 printing using the proof sheet 40 scanning for editing 53 photos do not print from memory card across wireless network 119 photos from memory device printing using printer software 38 PictBridge port 11 PictBridge enabled camera connecting 39 plain paper 26 poor quali...

Страница 139: ...DF from scan 55 documents for editing 54 documents for e mailing 54 photos for editing 53 tips 52 to a computer 52 to a flash drive 53 to a memory card 53 to a network 52 using the printer control panel 52 scanning takes too long or freezes the computer 111 scheduled fax sending 77 security wireless network 80 security information wireless network 90 security key 90 selecting the wireless port 130...

Страница 140: ...n printed image 109 troubleshooting setup cannot print through USB 106 incorrect language appears on display 102 page does not print 104 printer does not respond 105 printer printing blank pages 105 printhead error 102 software did not install 103 troubleshooting wireless cannot print over wireless network 121 changing wireless settings after installation Windows 84 photos do not print from memory...

Страница 141: ...er wireless network 121 changing wireless settings after installation Windows 84 photos do not print from memory card across wireless network 119 printer and computer on different networks 95 printer works intermittently on wireless network 132 Wi Fi indicator light is blinking orange 127 Wi Fi indicator light is not lit 124 Wi Fi indicator light is still orange 126 Wi Fi indicator 11 description ...

Отзывы: