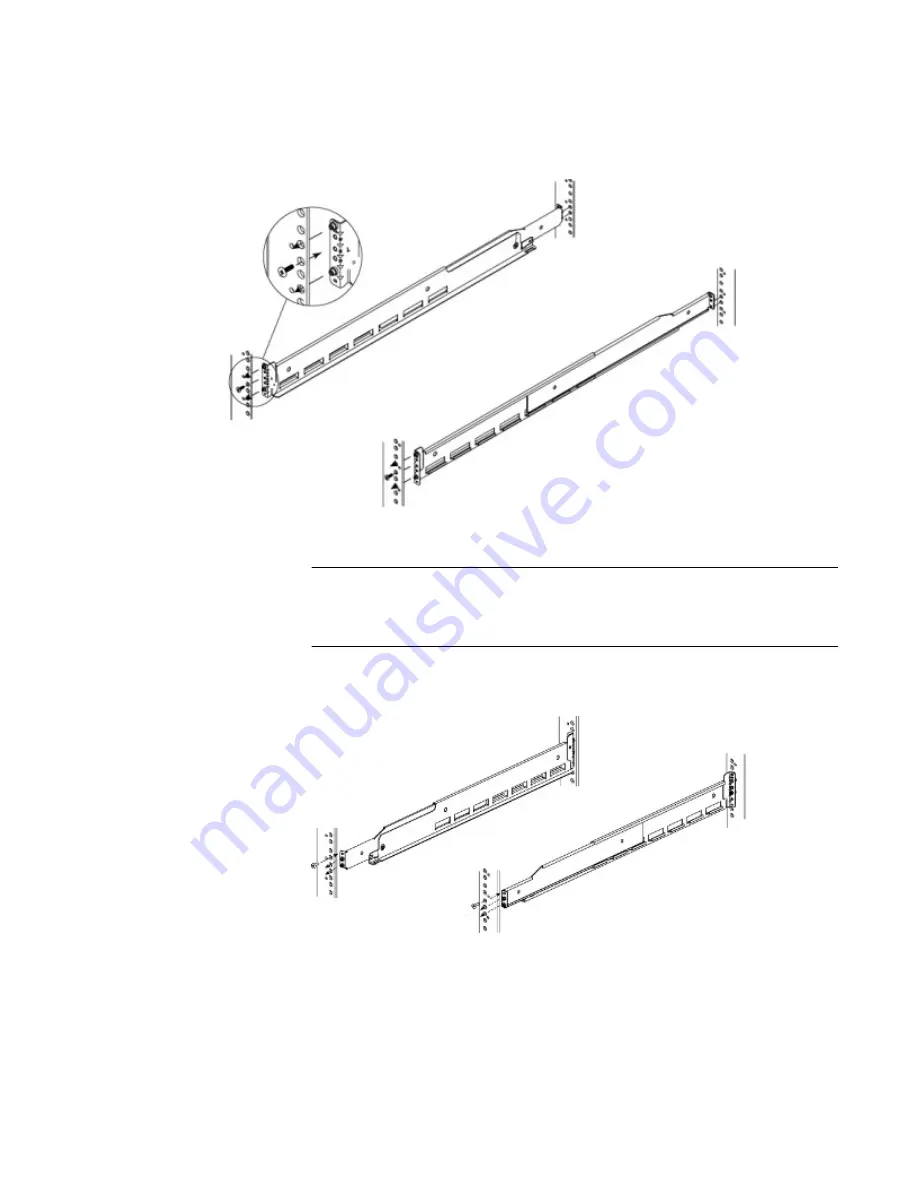
Once the filler is installed to the rail, the installation can continue as follows.
2. At the front of the cabinet, insert the two adaptors on the front of the rail into
the correct holes in the 2U space.
3. Insert one screw into the lower hole to hold the front of the rails in place. Do
not fully tighten the screw at this time.
Note
An 18-inch screwdriver (minimum) is required to install the screw into the rear
of the rails.
4. At the rear of the cabinet, align and insert the two adaptors on the rear of the
rail with the mounting holes in the NEMA channel. Make sure the rail is level.
5. Use an 18-inch screwdriver (minimum) to secure the rear of the rail to the
NEMA channel using one screw.
6. Tighten the front screw.
7. Repeat for the other rail.
Install the System in the Rack
16
Data Domain DD6300 System
Installation Guide
Содержание Data Domain DD6300
Страница 1: ...Dell EMC Data Domain DD6300 System Installation Guide 302 005 015 REV 01 ...
Страница 4: ...CONTENTS 4 Data Domain DD6300 System Installation Guide ...
Страница 6: ...FIGURES 6 Data Domain DD6300 System Installation Guide ...
Страница 8: ...TABLES 8 Data Domain DD6300 System Installation Guide ...
Страница 22: ...Install the System in the Rack 22 Data Domain DD6300 System Installation Guide ...
Страница 26: ...Figure 8 DD6300 with ES30 shelves Connect Cables and Power On 26 Data Domain DD6300 System Installation Guide ...
Страница 30: ...Connect Cables and Power On 30 Data Domain DD6300 System Installation Guide ...
Страница 36: ...Configure System for Use 36 Data Domain DD6300 System Installation Guide ...


