


45
Networking Guide
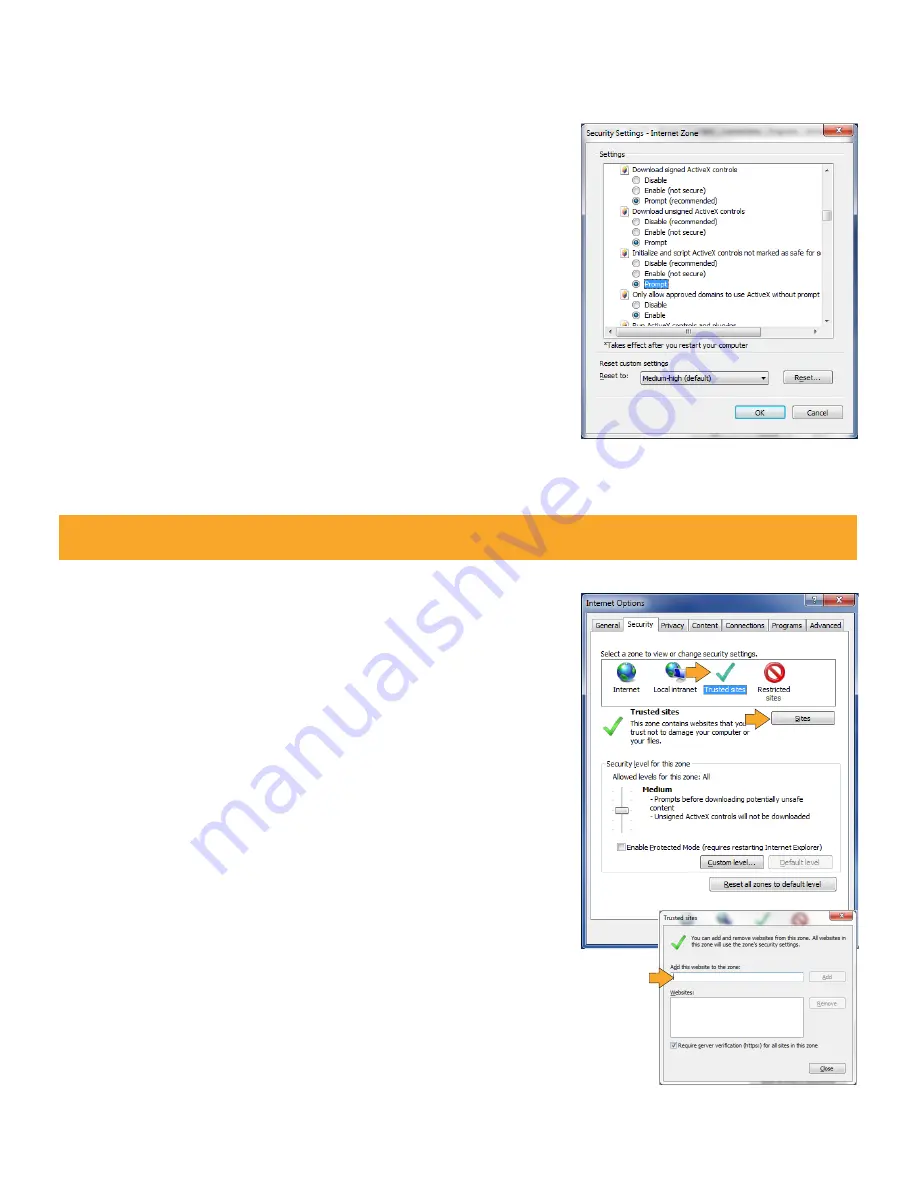
Method 1
(continued):
5. Change the ActiveX settings listed below.
• Download signed ActiveX controls: PROMPT or ENABLED
• Download unsigned ActiveX controls: PROMPT
• Initialize and script ActiveX controls not marked as safe: PROMPT
• Run ActiveX controls and plug-ins: ENABLE
• Script ActiveX controls marked as safe for scripting: ENABLE
If this is an option:
• Allow automatic prompting for file and code downloads: ENABLE
6. Click OK.
7. Click
APPLY.
8. Close the options window.
Note: This method needs to be done on every computer you wish to view your DVR from.
Method 2:
Add the DVR’s IP address to the Trusted Sites in Internet Explorer.
1. Open up Internet Explorer.
2. Click on TOOLS.
3. Click on INTERNET OPTIONS.
4. Click on the SECURITY Tab.
5. Click on TRUSTED SITES.
6. Click on the SITES button.
7. Type in the IP address of the DVR in the following format:
http://192.168.0.108 and click ADD.
8. If "Require server verification (https:) for all sites ..." is selected you
will need to uncheck the selection box.
9. Reduce the TRUSTED SITES zone to low. Click on DEFAULT LEVEL and
change the security level of the zone to LOW by running the slider
to the bottom. This will allow ActiveX controls from the DVR to be
downloaded and the DVR to be viewed on the computer.
10. Click APPLY.
11. Click OK.
Содержание Pro Widescreen DVR
Страница 1: ...Pro Widescreen DVR User Manual ...
Страница 72: ...WWW DEFENDER USA COM ...


