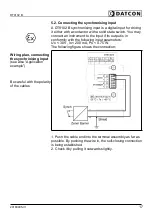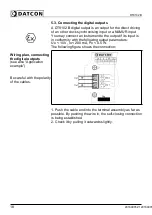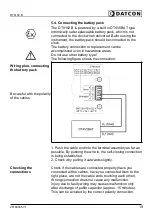
DT9102 B
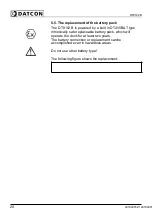
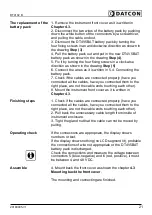
The replacement of the
battery pack
1. Remove the instrument front cover as it is written in
Chapter 4.3.
2. Disconnect the two wires of the battery pack by pushing
down the white button of the connectors by a screwdriver,
and pulling the cable end out.
3. Dismount the DT4V5BAT battery pack by turning the
four fixing screws in an anticlockwise direction as shown in
the drawing
Step (3)
.
4. Pull the battery pack out and put in the new DT4V5BAT
battery pack as shown in the drawing
Step (4)
.
5. Fix it by turning the four fixing screws in a clockwise
direction as shown in the drawing
Step (5)
6. Connect the wires as it is written in 5.4. Connecting the
battery pack.
7. Check if the cables are connected properly (have you
connected all the cables, have you connected them to the
right place, are not the cable ends touching each other).
8. Mount the instrument front cover as it is written in
Chapter 4.3.
Finishing steps
1. Check if the cables are connected properly (have you
connected all the cables, have you connected them to the
right place, are not the cable ends touching each other).
2. Pull back the unnecessary cable length from inside of
instrument enclosure.
3. Tight the gland nut that the cable can not be moved by
pulling.
Operating check
If the connections are appropriate, the display shows
numbers or text.
If the display shows nothing (no LCD segment lit), probable
the connections of wire not appropriate or the DT4V5BAT
battery pack is discharged.
Check the connections and measure the voltage between
connectors 5 (blue, negative) and 6 (red, positive), it must
be between 4 and 4.8 VDC.
Assemble
4. Mount back the front cover as shown the chapter
4.3
Mounting back the front cover
.
The mounting and connecting are finished.
20180905-V1
21
Содержание DT9102 B
Страница 1: ...DT9102 B Intrinsically Safe Digital Clock Operating Instructions...
Страница 11: ...DT9102 B 4 2 Main dimensions of the instrument 20180905 V1 11...
Страница 44: ...DT9102 B 10 2 Application example 44 20180905 V120180905...
Страница 53: ...DT9102 B 10 8 ATEX Certification 20180905 V1 53...
Страница 54: ...DT9102 B 54 20180905 V120180905...
Страница 55: ...DT9102 B 20180905 V1 55...
Страница 56: ...DT9102 B 56 20180905 V120180905...
Страница 57: ...DT9102 B 20180905 V1 57...
Страница 58: ...DT9102 B 58 20180905 V120180905...
Страница 59: ...DT9102 B 20180905 V1 59...
Страница 60: ......


