ENG & FREESTANDING TELEPROMPTER KIT TP-700
18
Connect a PC/Laptop for control and monitoring over IP
The TP-700 has the Datavideo dvPrompter Plus app built in. The TP-700 can be monitored and controlled
from any ethernet connected device with a modern web browser.
Direct ethernet connection
1. Connect an Ethernet cable between the TP-700 and your PC/Laptop
2. Power on the TP-700, the dvPrompter Plus app will open automatically
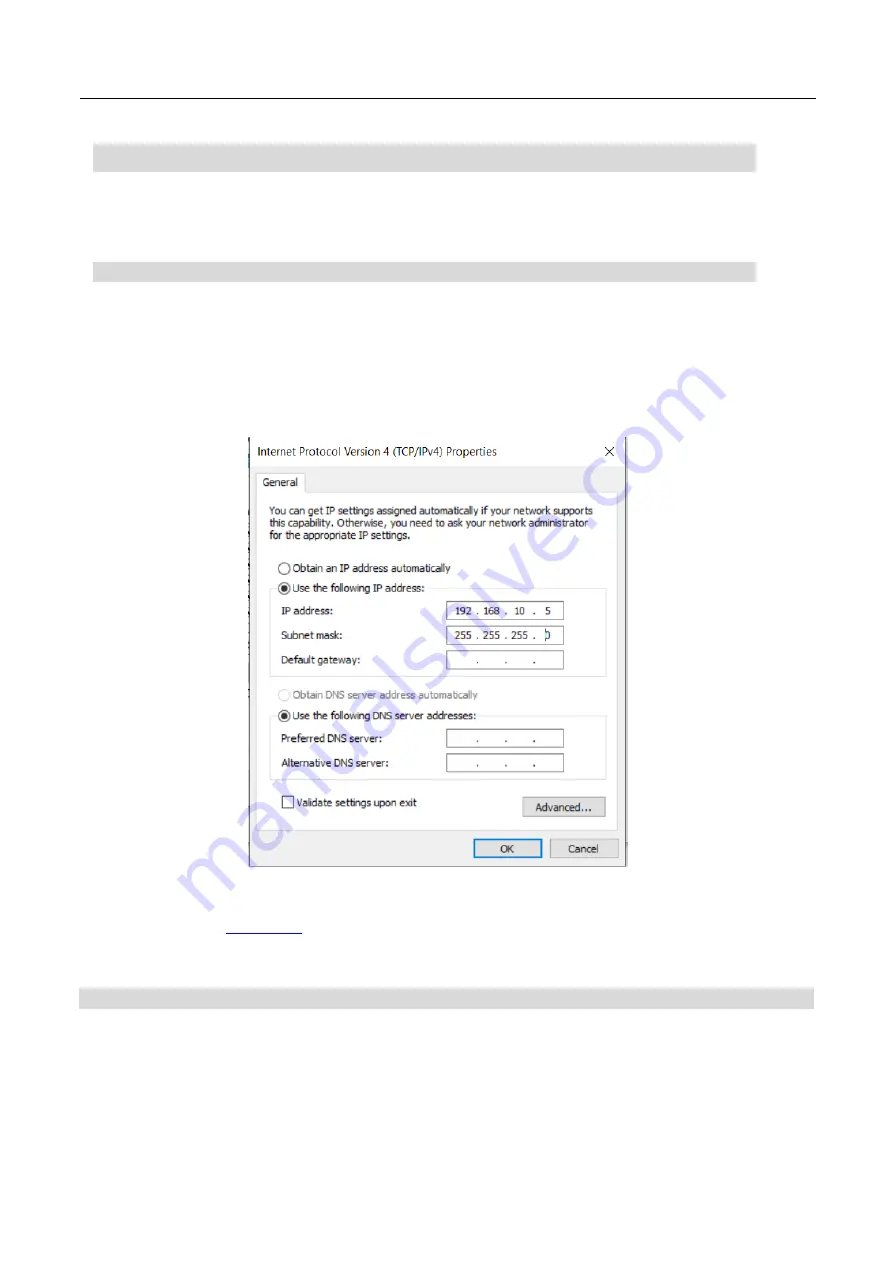
3. The TP-700 has the static IP address 192.168.10.10 by default, we must also set a static IP
address on the PC/Laptop
4. Turn on the Windows computer and set it to static IP set up within the
Windows Network and
Sharing Centre
. In our example the computer is given the following IP settings so that the
computer matches the same IP range as the TP-700.
5. Open a web browser and navigate to http://192.168.10.10:9789, you will see the main control
page shown below
section of this manual for software operation instructions
Connection via a router / DHCP LAN
1. Connect the supplied USB mouse to the TP-700 and power it on
2. Once the TP-700 has booted, right click to close the dv Prompter Plus app
3. Navigate to Settings > More > Ethernet
4. Change the
‘Ethernet IP mode’ from static to DHCP
5. Connect the TP-700 to your existing LAN
6. Open the dv Prompter Plus app


