12
Installing the Hardware Components
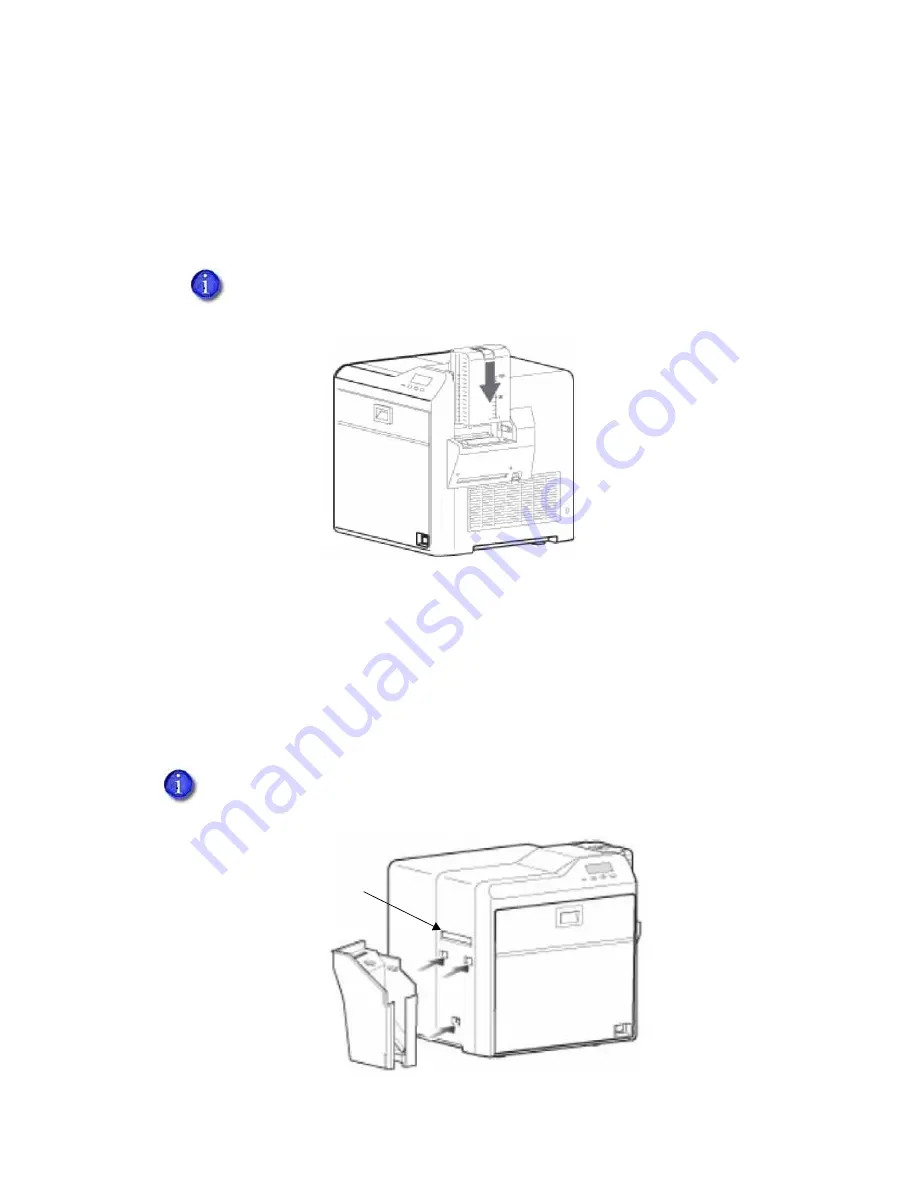
Installing the Card Hopper
1.
If
present,
remove
styrofoam
packing
foam
from
inside
the
card
hopper.
2.
Insert
the
card
hopper
hooks
into
the
receptacle
slots
on
the
printer.
3.
Slide
the
card
hopper
down
until
it
clicks
into
place.
Installing the Card Stacker
As
completed
cards
exit
the
printer
or
laminator,
they
are
collected
in
the
card
stacker.
Install
the
card
stacker
below
the
card
out
slot
on
the
left
side
of
the
printer
or
the
laminator
(if
used).
Card Stacker on SR200 or SR300 Printer
When
no
laminator
is
used,
place
the
stacker
tabs
into
the
attachment
slots
on
the
side
of
the
printer.
Be
sure
to
hang
the
card
stacker
on
the
attachment
slots,
not
on
the
card
out
slot.
The card hopper can hold up to 100, 0.030 inch (0.75 mm) thick cards.
The card stacker can hold up to 100 0.030 inch (0.75mm) thick cards.
Card
Out
Slot
Содержание SR200
Страница 24: ...16 Installing the Hardware Components...
Страница 34: ...26 Installing the Smart Card Driver...
Страница 62: ...54 Installing the USB Printer Driver...
Страница 70: ...62 Installing the Status Monitor...
Страница 94: ...86 Removing Printer Driver and Status Monitor...


