Agilent 7890
3 Installation Procedure
l
In the
System Configuration
dialog press the
Add
button
①
to invoke the
Available Control Modules
dialog.
l
Type "7890" into the searching field on the top of the dialog
②
for quick
filtering out the desired instrument.
l
Select the
Agilent 7890
in the
GC
section and press the
Add
button.
③
l
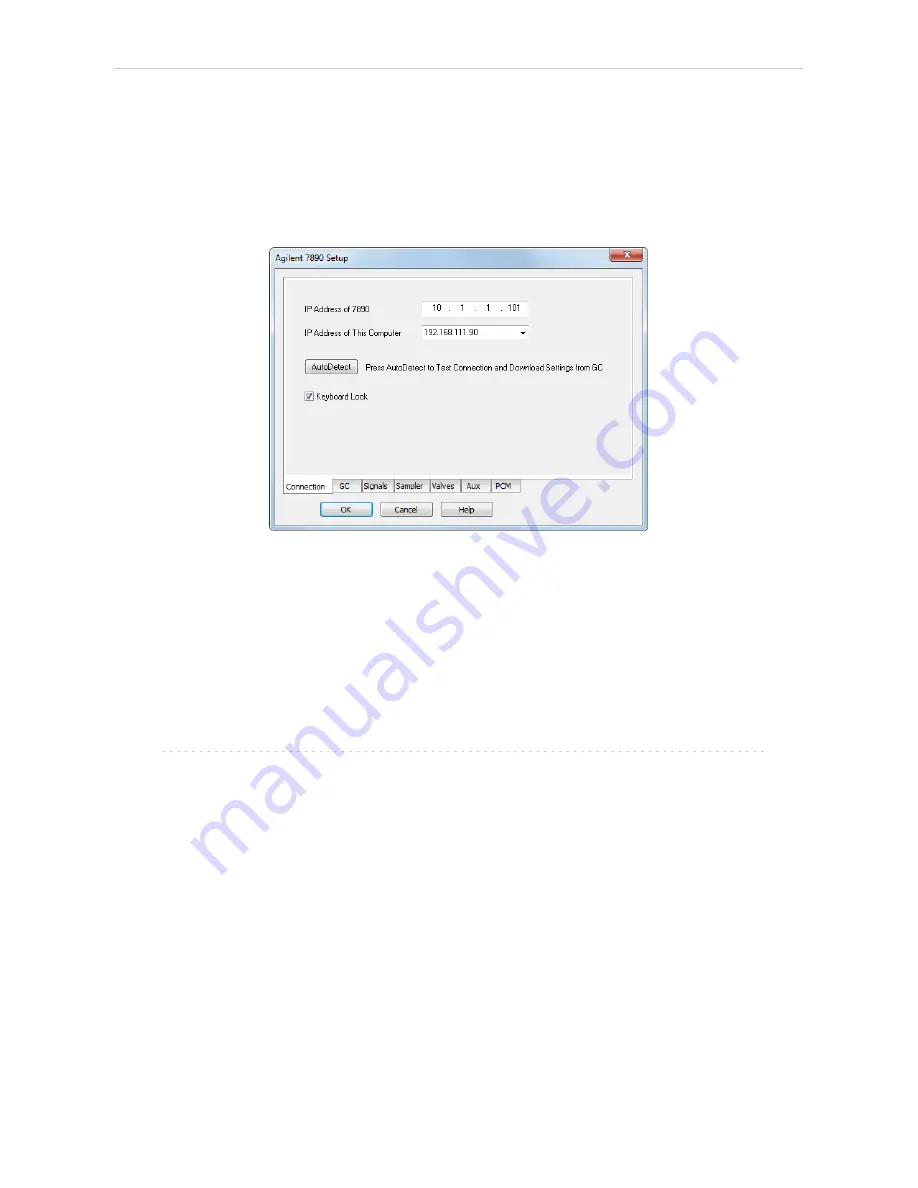
The
Agilent 7890 Setup
dialog will appear.
Fig 3: Agilent 7890 Setup
l
Fill in the
IP address of the 7890
and
IP address for receiving data
(i.e. IP
address of computer with installed
Clarity
datastation). Ask your
company's IT person if you don't know them. A default IP address of most
Agilent GC's is 10.1.1.101 which is suitable only in case the GC is
connected directly to computer using separate network.
l
Press the
Autodetect
button to read all settings from the instrument. Upon
successful detection the serial number of the GC will be displayed.
Note:
In most cases it is recommended not to change the settings obtained
through the
Autodetect
function. However some modules (e.g. PCM,
valves or Aux Pressure modules) are not autodetected correctly and in
certain systems it is necessary to set them manually.
l
Check the
Keyboard Lock
checkbox for ensuring the exclusive access to the
chromatograph. Apart from locking the keyboard of the device, this will also
prevent other users connected to the same network from connecting to the
chromatograph.
l
Switch to the
GC
tab to verify the correct detection of injectors, inlets, detectors
and columns. Do not change the autodetected values.
l
Switch to the
Signals
tab (for more details see the
Agilent 7890 Setup
dialog section later in the manual ), select the correct number of signals
- 6 -


