background image

Dake Corporation 

724 Robbins Road  

Grand Haven, MI 49417 

www.dakecorp.com


  2 

REV012019 


DAKE STANDARD LIMITED WARRANTY 


Finished Machines


Dake warrants to the original purchaser the finished machine manufactured or distributed by it to be free 

from defects in material and workmanship under normal use and service within 1 year (12 months) from 

the delivery date to the end user. 


Parts & Couplings


Dake warrants to the original purchaser the component part or coupling manufactured or distributed by it 

to be free from defects in material and workmanship under normal use and service within 30 days from 

the delivery date to the end user. 

The standard limited warranty includes the replacement of the defective component part or coupling, at 

no cost to the end user.  


Warranty Process  

Subject to the conditions hereinafter set forth, the manufacturer will repair or replace any portion of the 

product that proves defective in materials or workmanship. The manufacturer retains the sole right and 

option, after inspection, to determine whether to repair or replace defective equipment, parts or 

components. The manufacturer will assume ownership of any defective parts replaced under this 

warranty.  


All requested warranty claims must be communicated to the distributor or representative responsible for 

the sale. Once communication has been initiated, Dake Customer Service must be contacted for 

approval: 

Phone: (800) 937-3253 


Email: 

[email protected]


When contacting Dake, please have the following information readily available: 


- Model # 


- Serial # 


- Sales Order #  


Purchasers who notify Dake within the warranty period will be issued a Case number and/or a Return 

Material Authorization (RMA) number. If the item is to be returned per Dake’s request, the RMA number 

must be clearly written on the exterior packaging. Any item shipped to Dake without an RMA will not be 

processed.  


Warranty Exceptions: 

The following conditions are not applicable to the standard limited warranty: 

(a) Part installation or machine service was not completed by a certified professional, and is not 

in accordance with applicable local codes, ordinances and good trade practices. 

(b) Defects or malfunctions resulting from improper installation or failure to operate or maintain 

the unit in accordance with the printed instructions provided. 

(c)  Defects or malfunctions resulting from abuse, accident, neglect or damage outside of prepaid 

freight terms. 

(d) Normal maintenance service or preventative maintenance, and the parts used in connection 

with such service. 

(e) Units and parts which have been altered or repaired, other than by the manufacturer or as 

specifically authorized by the manufacturer. 

(f)  Alterations made to the machine that were not previously approved by the manufacturer, or 

that are used for purposes other than the original design of the machine. 

Содержание Technics 250

Страница 1: ...x 800 846 3253 www dakecorp com customerservice dakecorp com DAKE MANUAL COLD SAW Technics 250 INSTRUCTIONAL MANUAL WARNING Read and understand all instructions and responsibilities before operating Failure to follow safety instructions and labels could result in serious injury ...

Страница 2: ...SAFETY 5 SET UP 7 TRANSPORTING AND MOUNTING 7 ASSEMBLING THE MACHINE 7 ELECTRICAL CONNECTION 8 CHOOSING A BLADE 8 OPERATION 8 STARTING THE SAW 9 CHANGING THE BLADE 10 MAINTENANCE 12 DAILY MAINTENANCE 12 WEEKLY MAINTENANCE 12 MONTHLY MAINTENANCE 12 SIX MONTH MAINTENANCE 12 CHANGING THE GEAR BOX OIL 13 TROUBLESHOOTING 14 EXPLODED VIEW 16 ELECTRICAL DIAGRAM 17 PART LIST 18 ORDERING INFORMATION 19 ...

Страница 3: ... communication has been initiated Dake Customer Service must be contacted for approval Phone 800 937 3253 Email customerservice dakecorp com When contacting Dake please have the following information readily available Model Serial Sales Order Purchasers who notify Dake within the warranty period will be issued a Case number and or a Return Material Authorization RMA number If the item is to be ret...

Страница 4: ... Customer Service a representative will supply a Return Material Authorization RMA number The returned item must have the provided RMA number clearly marked on the outside packaging Any item received without an RMA number clearly visible on the packaging will not be processed An RMA number can only be provided by the Dake Customer Service team and must be obtained prior to the return shipment Refu...

Страница 5: ...ht left Phase 1 Weight 378 lbs Horsepower 1 2 Work Height 37 Speeds 44 rpm Height 61 Max blade diameter 10 Base 22 x 36 CUTTING CAPACITY 90 1 1 8 2 3 4 2 1 2 3 1 2 x 1 3 4 45 1 2 3 8 2 1 8 2 1 2 x 2 In the space provided record the serial number and model number of the machine If contacting Dake this information must be provided to assist in identifying the specific machine Serial No Model No Date...

Страница 6: ...gs This machine is intended to be operated by one person This person should be conscious of the machine movement not only for themselves but also for persons on the immediate area of the machine This machine has been built to comply with national accident prevention regulations Improper use and or tampering with the safety devices will relieve the manufacturer of all responsibility Check that the ...

Страница 7: ...ches chains or any other object that could get caught in the machine during operation tie back long hair Keep the machine bed free from tools or any object while the machine is in operation Locations of shields Metal shield screwed onto the disk head REF A Self regulating mobile blue plastic shield fitted coaxially with the fixed shield REF B Black plastic cover covering the electrical supply box ...

Страница 8: ...irm cement floor keeping a minimum distance from 2 1 2 feet from any wall ASSEMBLING THE MACHINE The following parts will be with your machine upon receiving Handle and stock stop Removing the shipping bolt and screw the handle in the hole There is a white plug that comes out of the handle plug this into its receptacle located on the side of the electrical box There is a lever in this attachment m...

Страница 9: ...lloys and mild bronze also require coarse toothing Attached to the on off switch on the machine you will find a blade pitch calculator part number 71756 with instructions on how to use OPERATION Use recommendations This machine has been designed to cut metal building materials with different shapes profiles used in workshops and mechanical structural work Only one operator is needed to use the mac...

Страница 10: ...k to make sure the coolant is on When the machine is now ready to cut the material Keep in mind that the cutting speed and the type of blade combined with a suitable descent of the head are important for cutting quality and machine performance When starting to cut with a new blade be sure to take out the back lash see changing the blade on the blade in order to safeguard the blade life and efficie...

Страница 11: ... gloves while handling loose blades 1 Move the head of the saw into its upright position 2 Using a 5mm hex wrench to remove the safety guard bolt and move the safety guard back out of the way 3 Using a 10mm hex wrench turn the blade bolt clockwise to loosen When loosened completely remove the blade bolt and flange that holds the blade on a This is a left hand threaded bolt to loosen clockwise turn...

Страница 12: ...of the blade with the flange pinholes of the first flange half 7 Making sure the flange pins are lined up with the pinholes through the blade put the second half of the flange back on to hold the blade in place 8 Start to thread the blade bolt back on 9 While tightening the blade bolt counter clockwise to tighten pull the blade up in reverse direction and hold it in place as tightening the bolt un...

Страница 13: ...il Check power chord for any damage Clean and grease the screw and sliding guide vice MONTHLY MAINTENANCE Check tightness of the screws on the motor pump jaws and safety guard Check safety shields are not broken Grease the head hinge pin SIX MONTH MAINTENANCE Change gear box oil Flush coolant tank This can be done by removing the tank cover on the back of the tank And remove the filter screen on t...

Страница 14: ...ve the handle and the plug coming out of the handle that goes to the electrical box 3 Use a bucket to collect the old oil unscrew sight level gauge drain the oil into the bucket 4 Once all oil is drained screw the bolt back in 5 Using the hole where the handle was connected pour in oil until it is visible half way up the sight level gauge 6 Screw the handle back on and reconnect the plug 7 Follow ...

Страница 15: ...e level of coolant in tank and increase the flow of coolant Talk to your coolant provider Premature Blade Wear Wrong blade being used Use the blade calculator to determine the correct pitch or consult your blade provider Wrong cutting speed or feed Insufficient coolant or incorrect type of coolant Check the level of coolant in tank and increase the flow of coolant Talk to your coolant provider Bla...

Страница 16: ...ould be 24 volts Auxiliary Relay Check voltages to relay terminals should be 24 volts If not check for loose wires if none relay should be replaced Motor will not work bit the indicator light is on Socket and or plug connecting the switch handle to the electrical box Check the plug connections and the wire connections inside the handle switch Switch inside the handle Make sure the switch makes the...

Страница 17: ...Dake Corporation 724 Robbins Road Grand Haven MI 49417 www dakecorp com 16 REV012019 EXPLODED VIEW ...

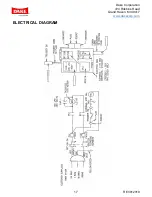
Страница 18: ...Dake Corporation 724 Robbins Road Grand Haven MI 49417 www dakecorp com 17 REV012019 ELECTRICAL DIAGRAM ...

Страница 19: ...ise Adjusting Handwheel 47100000 88 Coolant Pump Housing AG190044 22 Socket Cap Screw M8 1 25 x 20mm 80521 89 Socket Head Cap Screw M6 1 0 x 20mm 64179 24 27 Filter Support Flange Assembly ANC10071 90 Coolant Pump 8814100 28 Socket Head Cap Screw M5 x 12mm 64180 91 Socket Head Cap Screw M6 1 0 x 20mm 64179 29 Washer 8 5mm ID x 21mm OD 82100000 92 Oil Plug 88302002A 30 Coolant Flow Control Valve 88...

Страница 20: ...e Holder 73142005 53 Lower Blade Guard AHC20086 133 Transformer 30VA 73327011 54 External Snap Ring 82600000 134 Socket Connector 73600005 55 Blade Guard Mounting Pin AF190092 135 Plug Connector 73600052 56 Socket Cap Screw M6 x 12mm 80625 136 Main Power Shut Off 70201011 57 60 Blade Guard Support AFC10088 137 Reset Button 716812 61 Elastic Pin Ø 5mm 82504189 138 Emergency Stop 716538 62 Socket Ca...

Отзывы: