User's Manual
24
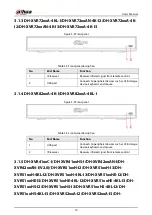
Table 3-11 Rear panel description
No.
Port Name
Function
1
Alarm input port 1–16
Four groups of alarm input ports (Group 1: port
1 to port 4; Group 2: port 5 to port 8; Group 3:
port 9 to port 12; Group 4: port 13 to port 16).
These ports receive the signal from the external
alarm source. There are two types: NO
(Normally Open) and NC (Normally Closed).
When your alarm input device is using external
power, please make sure the alarm input
device and the Device have the same ground.
Alarm output port 1–3 (NO1–
NO3; C1–C3)
●
Three groups of alarm output ports (Group
1: port NO1–C1, Group 2: port NO2–C2,
Group 3: port NO3–C3). These ports output
alarm signal to the alarm device. Please
make sure power supply to the external
alarm device.
●
NO: Normally open alarm output port.
●
C: Alarm output public end.
Ground.
2
Video input port
Connects to analog camera to input video
signal.
3
Audio input port
Receives audio signal output from the devices
such as microphone. It corresponds to video
input port 1.
4
DB25 port
Connects to the audio splitter taken from the
package to convert to audio input port which
receives the audio signal from devices such as
microphone. It corresponds to video input
ports 2–16.
5
Audio output port
Outputs audio signal to the devices such as the
sound box.
6
HDMI port
High definition audio and video signal output
port.
The port outputs the uncompressed high
definition video and multi-channel audio data
to the connected display with HDMI port.
7
USB port
Connects to external devices such as USB
storage device, keyboard and mouse.
8
Network port
Connects to Ethernet port.
9
RS-485 communication port
Connects to the control devices such as speed
dome PTZ. RS-485_A port is connected by the
cable A and RS-485_B is connected to the cable
B.
Содержание DH-XVR Series
Страница 1: ...AI Digital Video Recorder User s Manual ZHEJIANG DAHUA VISION TECHNOLOGY CO LTD V2 3 1...
Страница 31: ...User s Manual 15 Figure 2 32 Install HDD Step 4 Use the HDD cable and power cable to connect HDD and mainboard...
Страница 33: ...User s Manual 17 Figure 2 35 Fasten screws...
Страница 110: ...User s Manual 94 Figure 5 50 Main menu...
Страница 122: ...User s Manual 106 connected camera Procedure Step 1 Select Main Menu CAMERA Image Figure 5 63 Analog channel...
Страница 203: ...User s Manual 187 2 Click of the database that you want to configure Figure 5 140 Details 3 Click Register ID...
Страница 213: ...User s Manual 197 Figure 5 154 Smart search 4 Click the picture that you want to play back...
Страница 218: ...User s Manual 202 Figure 5 160 Search results...
Страница 307: ...User s Manual 291 Figure 5 263 Version 1 Figure 5 264 Version 2 Step 3 Click Apply...
Страница 350: ...User s Manual 334 Figure 6 3 Legal information...
Страница 378: ...User s Manual 362 Appendix Figure 7 7 Check neutral cable connection...
Страница 384: ...User s Manual...


