User's Manual
298
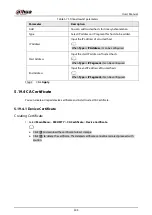
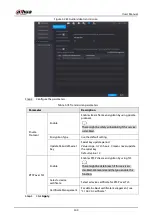
Parameter
Description
File Size
Enter the length of the uploaded recorded video.
●
If the entered length is less than the recorded video length,
only a section of the recorded video can be uploaded.
●
If the entered length is more than the recorded video
length, the whole recorded video can be uploaded.
●
If the entered length is 0, the whole recorded video will be
uploaded.
Picture Upload Interval (Sec.)
●
If this interval is longer than snapshot interval, the system
takes the recent snapshot to upload. For example, the
interval is 5 seconds, and snapshot interval is 2 seconds per
snapshot, the system uploads the recent snapshot every 5
seconds.
●
If this interval is shorter than snapshot interval, the system
uploads the snapshot per the snapshot interval. For
example, the interval is 5 seconds, and snapshot interval is
10 seconds per snapshot, the system uploads the snapshot
every 10 seconds.
●
To configure the snapshot interval, select
Main Menu
>
CAMERA
>
Encode
>
Snapshot
.
Channel
Select the channel that you want to apply the FTP settings.
Day
Select the week day and set the time period that you want to
upload the recorded files. You can set two periods for each
week day.
Period 1, Period 2
Record type
Select the record type (Alarm, Intel, MD, and General) that you
want to upload. The selected record type will be uploaded
during the configured time period.
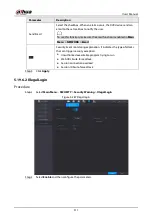
Step 3
Click
Test
.
The system pops up a message to indicate success or failure. If failed, check the network
connection or configurations.
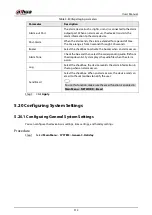
Step 4
Click
Apply
to complete the settings.
5.19 Security Center
You can set security options to strengthen device security and use the device in a much safer way.
5.19.1 Security Status
Security scanning helps get a whole picture of device security status. You can scan user, service and
security module status for detailed information about the security status of the device.
Detecting User and Service
Содержание DH-XVR Series
Страница 1: ...AI Digital Video Recorder User s Manual ZHEJIANG DAHUA VISION TECHNOLOGY CO LTD V2 3 1...
Страница 31: ...User s Manual 15 Figure 2 32 Install HDD Step 4 Use the HDD cable and power cable to connect HDD and mainboard...
Страница 33: ...User s Manual 17 Figure 2 35 Fasten screws...
Страница 110: ...User s Manual 94 Figure 5 50 Main menu...
Страница 122: ...User s Manual 106 connected camera Procedure Step 1 Select Main Menu CAMERA Image Figure 5 63 Analog channel...
Страница 203: ...User s Manual 187 2 Click of the database that you want to configure Figure 5 140 Details 3 Click Register ID...
Страница 213: ...User s Manual 197 Figure 5 154 Smart search 4 Click the picture that you want to play back...
Страница 218: ...User s Manual 202 Figure 5 160 Search results...
Страница 307: ...User s Manual 291 Figure 5 263 Version 1 Figure 5 264 Version 2 Step 3 Click Apply...
Страница 350: ...User s Manual 334 Figure 6 3 Legal information...
Страница 378: ...User s Manual 362 Appendix Figure 7 7 Check neutral cable connection...
Страница 384: ...User s Manual...


