background image

www.daewoopower.bg

43

BG

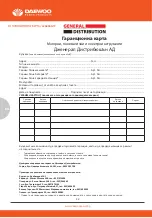
Гаранционни условия

* Правото на гаранционен сервиз е единствено за машината с посочения в картата сериен номер

Моторните, пневматичните и електроинструментите, предлагани от Дженерал Дистрибюшън АД /Дружеството/, 

са инструменти и машини, предназначени за домашна и хоби употреба, конструирани и произведени съгласно 

действащите нормативни директиви и стандарти за съответствие на Европейския съюз, като са изпълнени 

изискванията за безопасност. Търговската  гаранция за машините и пневматичните инструменти е 24 месеца от 

датата на покупката за лица, които имат качеството потребители по смисъла на § 6 т. 6 от Закона за 

предоставяне на цифрово съдържание и цифрови услуги и за продажба на стоки, а за всички останали купувачи  

търговската гаранция е валидна 12 /дванадесет/ месеца от датата на покупката. Търговската гаранция за 

батерии и зарядни станции за всички купувачи е 6 месеца от датата на покупката. Търговската гаранция може да 

бъде предявена на територията на Р.България, в посочените по-горе пунктове на Дженерал Дистрибюшън АД 

или в търговските обекти на търговеца /магазина/, от който е закупена машината. За предявяване на 

рекламация купувачът е необходимо да представи: коректно попълнена документация за закупената машина; 

попълнена гаранция – задължителни атрибути по гаранционната карта са сериен номер на машината, подпис и 

печат на търговеца, продал машината, подпис от страна на купувача, че е запознат с гаранционните условия и 

фискален касов бон или фактура, удостоверяваща датата на покупката.
За рекламация и ремонт се приемат само добре почистени машини.
Гаранцията покрива производствени дефекти в изработката или в материала и е валидна при условие, че 

машината е ползвана единствено според нейното предназначение, в точно съответствие с инструкциите на 

производителя за експлоатация и поддръжка. Купувачът е задължен да се информира за изискванията на 

производителя, посочени в инструкцията на последния, придружаваща стоката при покупката. В случай, че по 

каквато и да е причина не разполагате с инструкцията за експлоатация и поддръжка /дори и да сте я загубили/, 

свържете се с нас на посочените по-горе телефони и/или адреси, за да ви я предоставим повторно!
При основателна рекламация за гаранционна повреда Дженерал Дистрибюшън АД ще извърши ремонт до един 

месец от предаване на

машината за рекламация. По преценка на дружеството, при невъзможност за отстраняване на дефекта, 

продукта може да бъде заменен с нов. При изчерпана наличност, Дженерал Дистрибюшън АД уведомява 

Купувача и при негово съгласие го заменя с подобен или възстановява заплатената сума. Търговската гаранция е 

валидна съобразно условията, посочени в нея, като изпълнението на поетите от Дженерал Дистрибюшън АД 

задължения по търговската гаранция не е свързано с разходи за потребителя. Електроинструментите трябва да 

се използват само по предназначение в съответствие с инструкцията за експлоатация и при съблюдаване на 

мерките за безопасност, описани в инструкцията. Всички машини изискват периодична проверка и подходяща 

поддръжка. Моля, информирайте се своевременно за предписанията на производителя в Инструкцията за 

експлоатация и поддръжка на машината!
Гаранцията не покрива:
-     Цялостните повреди на инструментите, причинени от природни бедствия, наводнения, земетресения, 

пожари и т.н.;

-     Износване на цветното покритие на инструментите;

-     Стопяеми електрически предпазители и крушки;

-     Ръчен стартерен механизъм и ел. свещ;

-     Части и консумативи, които подлежат на износване, причинено от ползването, в това число, но не само: грес 

и масло, четки, водачи, опорни ролки, задвижващи ремъци, гъвкав вал с жило и др.;

-     Допълнителни аксесоари и консумативи в това число, но не само: ръкохватки, кутии, свредла, дискове за 

рязане, секачи, ножове, вериги, шкурки, ограничители, полир-шайби, патронници, макарата за корда и самата 

корда за косачки и др.;

-     Механични повреди по корпуса на изделието или декоративните елементи по него, предпазители за очи, 

предпазители за

режещи инструменти, гумирани плочи, закопчалки, линеали, захранващ кабел и щепсел.
Отпадане на гаранция
Дженерал Дистрибюшън АД има правото да откаже безплатен гаранционен сервиз в случай, че:

-      е правен опит за неоторизирана сервизна намеса в неупълномощена сервизна база;

-      идентификационния етикет на изделието е заличен или изцяло липсва такъв;

-      не е попълен сериен номер на машината в гаранционната карта;

-      несъответстващ сериен номер на машината с попълнения в гаранционната карта;

-      повредите са причинени в следствие на небрежно боравене с изделието;

Содержание DLM4600SPL

Страница 1: ...nes take care as rotating one blade can cause otherblades to rotate Operation 1 Do not operate the engine in a confined space where dangerous carbonmonoxide fumes can collect 2 Mow only in daylight or...

Страница 2: ...the spark plug wire make sure that all moving parts have come to a complete stop and where a key is fitted removethe key Before clearing blockages or unclogging chute Before checking cleaning or worki...

Страница 3: ...ver to secure thegrass bag in position Assembling the mulching plug Fig 8 1 Remove the grass bag 2 Push the plastic mulchingplug Fig 8 into the dischargechute Fig 9 until it is locked inplace Please p...

Страница 4: ...ling fuel There should be no fuel in thefiller neck 4 Clean up any overflow or splashes of petrolbefore starting the engine 5 Tighten the filler cap after filling fingertight on If petrol is spilled d...

Страница 5: ...lace worn or damaged parts safety the fuel tank has to be drained this should be done outdoors DJUSTMENT ing the cutting height As shown in Fig 17 UTION Adjust the cutting height only when the engine...

Страница 6: ...is purpose Refuel outdoors only and do not smoke while refueling Add fuel before starting the engine Never remove the cap of the fuel tank oradd petrol while the engine is running or when the engine i...

Страница 7: ...ve grease Check the grass catcher frequently for wear or deterioration 6 Replace worn or damaged parts safety the fuel tank has to be drained this should be done outdoors 6 For wheeled rotary machines...

Страница 8: ...using two bolts andtwo small knobs on each side as shown in Fig 2 46cm cutting witch has one knob on each side 2 Unfold the upper handle and fix it to lower handleby using the big knobs and the blots...

Страница 9: ...be filled with the correct grade of oil and petrol before tarting the engine NOTE Running the engine with a low oil level will cause engine damage It is recommend that high etergent premium quality 4...

Страница 10: ...verflow or splashes of petrolbefore starting the engine 5 Tighten the filler cap after filling fingertight on 26 Wipe away any spilt oil 4 Align the ribs of the cap with the groove of the filler neck...

Страница 11: ...STMENT Setting the cutting height As shown in Fig 17 CAUTION Adjust the cutting height only when the engine is switch off the spark plug Boot has bee pulled The cutting height is centrally adjusted wi...

Страница 12: ...e As shown in Fig 20 Release the engine start stop lever it will return to its Initial position the engine will automatically switch off 9 OPERATION Start and stop the engine WARNING the blade begins...

Страница 13: ...e scatteredefficiently do not cut high or wet grass When you have been cutting forseveral minutes please stop the mower and Fig21 To clean a flooded engine NOTE if the engine won t start after you hav...

Страница 14: ...ntains a lot of dust the air filter should be checked more frequently www daewoopower bg 14 EN www daewoopower bg 14 EN 30 clean the blade and the deck 9 Do not remove grass debris in the mower casing...

Страница 15: ...e oil Start the engine and allow it to run riefly top the engine wait one minute and check the oil level Top up if necessary Note see more in ngine manual Replacing the blade or safety reasons you sho...

Страница 16: ...p turn of the blade must project into the motor compartment Storing the Lawnmower for Short Periods The lawnmower can be stored for short periods of time less than 15 days without performing any stora...

Страница 17: ...ait until the blade has come to a stop Caution Improper repairs can result in the product functioning unsafely This endangers yourself and your environment Faults which cannot be rectified with the ai...

Страница 18: ...e may be flooded y r d d n a g u l p e v o m e R Engine runs unsteadily Air filter is soiled Clean the air filter Spark plug is soiled g u l p k r a p s e h t n a e l C Uneven mowing results Blade is...

Страница 19: ...www daewoopower bg 19 BG 1 20 2 21 3 22 4 22 5 22 6 23 7 25 8 27 9 28 10 30 11 33 12 34 13 41...

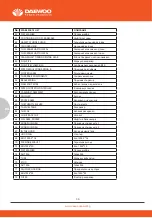
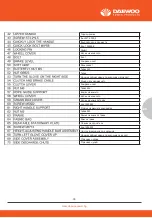
Страница 20: ...lever 5 Fixing knob w ith square neck blot 6 Lower handle 7 Grass box 8 Fuel tank cap 9 Primer 10 Front decorative cover 11 Height adjusting handle 12 Rear wheel 13 Engine oil cap 14 Side discharge c...

Страница 21: ...e any other use is Deemed to be a case of misuse The user operator and not the Manufacturer will be liable for any damage or injuries of any kind caused as a result of this Please note that our equipm...

Страница 22: ...ing Wearing ear protection eye protection when operating Hot surfaces will burn finger or palms 5 WARNING SYMBOLS ON THE MACHINE WARING To reduce the risk of injury user must read instruction manual T...

Страница 23: ...r exhaust gas contains toxic substances Do not start or run engine indoors or in an enclosed area even if windows and doors are open Conforms to relevant safety standards Waste electrical products sho...

Страница 24: ...lace all fuel tank and container caps securely 4 Replace faulty silencers 5 Before using always visually inspect to see that the blades blade bolts andcutter assembly are not worn or damaged Replace w...

Страница 25: ...bling the grass bag onto the mower As shown in Fig 6 1 Lift the rear discharge cover with one hand andhook in the grass bag 2 Release the rear discharge cover to secure thegrass bag in position Assemb...

Страница 26: ...2 3 Fix the plastic panel with the bolts and nuts 3 and 4 provided Checking the engine oil level And filling with engine oil As shown in Fig 15 16 CAUTION The following procedures and adjustments must...

Страница 27: ...e of oil and petrol before starting the engine WARNING Refuel in a well ventilated area with the engine stopped Do not smoke or allow flame or sparks in the area where the engine is refueled or where...

Страница 28: ...the cutting height As shown in Fig 17 CAUTION Adjust the cutting height only when the engine is switch off the spark plug Boot has been pulled The cutting height is centrally adjusted with Cutting hei...

Страница 29: ...plug carefully by hand to avoid cross threading After the plug is seated tighten 1 8 to 1 4 turn with socket spanner of sparkplug to compress the washer 1 Pull the engine start stop lever toward uppe...

Страница 30: ...TE Before placing the lawn mower on its side fully drain the fuel tank using a petrol extraction pump Do not tilt the lawn mower by more than 90 degrees Maintenance of the spark plug As shown in Fig 2...

Страница 31: ...afety reasons you should only ever have your blade sharpened balanced and mounted by an authorised service workshop For optimum results it is recommended that the blade should be inspected once a year...

Страница 32: ...Align the ribs of the cap with the groove of the filler neck then rotate 1 4 turn to secure it Filling with engine fuel As shown in Fig 15 CAUTION Always use clean fresh unleaded petrol Purchase fuel...

Страница 33: ...ed ll the adjusting handle out and select the desired cutting height The handle snaps onto the sired position om position 1 to position 7 The cutting height range from 25mm to 75 mm tting required fun...

Страница 34: ...g put the starter ropeInto the rope guide To stop the engine As shown in Fig 20 Release the engine start stop lever it will return to its Initial position the engine will automatically switch off ATIO...

Страница 35: ...Install the spark plug carefully by hand to avoid cross threading After the plug is seated ten 1 8 to 1 4 turn with socket spanner of sparkplug to compress the washer ull the engine start stop lever...

Страница 36: ...er it is time to empty the grass bag NOTE Before taking off the grass bag switch off the engine and wait untilthe blade has come to a stop 1 To take off the grass bag use one hand to lift up ejector f...

Страница 37: ...e without the air filter element installed 1 Remove the air cleaner outside cover A Be carefulto prevent dirt and debris from falling into the aircleaner assembly 2 Separate the Air Filter A from the...

Страница 38: ...at the end of every season To do so remove the used engine WARNING If the blade is cracked or damaged replace it with a new one WARNING Don t hold the blade by hand directly NOTE Maintain the sharpnes...

Страница 39: ...arranty you can also endanger yourself and your environment oil from a warm engine and refill with fresh oil4 Clean the cooling fins of the cylinder and the housing 5 Be sure to clean the entire machi...

Страница 40: ...www daewoopower bg 40 BG 10 6 M5x30 10 6 M5x30...

Страница 41: ...following standards and The under signed is responsible for the of technical BG 150 2 6 kW 460 mm DLM4600SPL DM46S D150 GBR address 15 F 100 Queen s Road Central Central Hong Kong Harmonized standard...

Страница 42: ...www daewoopower bg 42 BG WARRANTY 361 0893 383 798 1 3 052 575400 248 032 946065 42 082 870104 37 042 600699 5000 062 690003 90 064 600082...

Страница 43: ...www daewoopower bg 43 BG 24 6 6 12 6...

Страница 44: ...www daewoopower bg 44 BG 1 1 2022 6 6...

Страница 45: ...www daewoopower bg 45 BG...

Страница 46: ...www daewoopower bg 1784 1 51 359 2 81 77 600 359 2 81 77 601...

Отзывы: