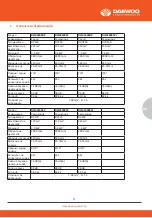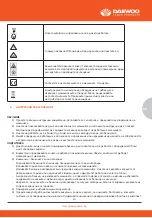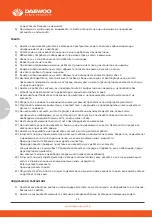
8. ADJUSTMENT
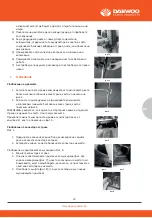
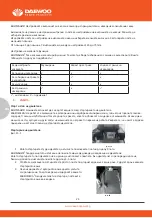
Setting the cutting height As shown in Fig 17
CAUTION! Adjust the cutting height only when the engine is switch off the spark plug Boot has been
pulled.
The cutting height is centrally adjusted with Cutting height adjusting handle. Different cutting
Heights can be selected.
Pull the adjusting handle out and select the desired cutting height. The handle snaps onto the
desired position.
From position 1 to position 7. The cutting height range from 25mm to 75 mm.
Setting required function
NOTE: This lawn mower has four functions. These functions can be converted by changing acces-
sory setting. Please see the following chart for detail setting.
9. OPERATION
Start and stop the engine
WARNING: the blade begins to rotate as soon as the engine is started.
NOTE: do not operate the machine in enclosed or poorly Ventilated areas as the exhaust gas con-
tains toxic substance. Keep hands , feet ,hair and clothing away from.
All the moving parts of the machine . the exhaust and other Parts of the machine will become hot
during use.
Make sure that the blade is securely fastened before starting the engine.
NOTE: to start the engine make sure that the spark plug boot is located on the plug and the machi-
ne is filled with sufficient oil and petrol.
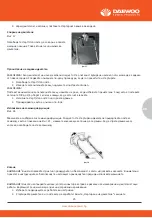
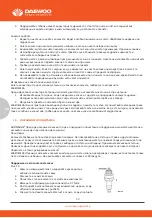
To start the engine As shown in Fig 18-19 1.
When starting a cold engine, press down
the Primer fully 3 times.
WARNING! Too much presses on primer May cause engine flooded When starting a warm Engine,
the primer does not need to be used. If the engine stops due to a lack of petrol, refill and press
down the primer 3~5 times.
2. Stand behind the mower. Pull the engine Start/stoplever toward upper handle with one hand. And
placethe other hand on the starter handle.
3. Pull the starter handle until you feel a resistance andthen start the engine with a sharp pull.
NOTE: If the engine fails to start after three pulls, repeat the process.
4. Once the engine is running, put the starter ropeInto the rope guide.
To stop the engine As shown in Fig 20 Release the engine start/stop lever, it will return to its Initial
position, the engine will automatically switch off.
oil from a warm engine and refill with fresh oil4.Clean the cooling fins of the cylinder and the housing
5.Be sure to clean the entire machine to protect the paint.6.Store the machine in a well-ventilated
place.
Maintenance Schedule
Performing routine maintenance correctly on your lawnmower will ensure you
get years of trouble free use.
Please keep this manual safe for future reference.
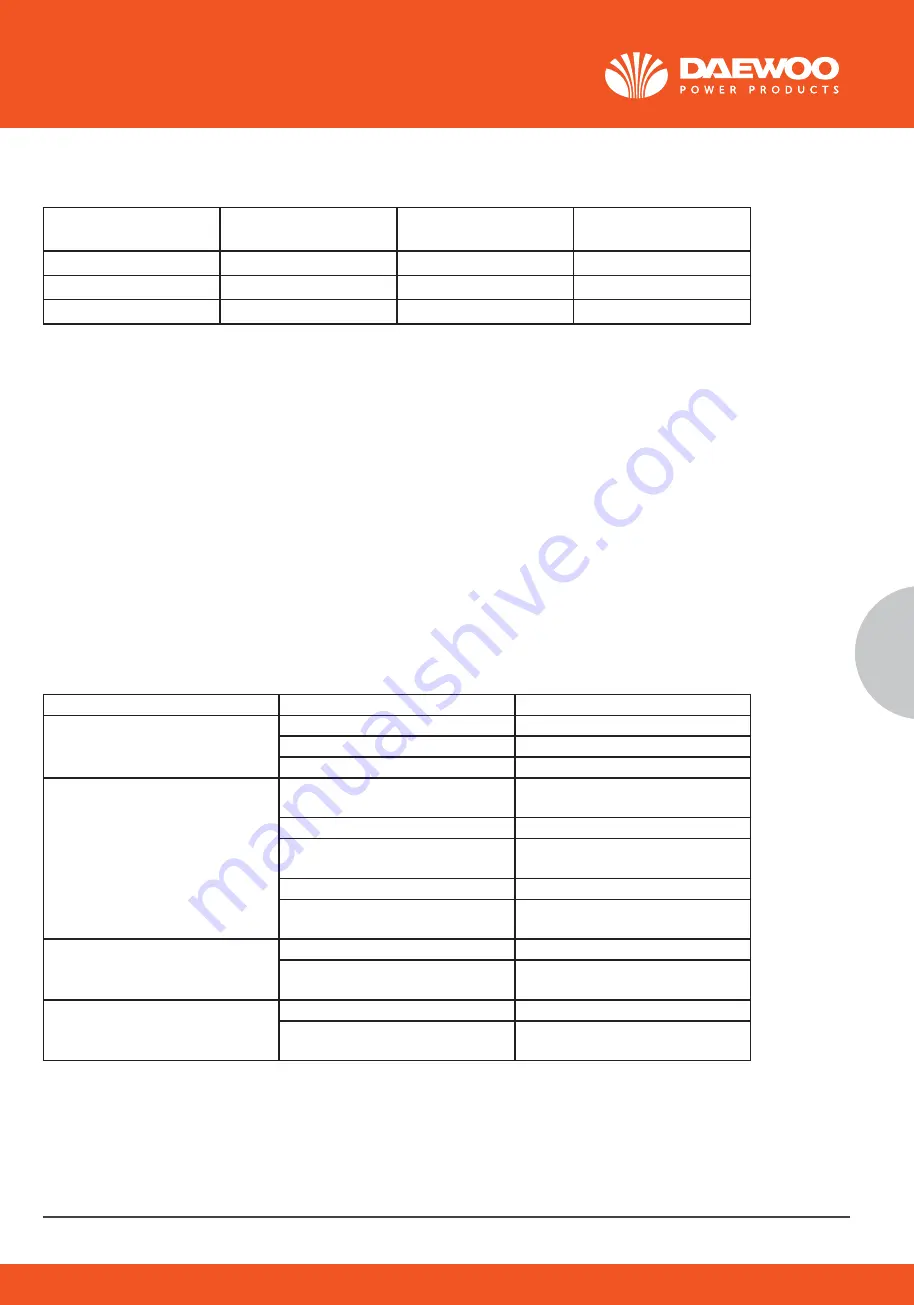
It is recommended that the following maintenance schedule is adhered to. This will ensure the
lawn-mower operated correctly and is safe to use.
The Engine oil should be changed after the fist 8 hours.
Transport
Empty the petrol tank
Always let the engine run until it has used up the remainder of petrol in the tank. Empty the engine
oil from the warm engine.
Remove the spark plug boot from the spark plug. Clean the cooling fins of the cylinder and the
housing. Use the original packaging to ship whenever possible.
11. TROUBLESHOOTING
WARNING: Before performing any maintenance or cleaning work, switch off the engine and wait
until the blade has come to a stop.
Caution!
Improper repairs can result in the product functioning unsafely. This endangers yourself and your
environment.
Faults which cannot be rectified with the aid of following table may be rectified by a specialist
company only (customer service center).
Please be aware that any improper repairs will also invalidate the warranty and
additional costs may be incurred.
Use only genuine spare parts. Only these spare parts are designed and suitable for the product.
The use of other spare parts not only voids the warranty, you can also endanger yourself and your
environment.
www.daewoopower.bg
33
BG
Моля,
запазете
инструкцията
за
бъдещи
справки
.
Препоръчително
е
да
се
консултирате
с
таблицата
по-долу,
за
да
сте
сигурни,
че
косачката
ви
ще
работи
коректно
и
безопасно
.
На
всеки
12
часа
работа
На
всеки
24
часа
работа
На
всеки
36
часа
работа
Въздушен
филтър
Почистване
Почистване
Подменете
Запалителна
свещ
Проверка
Почистване
Подменете
Двигателно
масло
Проверка
Подмяна
Проверка
Двигателното
масло
трябва
да
се
смени
и
след
първите
8
часа
работа
.
Транспорт
Изпразнете
резервоара
за
гориво
.
Винаги
оставяйте
двигателя
да
работи,
докато
не
изразходи
всички
остатъци
от
бензин
в
резервоара
.
Изпразнете
двигателното
масло
при
топъл
двигател
.
Махнете
запалителната
свещ
от
гнездото
.
Почистете
охлаждащите
отвори
на
цилиндъра
и
корпуса
.
Използвайте
оригиналната
опаковка
да
транспортирате
машината
.
11.
ЕВЕНТУАЛНИ ПРОБЛЕМИ И ТЯХНОТО РЕШЕНИЕ
ВНИМАНИЕ
!
Некачествените
ремонти
могат
да
се
отразят
на
безопасността
и
функционалността
на
машината
.
Това
поставя
в
риск
вас
и
околната
среда
.
Проблеми,
които
не
могат
да
бъдат
решени
в
съответствие
с
предоставената
таблица
по-долу,
трябва
да
се
отстраняват
от
оторизиран
сервиз
.
Обратното
ще
доведе
до
отпадане
на
гаранцията
на
машината
и
може
да
доведе
до
допълнителни
разходи
.
Използвайте
само
оригинални
резервни
части
.
Само
те
са
подходящи
и
проектирани
за
машината
ви
.
Употребата
на
други
резервни
части
не
само
ще
доведе
до
отпадане
на
гаранцията,
но
може
да
ви
постави
в
риск
.
Проблем
Причина
Решение
Машината
работи
шумно
и
има
големи
вибрации
Разхлабени
болтове
Затегнете
Разхлабени
болтове
на
ножа
Проверете
и
затегнете
Небалансиран
нож
Поставете
правилно
ножа
Двигателят
не
стартира
Не
сте
натиснали
старт/стоп
лоста
Натиснете
старт/стоп
лоста
Дефектна
запалителна
свещ
Подменете
запалителната
свещ
Проверете
дали
ножа
не
е
повреден
или
износен
Подменете
ножа
в
оторизиран
сервизен
център
Празен
резервоар
за
гориво
Заредете
гориво
Задавен
двигател
Махнете
запалителната
свещ
и
подсушете
Двигателят
работи
нестабилно Замърсен
въздушен
филтър
Почистете
въздушния
филтър
Замърсена
запалителна
свещ
Проверете
и
почистете
запалителната
свещ
Неравномерно
косене
Ножът
е
захабен
Наточете
ножа
Настроена
е
твърде
ниска
височина
на
косене
Настройте
коректна
височина
на
косене
Содержание DLM4600SPL
Страница 19: ...www daewoopower bg 19 BG 1 20 2 21 3 22 4 22 5 22 6 23 7 25 8 27 9 28 10 30 11 33 12 34 13 41...
Страница 40: ...www daewoopower bg 40 BG 10 6 M5x30 10 6 M5x30...
Страница 43: ...www daewoopower bg 43 BG 24 6 6 12 6...
Страница 44: ...www daewoopower bg 44 BG 1 1 2022 6 6...
Страница 45: ...www daewoopower bg 45 BG...
Страница 46: ...www daewoopower bg 1784 1 51 359 2 81 77 600 359 2 81 77 601...


