


xStack
®
DGS-3600 Series Layer 3 Gigabit Ethernet Managed Switch
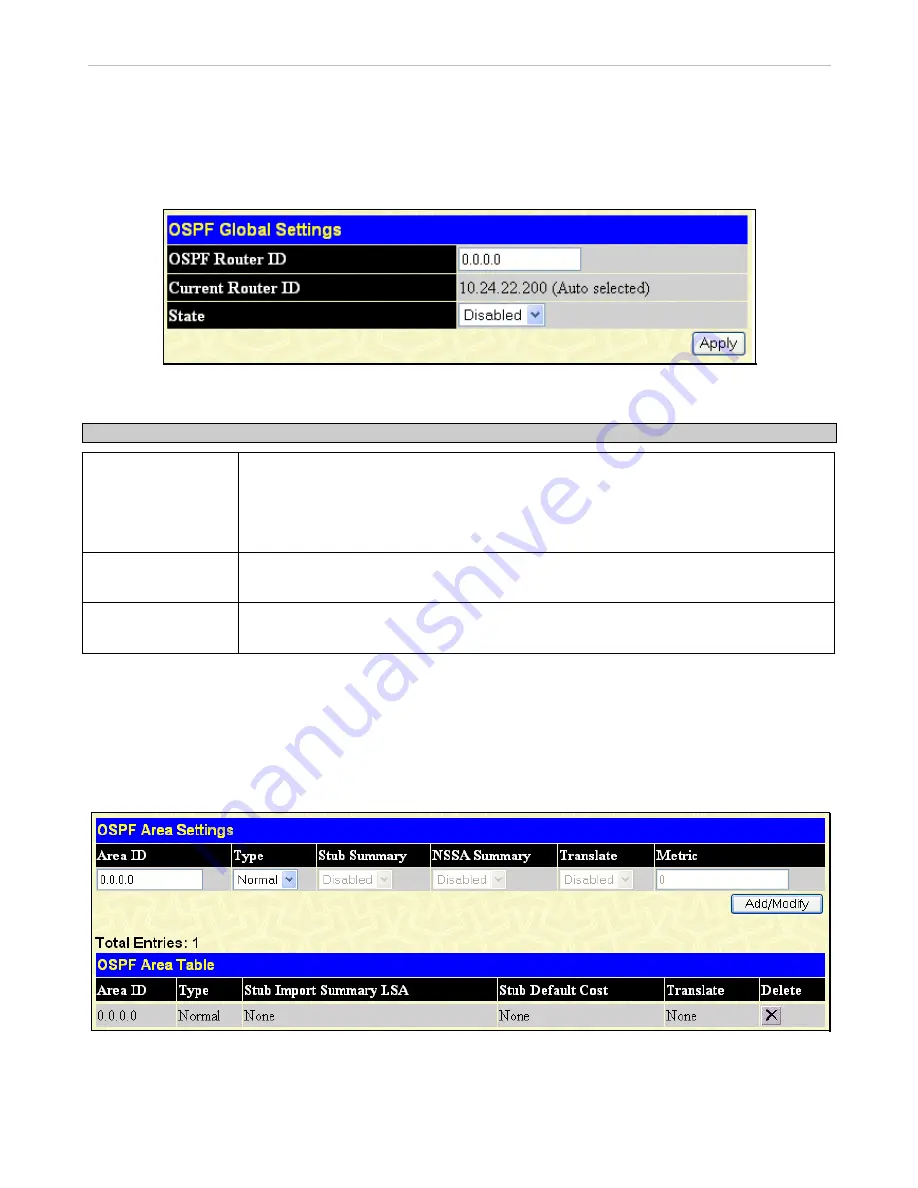
OSPF Global Settings
This window allows OSPF to be enabled or disabled on the Switch
without changing the Switch’s OSPF configuration. To
enable OSPF, first supply an OSPF Route ID (see below), select
Enabled
from the State drop-down menu and click the
Apply
button.
To view the following window, click
L3 Features > OSPF > OSPF Global Settings
, as shown below.
Figure 8- 44. OSPF Global Settings window
The following parameters are used for general OSPF configuration:
Parameter
Description
OSPF Router ID
A 32-bit number (in the same format as an IP address
xxx.xxx.xxx.xxx) that uniquely
identifies the Switch in the OSPF domain. It is common to assign the highest IP address
assigned to the Switch (router). In this case, it would be 10.24.22.200, but any unique 32-bit
number will do. If 0.0.0.0 is entered, the highest IP address assigned to the Switch will
become the OSPF Route ID.
Current Router ID
Displays the OSPF Route ID currently in use by the Switch. This Route ID is displayed as a
convenience to the user when changing the Switch’s OSPF Route ID.
State
Allows OSPF to be enabled or disabled globally on the Switch without changing the OSPF
configuration.
OSPF Area Settings
This menu allows the configuration of OSPF Area IDs and to designate these areas as Normal, Stub or NSSA. Normal OSPF areas
allow Link-State Database (LSDB) advertisements of routes to networks that are external to the area. Stub areas do not allow the
LSDB advertisement of external routes. Stub areas use a default summary external route (0.0.0.0 or Area 0) to reach external
destinations.
To set up an OSPF area configuration, click
Layer 3 Features > OSPF > OSPF Area Settings
, as shown below.
Figure 8- 45. OSPF Area Settings window
To add an OSPF Area to the table, type a unique Area ID (see below) select the Type from the drop-down menu. For a Stub type,
choose
Enabled
or
Disabled
from the Stub Summary drop-down menu and determine the Metric. Click the
Add/Modify
button to
add the area ID set to the table.
194


