background image

12

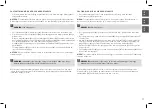
SECURING THE CHILD SEAT USING THE ISOFIX SYSTEM

NOTE! 

The ISOFIX fixture points 

(8)

 are two metallic clips for each seat and are 

positioned between the backrest and the seating surface of the vehicle seat. In case of 

doubt, please refer to the driver’s manual of your vehicle.

NOTE!

 Before clicking the the ISOFIX locking arms 

(5)

 into the ISOFIX fixture points 

(8)

check the release buttons 

(10)

. If the green safety indicators 

(11)

 are visible, you must first 

release the ISOFIX locking arms before joining by pressing and pulling back the release 

button 

(10)

. Repeat the process if necessary with the second locking arm.

NOTE!

 Note the information in the section “Placing the seat in the vehicle”.

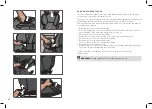
•  Push the two locking arms 

(5)

 into the ISOFIX guides 

(7)

 until these lock into place in 

the ISOFIX fixture points 

(8)

 with an audible ‘click’.

•  Ensure that the seat is secure by trying to pull it out of the ISOFIX guides 

(7)

.

•  The green safety indicator 

(11)

 must now be clearly visible on the two grey release 

buttons 

(10)

.

•  You can now use the ISOFIX adjustment lever 

(9)

 under the booster seat 

(1)

 of the 

CYBEX SOLUTION S i-FIX child seat to adjust the position.

•  Always ensure that the entire surface of the backrest 

(2)

 of the CYBEX SOLUTION S 

i-FIX is placed against the backrest of the vehicle seat.

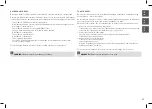
•  Insert the supplied ISOFIX guides 

(7)

 with the longer strap upwards into the  

two ISOFIX fixture points 

(8)

. In some vehicles, it is better to mount the ISOFIX guides 

(7)

 in the opposite direction.

•  Use the ISOFIX adjustment lever 

(9)

 under the booster seat.

•  Pull the two ISOFIX locking arms 

(5)

 as far as they will go.

•  Now twist the ISOFIX locking arms 

(5)

 180° so that they are facing the direction of the 

ISOFIX guides 

(7)

.

Using the ISOFIX system, you can fix the CYBEX SOLUTION S i-FIX to the vehicle, 

thereby increasing your child’s safety. The child still needs to be secured with the three-

point belt of your vehicle.

9

2

11

10

CLICK!

7

10 11

10

11

8

7

5

9

180

0

9

1

NOTE! 

Please use the ISOFIX guides provided to ensure that the vehicle seat is not 

destroyed by the ISOFIX locking arms.

Содержание SOLUTION S i-FIX

Страница 1: ...EN FI SE DK NO SI HR SOLUTION S i FIX User guide UN R129 03 100 150 cm...

Страница 2: ...2 1 13 2 3 CLICK 5 10 15 PRESS 9 14 4 6 7 8 CLICK 11 12 MAX 16 17 Short instruction Korta instruktioner Korte instruksjoner Lyhyt k ytt ohje Kort vejledning Kratka navodila Detaljne upute...

Страница 3: ...rada za certificiranje Popravila lahko izvede samo poobla ena oseba Za popravila se lahko uporabljajo le originalni deli in dodatki e ne boste ravnali v skladu z zgornjimi napotki varnostna funkcija o...

Страница 4: ...ic regulations e g regarding colour coding on child seats may mean that product features may vary in appearance This will however not affect the product in its correct function NOTE Always keep these...

Страница 5: ...truksjonene INNEH LL INNHOLD F RSTA INSTALLATIONEN 7 KORREKT PLACERING AV BILBARNSTOLEN I FORDONET 9 S KERHET I BILEN 11 PLACERING AV BILBARNSTOLEN I FORDONET 11 S KRA BARNS TET MED HJ LP AV ISOFIX SY...

Страница 6: ...1 NOTE Always keep these instructions to hand e g in the designated compartment on the rear of the backrest WARNING The parts of the CYBEX SOLUTION S i FIX must not be used alone or in combination wi...

Страница 7: ...p ryggst dets baksida MERK Ha alltid disse instruksjonene til h nden for eksempel i det angitte rommet p baksiden av ryggst tten VARNING CYBEX SOLUTION S i FIX delar f r inte anv ndas i kombination m...

Страница 8: ...or using it on another seat this child seat is not suitable for your vehicle WARNING Luggage or other objects present in the vehicle that may cause injury in the event of an accident must always be f...

Страница 9: ...itt fordon ADVARSEL Diagonalbeltet 6 m l pe tilbake ved en tilbakestilling og m aldri l pe frem til det vre beltepunktet i kj ret yet Hvis det ikke er mulig justere setet p denne m ten f eks Ved skyve...

Страница 10: ...ny recline of the vehicle seat In order to guarantee the best possible safety for all passengers make sure that the foldable backrests in the vehicle are locked in their upright position when installi...

Страница 11: ...sta m jliga s kerhet f r alla passagerare se till att De reglerbara ryggst den i fordonet r l sta i sitt uppr tta l ge n r du installerar bilbarnstolen i det fr mre passagerars tet justera fordonss te...

Страница 12: ...dicator 11 must now be clearly visible on the two grey release buttons 10 You can now use the ISOFIX adjustment lever 9 under the booster seat 1 of the CYBEX SOLUTION S i FIX child seat to adjust the...

Страница 13: ...ytan p 2 CYBEX SOLUTION S i FIX ryggst det placeras mot fordonss tets ryggst d Trykk de to l searmene 5 inn i ISOFIX festepunktene 7 til disse l ses p plass i ISOFIX festepunktene 8 med et h rbart kli...

Страница 14: ...ly by using the adjustable headrest 12 To do this pull the adjustment lever 13 upwards to unlock the headrest 12 Adjust the headrest so that there is at maximum 2cm gap approximately two fingers betwe...

Страница 15: ...ackst det 12 Justera nackst det s att det finns h gst 2 cm mellanrum ungef r tv fingrar mellan barnets axel och nackst dets undre kant Stolen kan deretter justeres til barnets kropp bare ved bruke den...

Страница 16: ...he booster seat Now feed the diagonal belt 6 through the upper belt guide 18 in the headrest 12 until it is inside the belt guide NOTE The three point belt must only be passed through the designated r...

Страница 17: ...inn i den nedre belteguiden 17 Hoftebeltet 16 skal ha blitt matet gjennom de nedre belteguidene 17 p begge sider av boosteren F r n diagonalbeltet 6 gjennom den vre belteguiden 18 p nakkest tten 12 h...

Страница 18: ...not twisted the lap belt sits low on the pelvis the headrest has been adjusted to the correct height if using ISOFIX the seat has locked into place on both sides with the connectors into the ISOFIX a...

Страница 19: ...tef ringen p setet diagonalbeltet har blitt matet gjennom beltef ringen markert med gr nt i skulderst tten diagonalbeltet ligger bakover hele beltet er stramt mot barnets kropp og er ikke vridd magebe...

Страница 20: ...e optimum protection in case of side collisions RECLINING HEADREST To ensure that your child seat provides maximum protection it is imperative that you note the following CARE MAINTENANCE All major pa...

Страница 21: ...sidekollisjoner LUTANDE HUVUDST D TILBAKELENT HODEST TTE F r att s kerst lla att barns tet ger maximalt skydd r det viktigt att du noterar f ljande For sikre at barnesetet gir maksimal beskyttelse er...

Страница 22: ...the cover from the head support Unlock the cover from the hook at each side of the rear of the shoulder area Pull the cover out of the cover attachment channel Removing the cover from the shoulder par...

Страница 23: ...p fram och baksidan Dra av kl dseln ver armst den hornen och l ngs sittytan Avmonter trekket fra den vipbare hodest tten Trekk pningen p trekket over justeringsh ndtaket p nakkest tten slik at ikke t...

Страница 24: ...vehicle is directly exposed to strong sunlight for long periods the child seat must be removed from the vehicle or covered with a light cloth Check all plastic and metal parts of the seat regularly fo...

Страница 25: ...snas fr n fordonet eller t ckas med ett ljus tyg Kontrollera alla plast och metalldelar i s tet regelbundet f r skador eller f r ndringar i form eller f rg Om du m rker n gon f r ndring i barns tet m...

Страница 26: ...of the retailer and the product name must be presented No claims may be made on this warranty if the product is sent to the manufacturer or any other person than the retailer having first sold it for...

Страница 27: ...cker inte skador som orsakats av missbruk yttre p verkan vatten brand trafikolyckor etc eller normalt slitage Fordringar p garantin kommer endast att uppfyllas om produkten behandlas och anv nds i en...

Страница 28: ...16 tai vastaavan mukaisesti HUOM Maakohtaiset vaatimukset esim koskien v rikoodeja turvaistuimissa saattavat aiheuttaa tuotekohtaisia eroja T m ei kuitenkaan vaikuta tuotteen oikeaan toimivuuteen HUOM...

Страница 29: ...v teh navodilih INDHOLD VSEBINA F RSTE MONTERING 31 KORREKT PLACERING I BILEN 33 SIKKERHED I BILEN 35 PLACERING AF AUTOSTOLEN I K RET JET 35 MONTERING AF AUTOSTOLEN MED ISOFIX SYSTEMET 37 JUSTERING A...

Страница 30: ...ohjeet saatavilla esim sille varatussa lokerossa selk nojan takana VAROITUS CYBEX SOLUTION S i FIX turvaistuimen osia ei saa muuttaa k ytt erikseen tai yhdistettyn muiden valmistajien tuotteiden tai m...

Страница 31: ...placeret bag p stolen OPOMBA Navodila za uporabo imejte vedno pri roki npr v dolo enem predelku na zadnji strani opore za hrbet ADVARSEL De enkelte dele af CYBEX SOLUTION S i FIX m ikke anvendes alen...

Страница 32: ...aiheuttaa vammoja kolarissa ja siksi ne tulee aina kiinnitt turvallisesti Irrallaan ne saattavat aiheuttaa kohtalokkaita vammoja VAROITUS Turvaistuinta ei saa koskaan k ytt sivuttain auton kulkusuunta...

Страница 33: ...b de f rer af bilen og passagerer OPOZORILO Prtljaga ali drugi predmeti v vozilu ki v primeru trka lahko po kodujejo potnike morajo biti vedno vrsto pritrjeni V nasprotnem primeru se lahko prevrnejo i...

Страница 34: ...jataksesi kaikki matkustajat varmista ett auton istuimien s dett v t selk nojat ovat lukittuina pystyimp n asentoonsa asennettaessa turvaistuin auton etumatkustajan paikalle se on s detty takimmaiseen...

Страница 35: ...erer bdes du sikre at klapbare rygl n i bilen er l st i opretst ende position forreste passagers de er skubbet helt tilbage hvis autostolen er placeret herp N r du g r det skal du dog sikre at det ver...

Страница 36: ...timien 11 tulee olla selv sti n kyviss vapautuspainikkeista 10 Voi nyt k ytt ISOFIX s t kahvaa 9 s t ksesi CYBEX SOLUTION S i FIX istuimen oikeaan kohtaan auton istuimella Varmista aina ett CYBEX SOLU...

Страница 37: ...verfladen p CYBEX SOLUTION S i FIXs rygl n 2 placeres mod bils dets rygl n Obe zasko ni ro ici 5 potisnite v ISOFIX vodili 7 dokler se s sli nim klikom ne zatakneta v ISOFIX pritrdilni to ki 8 Prepri...

Страница 38: ...sesti k ytt en s dett v p ntukea 12 S t ksesi p ntukea nosta lukituspainiketta 13 yl sp in vapauttaaksesi p ntuen 12 P ntuki tulee s t siten ett aikuisen kaksi sormea 2 cm v li mahtuu lapsen hartioide...

Страница 39: ...tten 12 Just r hovedst tten s ledes at der maksimalt er et mellemrum p 2 cm ca 2 fingres bredde mellem barnets skulder og den nedre kant af hovedst tten Sede lahko nato enostavno prilagajate otrokovi...

Страница 40: ...lemm n vy nohjaimen 18 kautta p nsuojassa 12 kunnes se on vy nojaimen sis puolella HUOM Kolmipisteturvavy n saa pujottaa vain sille tarkoitettujen ohjainten l pi Vy n ohjaimet on kuvattu tarkkaan t ss...

Страница 41: ...deni ni pas 16 mora potekati skozi spodnji vodili 17 na obeh straneh jaha a Nato diagonalni pas 6 napeljite skozi zgornje vodilo 18 v opori za glavico 12 dokler ni znotraj vodila BEM RK Trepunktsselen...

Страница 42: ...skatuki on s detty oikeaan korkeuteen jos k yt ss on ISOFIX j rjestelm turvaistuin on lukittunut molemmin puolin paikoilleen ISOFIX lukituslenkkeihin ja molemmat vihre t osoittimet ovat selv sti n kyv...

Страница 43: ...e diagonalni pas je bil napeljan skozi zeleno ozna eno vodilo za pas na opori za ramena diagonalni pas poteka po evno nazaj se pas v celoti tesno prilega otrokovemu telesu in ni zvit je trebu ni pas n...

Страница 44: ...tuin antaa parhaan suojan on t rke noudattaa seuraavia ohjeita K YTT JA HUOLTO Kaikki turvaistuimen osat tulee tarkastaa s nn llisesti Kaikkien mekaanisten osien tulee olla vahingoittumattomia On ehdo...

Страница 45: ...ito VIPBAR HOVEDST TTE NAGIBNA OPORA ZA GLAVICO For at din autostol kan yde den bedst mulige beskyttelse er det vigtigt at du bem rker f lgende Da bi zagotovili optimalno za ito va ega otro kega sede...

Страница 46: ...iasuojien takapuolelta Ved p llinen pois p nsuojasta Varo rikkomasta kankaan alla olevia iskusuojia P llisen irrotus hartiasuojista Ved p llinen pois hartiasuojien p lt Varo rikkomasta iskusuojia kank...

Страница 47: ...rml nene og langs siddefladen Odstranitev prevleke z zavihka opore za glavico Odprtino prevleke potegnite preko regulirne ro ice opore za glavico 13 tako da se ne zatakne ob ro ico ko jo potegnete nav...

Страница 48: ...istusaineita Jos auto on pys k ityn pidemm n aikaa suorassa auringonpaisteessa tulee turvaistuin poistaa autosta tai peitt vaalealla suojakankaalla Tarkasta s nn llisesti muovi ja metalliosat vaurioil...

Страница 49: ...fra k ret jet eller d kkes med et lyst kl de Kontroll r regelm ssigt alle plast og metaldele for skader deformering eller farve ndring Hvis du opdager nogle ndringer skal autostolen bortskaffes eller...

Страница 50: ...uotteen malli ja ostopaikka tulee toimittaa myyj lle tuotteen mukana Takuu ei ole voimassa jos takuuvaatimukset esitet n valmistajalle muun kuin alkuper isen tuotteen myyneen j lleenmyyj n toimesta Ta...

Страница 51: ...ien g lder kun n r produktet har v ret anvendt i henhold til brugervejledningen hvis eventuelle reparationer er blevet udf rt af autoriserede personer og hvis originale komponenter og reservedele er a...

Страница 52: ...malnu za titu CYBEX SOLUTION S i FIX treba se koristiti kako je obja njeno u ovim uputama SADR AJ PRVO POSTAVLJANJE 53 PRAVILNO POSTAVLJANJE SJEDALICE U VOZILO 54 SIGURNOST U VOZILU 55 POSTAVLJANJE DJ...

Страница 53: ...jedala 1 NAPOMENA Ove upute uvijek dr ite pri ruci u odjeljku na stra njoj strani naslona autosjedalice UPOZORENJE Dijelovi CYBEX SOLUTION S i FIX ne smiju se koristiti odvojeno niti u kombinaciji s b...

Страница 54: ...ti povrede u slu aju nesre e moraju biti uvijek prikladno u vr eni Neu vr eni predmeti mogu postati opasni tijekom sudara i uzrokovati po ivot opasne ozljede UPOZORENJE Dje ja sjedalica se ne smije ko...

Страница 55: ...ako bi osigurali najbolju sigurnost svih putnika uvjerite se da sklopivi nasloni sjedala vozila su u vr eni u uspravnom polo aju prilikom postavljanja sjedalice na prednje sjedi te vozila sjedi te gur...

Страница 56: ...nosni indikator 11 mora biti jasno vidljiv na oba gumba za otpu tanje 10 Sada mo ete koristiti ISOFIX polugu za namje tanje 9 ispod sjedi ta 1 na CYBEX SOLUTION S i FIX autosjedalice kako bi namjestil...

Страница 57: ...ovom tijelu jednostavno koriste i naslon za glavu 12 Pritisnite polugu za namje tanje 13 prema gore kako bi odblokirali naslon za glavu 12 Namjestite naslon za glavu tako da je razmak izme u djetetovi...

Страница 58: ...utosjedalice Zatim umetnite dijagonalni pojas 6 kroz gornju vodilicu pojasa 18 kroz naslon za ruku 12 dok je cijelo vrijeme u vodilici pojasa NAPOMENA Pojas u tri to ke mora se voditi samo odre enim s...

Страница 59: ...s nalije e nisko na zdjelicu naslon za glavu namje ten je na ispravnu visinu ako koristite ISOFIX sjedalo je u vr eno na mjestu s obje strane s priklju cima na ISOFIX priklju nim to kama vozila i oba...

Страница 60: ...AGODLJIV NASLON ZA GLAVU Kako bi osigurali da va a autosjedalica nudi najve u za titu ovo su pravila koja morate slijediti ODR AVANJE PROIZVODA Svi va ni dijelovi dje je autosjedalice moraju se redovi...

Страница 61: ...kukica s obje strane iza podru ja za ramena Izvucite navlaku sa lijebova za u vr ivanje Uklanjanje navlake s naslona za ramena Izvucite navlaku sa lijebova za u vr ivanje Uklanjanje navlake sa sjede...

Страница 62: ...na sredstva za i enje ili sredstva za izbjeljivanje Ako je vozilo du e vrijeme izlo eno sun evoj svjetlosti dje ja autosjedalica treba se izvaditi ili prekriti tkaninom Provjeravajte redovito sve plas...

Страница 63: ...ncija ne e vrijediti u slu aju da je proizvod poslan proizvo a u ili drugoj osobi a ne maloprodajnom trgovcu koji je prvobitno prodao proizvod Garancija se odnosi samo na proizvod za koji je odmah nak...

Страница 64: ...CYBEX GmbH Riedingerstr 18 95448 Bayreuth Germany INFO CYBEX ONLINE COM WWW CYBEX ONLINE COM WWW FACEBOOK COM CYBEX ONLINE CY_171_6444_A0919 GO TO WWW CYBEX ONLINE COM TO WATCH AN INSTRUCTIONAL VIDEO...

Отзывы: