GETTING STARTED
Powering on and off the unit
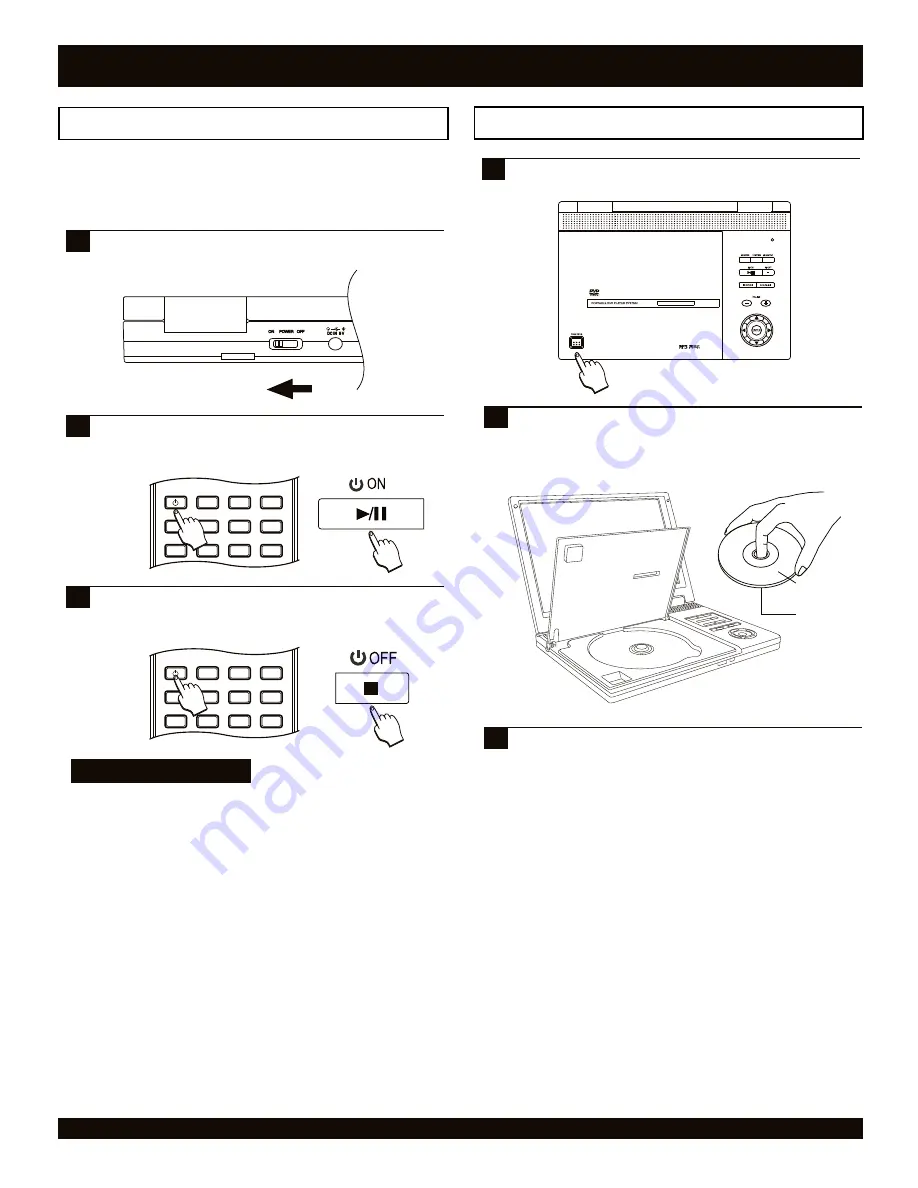
To power on the unit, slide the “ON/POWER/OFF” main
power switch to the ON position on the back panel of
the unit as shown below.
1
Notes on power states
There are 3 power states for this unit:
OFF - The main power switch on the back is turned off. The
unit draws no power and cannot be turned on by the remote
control.
STANDBY - The main power switch has been turned ON,
but the unit has not been taken out of standby by pressing
either the POWER key on the remote control or the ON
button on the front panel. The unit draws a slight amount of
power to enable the remote control receiving circuit.
ON - The main power switch has been turned ON, and
either the POWER button on the remote control
or
the ON
button on the front panel has been pressed. The unit is ready
to use.
Press the PUSH OPEN button on the front panel to open
the disc door.
1
Inserting a disc
Labeling Side
Surface
2
Close the disc tray door and the unit will automatically
start playback of the disc.
22
GETTING STARTED
POWER
LCD
GOTO
PROGRAM
BOOKMARK
SUBTITLE
ANGLE
DISPLAY
MENU
TITLE
MONITOR
SETUP
To power off the unit, press the POWER key on the
remote control or the OFF key on the front panel of the
unit. The unit is now ready to use.
3
POWER
LCD
GOTO
PROGRAM
BOOKMARK
SUBTITLE
ANGLE
DISPLAY
MENU
TITLE
MONITOR
SETUP
Only after all connections are complete, connect the power cord.
Slide the “On / Off” switch on the rear panel of the player to the
“On” position to activate the power of the device, and then
power on the unit.
Insert the disc, being careful not to touch the playing
surface. Hold the disc by the sides and with your fore
finger through the hold in the middle and insert gently
into the tray.
3
To power on the unit, press the POWER key on the
remote control or the ON key on the front panel of the
unit. The unit is now ready to use.
2


