


Page 15 of 34
Fitting Instructions
1.
Refer to the section
“unpacking the appliance” on page 7
.
2.
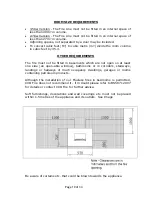
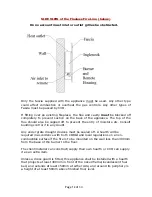
Positioning Wall Bracket.
a.
The wall must be flat and level otherwise the burner flame will
be affected.
b.
The Wall on which the fire is to be installed must be secure and
able to withstand the weight of the Fire and Fascia.
c.
Decide preferred height of fire. (NOTE – There must be at least
300mm clearance between the floor to the fire opening and
1000mm from the top of the gather to the ceiling.
d.
To get the desired height measure from the floor to the top of
the gather. Place the top of the wall bracket central and 40mm
lower than the gathers height, and mark out the holes.
e.
Drill and plug holes and attach the fixing bracket to the wall
using 3 screws.
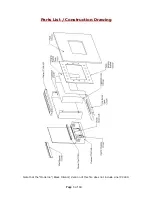
3.
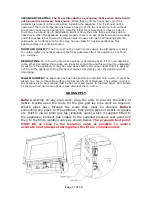
Place the gas burner unit enclosure onto the wall bracket. Mark out the
position of the lower securing points which are located within the
burner workings
[see A above].
Remove the burner and drill and plug
holes then refit the burner onto the wall bracket and secure using the
two screws provided.
WARNING:
This must be done as it ensures the
fire cannot be lifted from the wall and the burner cannot warp while
operating.
4.
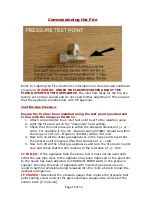
A qualified GAS SAFE registered gas fitter must connect the gas to the
fire using the pressure test point provided.
[See “Before Connecting
the Fire” Section – Page 14]
5.
Once the fire is connected to the gas, fit the fascia in place by locating
the lugs on the back of the fascia into the slots on the burner housing.
As the fascia is heavy, it is advisable that another person helps.
6.
Once fitted the fascia must be locked in place, this is done by locating
two cross-headed screws through both the fascias hanging bracket and
the enclosure situated on each side of the unit. [
See Page 28]
7.
A qualified GAS SAFE registered gas fitter must commission the fire.
[See “Commissioning the Fire” Section – Page 16]
Содержание FIRE LINE FLUELESS
Страница 19: ...Page 19 of 34 ...