background image


JetScan iFX 

®

 i100 Scanner 

All Models


78 

Setup Main Menu 5 Key 

Description 

SETUP PASSWORD 

(Continued)


3.


The 

REPEAT PASSWORD

 screen appears. Enter the four-digit 

password again. Press ENTER. 

4.


When the two password entries match, 

SETUP MAIN MENU 5


appears. The password now is active. 

When the two password entries do not match, the 

PASSWORDS DO 

NOT MATCH

 screen appears. Press OK to return to the 

SET NEW 

PASSWORD

 screen and begin again. 


To change an existing password, press SET to prompt the 

SET NEW 

PASSWORD 

screen. Follow the steps previously described to create a new 

password. 

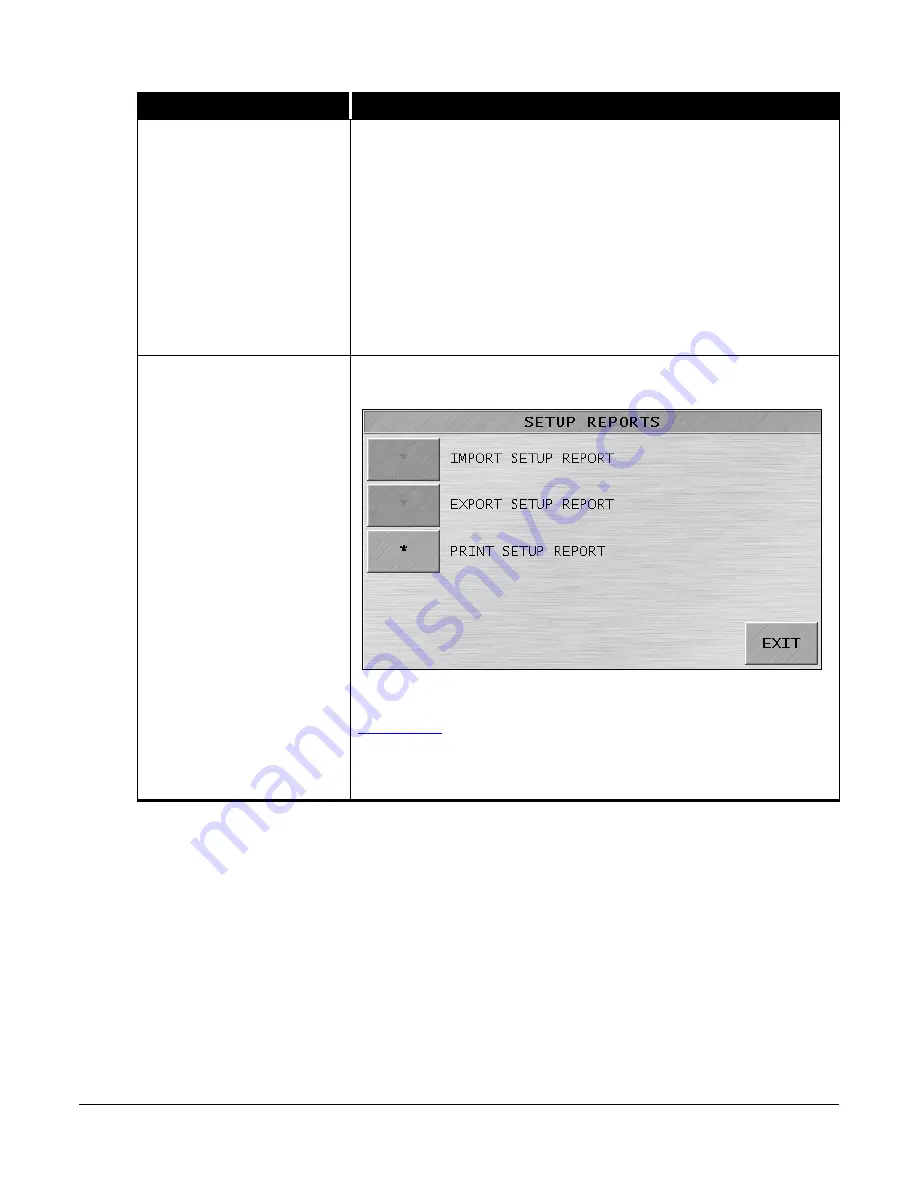
SETUP REPORTS 

Pressing SET prompts the 

SETUP REPORTS

 screen below. 


To create a printed report listing all current defined setup parameters,  

as well as current machine settings, press PRINT SETUP REPORT. 

(See 

Setup Report

 for more information.) 


The IMPORT SETUP REPORT and EXPORT SETUP REPORT buttons are 

inactive. 


Содержание JetScan iFX i100

Страница 1: ...JetScan iFX i100 Scanner Operating Instructions for All Models ...

Страница 2: ...entative maintenance agreement for this device Power conditioning stabilizing devices are available for purchase from Cummins Allison High voltage levels may be present Risk of electric shock Turn power OFF and unplug power cord from machine before cleaning Do not attempt repairs Repairs must be made by authorized Cummins Allison personnel Plug three prong grounded plug supplied into properly grou...

Страница 3: ...ty to operate the equipment To maintain compliance with FCC rules and regulations cables connected to this device must be shielded cables in which the cable shield wires are grounded tied to the connector shell To meet the requirements of EN 55022 Class A a ferrite bead recommended by Cummins or an equivalent must be installed on all external communication cables The ferrite bead must be positione...

Страница 4: ...EEN DESCRIPTION 11 Main Screen Key Descriptions 11 Password Entry 13 OPERATING MODE DESCRIPTIONS 14 MACHINE FEATURES 16 Memory Levels 16 How to Use the Verify Function 17 STRAP COUNTS AND STRAP LIMITS 18 How to Set Strap Limits 18 How to Clear Strap Counts 19 MAIN SUB MENU FUNCTIONS 20 Report Menu 21 Adjustment Menu 27 File Export Menu 33 IMS Connection 36 PRINTED REPORTS 37 Batch and Sub Batch Re...

Страница 5: ...ETUP MAIN MENU 4 74 SETUP MAIN MENU 5 76 SETUP MAIN MENU 6 79 Ticket Capture Option Activated 79 Serial Number Capture Option Activated 81 SETUP MAIN MENU 7 82 Check Setup Menu 1 83 Check Setup Menu 2 84 REFERENCE 86 DAILY CLEANING PROCEDURES 86 Recommended Cleaning Materials 86 Daily Cleaning 86 STOPPING CONDITIONS AND RECOVERY STEPS 89 CHECK ORDER INTEGRITY PROCESSES 108 Example No 1 Ordered Rec...

Страница 6: ...n the following information for easy reference Model No Serial No Your Local Cummins Allison Office Address Phone i100 Series Features This manual covers all of the available features and functions for the i100 series However your particular unit may or may not be equipped with every option To learn more see Machine Specifications Recommended Maintenance To learn more see Daily Cleaning Procedures...

Страница 7: ...res Selectable operating modes which include the ability to detect stranger documents and target denominations Facing and orientation functions Configurable strap limits Cumulative counting A setting for recounting documents without impacting totals Several counterfeit detection options Serial number check and ticket capture options which include the ability to image serial numbers full notes full...

Страница 8: ...le hopper guides Feed roller Thickness adjustment dial located behind hopper extension Feed roller Hopper Touch screen display Stacker wheels Pocket Pocket mirror Release lever Release lever Stacking sensor Pocket sensor Power switch on back of unit Display panel ...

Страница 9: ...hopper Contact a Cummins Allison representative for more information When the adjustable hopper guides are raised for check processing the stationary hopper guides keep checks aligned as they enter the feeder This reduces the risk of feed errors and no calls Hopper Guides for Check Processing Machine is auto start capable Feed rollers in hopper rotate inward Entanglement and drawing in hazard Do n...

Страница 10: ...per transport plate to the open locked position as shown above To close the upper transport plate press down on the release levers to unlock it from the open position Next push down on the upper transport plate until it locks in the closed position which produces an audible click For normal feeding start with 0 at the top of the dial To help reduce the occurrence of doubles or chains turn the dial...

Страница 11: ...ed on the back of the machine Radio frequency present Install ferrite bead on all external communication cables position ferrite bead near external port Only connect Ethernet cable to Ethernet port Use of any other cable may damage equipment DB9 serial port FireWire port non functional Two USB ports Ethernet port ...

Страница 12: ...ensure the machine is not processing documents and then set the rocker switch located on the rear of the machine to the OFF position O High voltage levels may be present Risk of electric shock Turn power OFF and unplug power cord from machine before cleaning Do not attempt repairs Repairs must be made by authorized Cummins Allison personnel Plug three prong grounded plug supplied into properly gro...

Страница 13: ...low USD Note Processing International Note Processing Check Processing Serial Number Capture The keys are described in the following table The screen also displays the sub batch batch currently selected mode denomination being processed strap limit and strap count Main Screen Key Descriptions Main Screen Key Description MEDIA Press to prompt the MEDIA ENTRY screen which is used to enter custom lab...

Страница 14: ...otal from the batch total strap count and day total when a sub batch is suspected of being incorrect The CLEAR key appears when the following SETUP settings are active for SBAT ENABLE ON and CLEAR UNIT Press to change the batch total and sub batch total on the main screen to piece counts When the serial number capture option is enabled in SETUP The S N key replaces the UNIT key on the main screen ...

Страница 15: ...eprocess documents if the count is suspected of being inaccurate CF Press to activate counterfeit detection if the machine has counterfeit detection capability When processing international currency on a model with USD counterfeit detection sensors the CF key is gray indicating note authentication is not available MODE Press to prompt the MODE SELECTION screen which displays all processing modes t...

Страница 16: ...e in the hopper When the machine encounters a note it is presented as a no call with a prompt to enter a MICR number Remove the note from the pocket and press CONT Check order integrity settings determine feed error behavior See Check Setup Menu 2 for more information A grand total piece count is provided Ticket processing Scans for a bar code and rejects documents without a bar code as strangers ...

Страница 17: ... count is provided Ticket processing Scans tickets and stops when the machine encounters a non ticket document A grand total piece count is provided COUNT Counts any type of media that complies with document size and density setting specifications This mode only counts pieces document scanning does not occur FACE When FACE is selected in addition to STRANGER MIXED or SORT mode the machine stops wh...

Страница 18: ...batch is a deposit processed from one or several sources and treated as sub groups within a batch Sub batch tracks individual amounts and provides a total by category as well as a grand total Available in all operating modes BATCH A batch is a deposit processed from one general source Batch tracks individual amounts and provides a total by category as well as a grand total Available in all operati...

Страница 19: ... or a customized environment Customized settings such as disabling counterfeit detection or lowering density settings only apply to the active verify session and are not retained for future sessions When users exit the verify function the machine resumes its previous operating mode totals and settings To use the verify function 1 Press VERIFY The VERIFY key is yellow and the total changes to 0 2 I...

Страница 20: ... to the non value piece count and appear while using COUNT mode or processing checks The UNIT column indicates the current strap count The LIMIT column indicates the current strap limit How to Set Strap Limits To set a strap limit 1 Press or to scroll through the denominations and document types Stop on the desired document 2 Enter a strap limit by doing one of the following options Press LIMIT to...

Страница 21: ... To clear a document s strap count to 0 select the document using or and then press CLEAR To clear all document strap counts to 0 press CLEAR followed by ALL If STRAPS CLEAR is set to ENDBT in SETUP then ending a batch automatically clears all strap counts ...

Страница 22: ...her settings including the currently selected operating mode and simply counts and images tickets When a note is in a stack of tickets being processed in stranger mode the note is read as a ticket no call instead of a stranger With the BAR CODE CORRECTION screen ON notes are rejected as ticket no calls Ticket validation numbers and images are sent to the optional JetScan iFX Image Management Softw...

Страница 23: ...PORT MENU on the MAIN SUB MENU prompts the REPORT MENU below Report Menu Key Description EXIT Press EXIT to return to the MAIN SUB MENU DOC DATA PRNT REPRT is only available on machines with imaging options activated serial number check or ticket capture ...

Страница 24: ...CK line appears if the machine is set to process checks Use the arrow keys to view additional documents The UNIT column shows current piece counts The VALUE column shows the current total value by denomination and the grand total When a printer is connected pressing PRINT generates the day total report Press EXIT to return to the REPORT MENU screen To clear current day totals 1 Press CLEAR to prom...

Страница 25: ... column shows the current total value by denomination and the grand total When a printer is connected pressing PRINT generates the batch report When the ADD key is ON and a batch is suspected of being incorrect press CLEAR to clear the active batch total along with the associated strap count and day total Press EXIT to return to the REPORT MENU screen To end a batch 1 Press END once on the main sc...

Страница 26: ... line appears if the machine is set for COUNT mode Use the arrow keys to view additional documents The UNIT column shows current piece counts The VALUE column shows the current total value by denomination and the grand total When a printer is connected pressing PRINT generates the sub batch report Press EXIT to return to the REPORT MENU screen To end a sub batch 1 Remove documents from the pocket ...

Страница 27: ...mation as shown below 2 Do one of the following Press OK to delete the sub batch total and return to the main screen Press CANCEL to return to the main screen without clearing totals When SBAT ENABLE is ON and set to CLEAR in SETUP the sub batch ends and the total on the main screen resets to 0 when documents are removed from the pocket SUB BATCH REPRT may be used to view or print totals after the...

Страница 28: ...a reports by day batch or sub batch Sample reports are shown in the Printed Reports section DOC DATA PRNT REPRT is only available on machines with imaging options activated serial number check or ticket capture Images do not appear on printed reports Activated labels for batches or sub batches appear on reports CANCEL PRINTING Stops printing a report in progress The key is active only when a repor...

Страница 29: ...djustment Prompts the COUNTERFEIT ADJUSTMENT screen shown below To set sensitivity levels for UV fluorescence and magnetics for individual denominations by series 1 Press or to move the cursor to the desired denomination The first digit indicates the denomination The digit after the decimal indicates the series DOC CORRECT ADJ is only available on machines with imaging options activated serial num...

Страница 30: ...s 3 Use and to select a level 1 10 or OFF 4 Repeat steps 1 through 3 for each denomination as needed 5 When finished press EXIT to return to the ADJUSTMENT MENU See Stopping Conditions and Recovery Steps for information on suspect documents The lower the number the less sensitive the setting is The higher the number the more sensitive the setting is The ideal sensitivity level depends on overall n...

Страница 31: ... setting for a denomination or document The first digit in the DENOM column indicates the denomination The digit after the decimal indicates the note series To view additional density settings press the double down arrows 2 Use and to select a level 1 5 or OFF 3 Repeat steps 1 and 2 for each document type as needed 4 When finished press EXIT to return to the ADJUSTMENT MENU The lower the number th...

Страница 32: ...cument types are itemized in the DENOM column The CORRECT S N column indicates whether the SERIAL NUMBER CORRECTION and BAR CODE CORRECTION screens are ON or OFF The THRESHOLD value is the number of unidentified characters that trigger the correction screens The CORRECT DOC DATA column indicates whether the MICR LINE CORRECTION screen is ON or OFF The THRESHOLD value is the number of unidentified ...

Страница 33: ...ps 1 through 3 as needed 5 When finished press EXIT to return to the ADJUSTMENT MENU SPEED ADJ Speed Adjustment Prompts the MACHINE SPEED ADJUSTMENT screen shown below The default processing speed and maximum ticket processing speed is 1200 BPM bills per minute or documents per minute A slower speed may be selected to process poor quality documents as needed To adjust machine speed 1 Press a key t...

Страница 34: ...ND TIME screens These screens are used to set the date time and format that appear on printed reports To set the date time and format 1 Repeatedly press DDMMYY and MMDDYY Stop on the desired format 2 Press PREV and NEXT to navigate through the date and time fields 3 Press or to select the desired setting 4 Press EXIT to return to the ADJUSTMENT MENU ...

Страница 35: ...Description EXIT Press EXIT to return to the MAIN SUB MENU FILE EXPORT MENU appears on the MAIN SUB MENU when FILE EXPORT is ON in SETUP Users must configure settings on the DOC DATA EXPORT CONFIGURATION screen and DOCUMENT DATA STORAGE screen BEFORE attempting to export a comma delimited file Do not insert a USB flash drive into the USB port on the back of the machine until the machine is POWERED...

Страница 36: ...en FILE INCREMENT is ON the machine automatically increments the file name if a file with the same name already exists in the file location For example if the file name is image csv the incremented file name will be imagexx1 csv About FILE LOCATION To assign a file location for a file that will be exported 1 Press USB to prompt the keypad and export the file to a USB drive connected to the machine...

Страница 37: ...ash drive Insert the flash drive into the USB port on the back of the machine after the machine has been turned ON and it has initialized 2 Configure settings on the DOC DATA EXPORT CONFIGURATION screen 3 Ensure the machine is in a batch ended condition 4 Select DOC EXPORT from the FILE EXPORT MENU screen One of the following messages will appear on the bottom of the screen FILE EXPORT SUCCESSFUL ...

Страница 38: ...ion of note serial number ticket validation number or MICR data to the IMS server IMS OFF LINE If the connection between the machine and the IMS server is lost pressing this key allows the machine to be used as a document counter until the connection is restored When the machine is off line images and related data are not sent to the IMS server Machine sub batch batch and day totals are not affect...

Страница 39: ...mong all reports sent to the printer The transaction number increments each time a report is sent and resets to one when the day total is cleared The next four digits represent the batch number The final three digits represent the sub batch number Samples of automatically generated sub batch and batch reports are shown below When imaging options serial number check and ticket capture are activated...

Страница 40: ...9A DENOM TOTAL 2 DENOM USD 20 CB24380242A CE79835797C EL46502464B DENOM TOTAL 3 BATCH TOTAL 11 BATCH REPORT AUDIT 00007 0014 000 01 31 2013 14 12 00 ACCOUNT 396 BATCH 414 SLOT 33 BOX 99 DENOM UNIT VALUE USD 1 2 2 5 3 15 20 4 80 TICKET 6 0 TOTAL 15 97 DENOM TICKET 98765F321988029175 987654321988029176 987654321988029294 987654321988029295 987654321988029296 987654321988029299 DENOM TOTAL 6 DENOM US...

Страница 41: ...nt data such as serial numbers MICR numbers and ticket validation numbers A sample for note and ticket processing is shown below For more information see SETUP MAIN MENU 3 DAY TOTALS REPORT 01 31 2013 16 14 54 DENOM UNIT VALUE USD 1 4 4 USD 5 3 15 USD 10 2 20 TOTAL 9 39 DAY TOTALS REPORT 01 31 2013 16 14 54 DENOM UNIT VALUE USD 1 2 2 USD 5 3 15 USD 20 4 80 TICKET 6 0 TOTAL 15 97 DENOM TICKET 98765...

Страница 42: ...inted report listing all current defined setup parameters as well as current machine settings 1 Ensure one communication port is set to GENERIC PRINTER 2 Go to SETUP MAIN MENU 5 3 Press SET at SETUP REPORTS to prompt the SETUP REPORTS screen 4 Select PRINT SETUP REPORT ...

Страница 43: ... size and density setting specifications See Machine Specifications for document size Piece count refers to a count of individual units Value count refers to a piece count that is multiplied by a denomination s value 1 Press MODE on the main screen The MODE SELECTION screen appears 2 Press COUNT The DENOM SET key appears 3 Press DENOM SET The SELECT DENOMINATION screen appears Machine is auto star...

Страница 44: ...sing UNIT on the main screen The piece count appears in the upper right corner The International Organization for Standardization ISO abbreviation for the active currency appears after BAT as shown above 6 Press ADD on the main screen to accumulate batch totals if desired 7 Set strap limits if desired See Strap Counts and Strap Limits Machine is auto start capable Feed rollers in hopper rotate inw...

Страница 45: ...on see Stopping Conditions and Recovery Steps 10 The machine stops automatically after the last document in the hopper has been run The batch is ended when documents are removed from the pocket If the ADD key is ON press END to end the batch restart the count and begin the next batch The ADD Key and Sub Batches A sub batch is a deposit processed from one or several sources and treated as sub group...

Страница 46: ...s best used when batching strapping checks is not required Check order integrity settings determine feed error behavior See Check Setup Menu 2 for more information A grand total piece count is provided Note and ticket processing Scans notes and tickets and is best used when batching strapping is not required A grand total for notes and ticket piece counts is provided 1 Press MODE on the main scree...

Страница 47: ...nformation see Stopping Conditions and Recovery Steps 10 The machine adds the value of all documents processed provides a total and stops automatically after the last document in the hopper is read The batch is ended when documents are removed from the pocket If the ADD key is ON press END to end the batch restart the count and begin the next batch The ADD Key and Sub Batches A sub batch is a depo...

Страница 48: ...T The document is added to the total Properly face the top document in the pocket return it to the hopper and press REJECT The document is not added to the total Orienting Documents To orient documents select MIXED and ORIENTATION on the MODE SELECTION screen Make certain the bottom document in the stack is oriented in the desired direction The machine uses the bottom document as a reference and s...

Страница 49: ...nd total is provided Check processing Scans checks and stops on non check documents with a prompt to enter a MICR number Remove the non check document from the pocket and press CONT Check order integrity settings determine feed error behavior See Check Setup Menu 2 for more information A grand total piece count is provided Ticket processing Scans tickets and stops when the machine encounters a non...

Страница 50: ...ocument passing through the machine changes the machine stops and the screen reads DENOMINATION CHANGE The change in denomination or document is the first item in the pocket Remove contents from the pocket Separate the denominations and documents and place them in a holding area to await a complete strap quantity When contents are removed from the pocket the machine resumes processing and switches...

Страница 51: ...NABLE is ON in SETUP Facing Documents To face documents select SORT and FACE on the MODE SELECTION screen Make certain the bottom document in the stack is faced in the direction desired for all documents The machine uses the bottom document as a reference and stops on all documents faced in the opposite direction Place documents in the hopper The machine begins processing It stops each time it fin...

Страница 52: ...documents oriented in the opposite direction Place documents in the hopper The machine begins processing It stops each time it finds a document that is oriented improperly and the screen reads ORIENTATION ERROR DETECTED To resume processing do one of the following Properly orient the top document in the pocket and press ACCEPT The document is added to the total Properly orient the top document in ...

Страница 53: ...ne assumes checks are in the hopper When the machine encounters a note it is presented as a no call with a prompt to enter a MICR number Remove the note from the pocket and press CONT Check order integrity settings determine feed error behavior See Check Setup Menu 2 for more information A grand total piece count is provided Ticket processing Scans for a bar code and rejects documents without a ba...

Страница 54: ...ent which becomes the target denomination or document The machine stops on every document that is different than the target denomination or document and the STRANGER DETECTED screen appears To resume processing remove the stranger which is the top document in the pocket and press CONT If the machine stops due to an error read the instructions on the main screen For more information see Stopping Co...

Страница 55: ...NABLE is ON in SETUP Facing Documents To face documents select STRANGER and FACE on the MODE SELECTION screen Make certain the bottom document in the stack is faced in the direction desired for all documents The machine uses the bottom document as a reference and stops on all documents faced in the opposite direction Place documents in the hopper The machine begins processing It stops each time it...

Страница 56: ...l documents oriented in the opposite direction Place documents in the hopper The machine begins processing It stops each time it finds a document that is oriented improperly and the screen reads ORIENTATION ERROR DETECTED To resume processing do one of the following Properly orient the top document in the pocket and press ACCEPT The document is added to the total Properly orient the top document i...

Страница 57: ... external keyboard keypad may be used instead Although the screen keyboard may show a subset of keys it does not restrict use of the entire character set on the keyboard keypad The screen keyboard remains active when an external keyboard keypad is connected allowing the on screen keyboard and external devices to be used simultaneously if desired The following characters may not be used for data en...

Страница 58: ...ition ferrite bead near external port Only connect Ethernet cable to Ethernet port Use of any other cable may damage equipment The SPECIAL MODE MENU is intended for use by trained Cummins Allison personnel only Incorrect use can negatively affect machine operation 1 To enter the SPECIAL MODE MENU touch the upper right corner of the screen for 3 to 5 seconds If a password is required the following ...

Страница 59: ...ssword 4 If the password was correct or a password is not required the SPECIAL MODE MENU shown below appears Special Mode Menu Key Description EXIT Closes the SPECIAL MODE MENU and prompts the main screen LANGUAGE Pressing LANGUAGE leads to a menu where the preferred language is selected for machine operation SETUP Prompts SETUP MAIN MENU 1 DIAGNOSTICS Setting for use by trained Cummins Allison se...

Страница 60: ...s setup parameters can be defined saved and retrieved by operators Press SET USER DEFAULTS to set up and then save the machine s current settings as the user default Press RESTORE USER DEFAULTS to return machine settings to the user default Press RESTORE FACTORY DEFAULTS to return machine settings to the factory default settings all communication ports OFF all modes active all keys ON ADD key OFF ...

Страница 61: ...Highlighted keys indicate the mode is ON unhighlighted keys indicate the mode is OFF Modes set to ON are available to the user and appear when the user presses MODE from the main screen KEY STATUS Pressing SET prompts KEY AND FUNCTION ENABLE MENU 1 below Press the corresponding key to enable or disable the following functions DAY FACE ORIENT UNIT CF ADD and VERIFY When the DAY key is disabled day ...

Страница 62: ...FUNCTION ENABLE MENU 1 turn the desired key OFF When the machine returns to operating mode the function key is locked OFF 3 When configuration is complete press EXIT to return to SETUP MAIN MENU 1 or press MORE to prompt the KEY AND FUNCTION ENABLE MENU 2 screen shown below This menu allows the following functions to be enabled or disabled CF SN counterfeit document sensitivity control DENSTY dens...

Страница 63: ...ng error and one beep for all other conditions When KEYS is ON a tone sounds when keys are touched on the screen When configuration is complete press EXIT to return to SETUP MAIN MENU 1 STRNGR stranger detect NOCALL no call CF suspect document SPACE spacing error DOUBLE double DC denomination change JAM jam SNC serial number capture error LIMIT strap limit STKERR stacking sensor error CHAIN chain ...

Страница 64: ...corresponds to the top note in the pocket When DENOM VERIFY also is ON users are asked to confirm the denomination value key that was pressed Users have the option to press ACCEPT or REJECT when a suspect document occurs When SUSPECT DOC is ON and ACCEPT is pressed the suspect document s denomination automatically is added to recorded totals When REJECT is pressed users have two options If the not...

Страница 65: ...rinter or a computer data communication protocol for external software may be configured To configure communication port settings for an external device 1 Press 1 2 3 or 4 to prompt the following screen Radio frequency present Install ferrite bead on all external communication cables position ferrite bead near external port Only connect Ethernet cable to Ethernet port Use of any other cable may da...

Страница 66: ... PRINTER CISS Cummins Allison Information Settlement System CISS ATRB CISS VERID CISS ST Cummins Allison Information Settlement System with Status CISS ST 4062 emulates CISS ST data stream from traditional JetScan models CRM Cash Room Manager JETTOUCH JetTouch software Select to communicate with the JetTouch workstation COMP1 computer JETSORT WEDGE and WEDGE2 JetWedge hardware or software REMOTE D...

Страница 67: ...emoved from the pocket this eliminates the need to press END to end a sub batch Press PRINT to automatically generate a sub batch report after the sub batch is ended Press CLEAR and PRINT to enable both features STRAPS CLEAR Two settings are available MANUAL keeps strap counts in memory until a strap limit is reached or straps manually are cleared in the STRAP menu which is accessible from the mai...

Страница 68: ...reen to prompt the MEDIA ENTRY screen for label entry AUTO BLANK When a sub batch or batch begins and label values are cleared the MEDIA ENTRY screen automatically appears for label entry HOLD NONE Label entries are cleared every time a sub batch or batch ends HOLD BAT Label entries are retained throughout a sub batch and are cleared when the batch ends HOLD BOTH Label values are retained througho...

Страница 69: ... keypad between capital letters lower case letters and numbers and symbols Press SPACE to add a space between characters If necessary press to delete one character which will begin at the right and move left 3 When finished press DONE to return to the MEDIA ENTRY SETUP screen When configuration is complete press EXIT on the MEDIA ENTRY SETUP screen to return to SETUP MAIN MENU 2 Use of these chara...

Страница 70: ...is placed in the hopper To activate auto start for checks also press CHECK When AUTO START and CHECK are OFF the machine s motors do not automatically start and begin processing when any document type is placed in the hopper CONT must be pressed on the main screen to start the machine s motors and begin processing Machine is auto start capable Feed rollers in hopper rotate inward Entanglement and ...

Страница 71: ...national breakdown report prints Press BATCH to automatically generate a document report after a batch is ended and the denominational breakdown report prints Press DAY to automatically generate a document report after day totals are cleared and the denominational breakdown report prints Press MORE to view additional print options See Main Sub Menu Functions and Printed Reports for details The AUT...

Страница 72: ...capture settings To configure document capture settings 1 Navigate to the DOCUMENT CAPTURE SETUP MENU above Press ON for NOTES CHECKS or TICKETS 2 Press SAVE 3 Configure document capture settings for the active document capture option by pressing IMAGE SETUP at NOTES CHECKS or TICKETS One of the following screens appear The DOCUMENT CAPTURE buttons are only available on machines with imaging optio...

Страница 73: ...ible MICR lines and amounts The RESOLUTION DPI setting of 200 is available on select models DIMENSION These settings are used to define an image capture region for notes Select OPT to capture snippets or small cropped images of serial numbers Select FULL to capture full frame note images FACING These settings are used to define which sides of a document are imaged For note check and ticket capture...

Страница 74: ... Select B W to remove most of the background from checks while retaining critical information SET OPTIMIZED DEFAULTS Select this setting to automatically activate the best configuration for quality and storage conservation SAVE When configuration of an IMAGE SETUP MENU is complete press SAVE to retain settings If EXIT is pressed before SAVE the CONTINUE AND ABANDON CHANGES screen appears Press NO ...

Страница 75: ...ype To activate serial number check or ticket capture 1 Press or to move the cursor in the CAPTURE DATA column Stop on the desired field 2 Press ON or OFF to enable or disable the option 3 Repeat the previous steps as needed 4 Press SAVE to retain settings 5 Press EXIT to return to SETUP MAIN MENU 3 The DOCUMENT CAPTURE buttons are only available on machines with imaging options activated serial n...

Страница 76: ... the machine and the optional JetScan iFX Image Management Software IMS or another host system MACHINE IP Setting for use by trained Cummins Allison personnel only MACHINE ID Setting for use by trained Cummins Allison personnel only IMS MENU ON The IMS CONNECTION selection appears on the MAIN SUB MENU OFF The IMS CONNECTION selection does not appear on the MAIN SUB MENU IMS MENU keys are only avai...

Страница 77: ...the FEATURE KEY ENTRY screen 5 Press SAVE When the code is accepted SAVE SUCCESSFUL appears in the bottom left corner of the screen When the code is not accepted the FEATURE SELECTION CODE IS INVALID screen appears Press OK to return to the FEATURE CODE KEYPAD screen to enter the code again For further assistance contact a Cummins Allison representative 6 Press EXIT to return to SETUP MAIN MENU 4 ...

Страница 78: ...eature in the MIXED mode 1 Enter MIXED mode 2 Go to SETUP and select SETUP MAIN MENU 5 3 At SEPARATE SERIES select MIX The SEPARATE SERIES CONFIGURATION screen appears 4 Select the denomination Repeatedly press the denomination key to toggle among OFF SERIES 1 or SERIES 2 3 Stop on the desired setting 5 When configuration is complete press EXIT twice to return to SETUP MAIN MENU 5 This feature is ...

Страница 79: ...s REJECT to exclude the note from the total The machine automatically continues processing SETUP PASSWORD Users can create a four digit password for entering the SPECIAL MODE MENU To disable password protection press OFF To enable password protection 1 Press ON to enable the password the SET NEW PASSWORD screen appears 2 Type the four digit password by pressing the numbered keys Press ENTER to con...

Страница 80: ...OT MATCH screen appears Press OK to return to the SET NEW PASSWORD screen and begin again To change an existing password press SET to prompt the SET NEW PASSWORD screen Follow the steps previously described to create a new password SETUP REPORTS Pressing SET prompts the SETUP REPORTS screen below To create a printed report listing all current defined setup parameters as well as current machine set...

Страница 81: ...s to SETUP MAIN MENU 5 MORE Prompts SETUP MAIN MENU 7 EXIT Returns to SETUP MAIN MENU 1 PRINT ON DEMAND ON Select to disable automatic report generation To print reports manually navigate to the REPORT MENU select DAY REPORT BATCH REPORT or SUB BATCH REPRT and press PRINT OFF Select to automatically print reports when a sub batch or batch ends EXTERNAL VIDEO EXTERNAL VIDEO settings are not functio...

Страница 82: ...ECTION This setting establishes ticket orientation to meet requirements of the optional JetScan iFX Image Management Software IMS or a third party software provider Select the left or right arrow to indicate bar code reading direction The right arrow is selected for most tickets The left arrow is selected for CA test tickets Press SAVE to save the settings and return to SETUP MAIN MENU 6 Press EXI...

Страница 83: ...ress PRINT OFF Select to automatically print reports when a sub batch or batch ends EXTERNAL VIDEO EXTERNAL VIDEO settings are not functional at this time SN DUAL SNIPPET ON Select to present both note serial numbers on the SERIAL NUMBER CORRECTION screen for examination Operators can visually inspect both serial numbers as an additional counterfeit prevention measure or reference both serial numb...

Страница 84: ...ion BACK Returns to SETUP MAIN MENU 6 EXIT Returns to SETUP MAIN MENU 1 CHECK SETUP Setting for use by trained Cummins Allison personnel only Press SET to prompt check processing configuration menus described in Check Setup Menu 1 and Check Setup Menu 2 SETUP MAIN MENU 7 is only available on machines with the check capture imaging option activated ...

Страница 85: ...encoded check amounts OFF Select when the check amount is not part of the encoded information on checks being processed 2 PASS BINARIZE ON Select to improve the readability of checks on which the courtesy amount recognition legal amount recognition CAR LAR is printed lightly OFF Select to disable the feature SPACING Setting for use by trained Cummins Allison personnel only CHARS TO TRANS Setting f...

Страница 86: ...s the error in the pocket for correction OFF Select when maintaining check item order is not required during processing When a feed error or jam occurs all checks in the pocket must be returned to the hopper for reprocessing which is similar to the procedure used when processing notes ORDERED RECOVERY Setting for use by trained Cummins Allison personnel only ON Select when maintaining check item o...

Страница 87: ...r documents such as rebate checks to pass through the device without reprocessing When a thicker document is detected the machine stops and presents a screen with an ACCEPT key allowing the user to confirm that the document is not a double and continue processing OFF Select to process checks with the same doubles error recovery steps as notes Users must return the check to the hopper for reprocess...

Страница 88: ...ily Cleaning Simple Green the recommended cleaning agent can be an eye irritant Avoid eye contact If eye contact occurs flush eye s with cool water for 5 minutes remove contact lenses if present continue flushing eye s with cool water for 15 more minutes If irritation persists consult physician Individuals with sensitive skin should rinse hands after using High voltage levels may be present Risk o...

Страница 89: ...he top middle of the feeder plate shown at left 5 Flat center rubber drive tire Use a Simple Green Safety Towel to clean all rubber sections of the large black feed rollers Rotate the rollers Next use a Simple Green Safety Towel to clean the flat center rubber drive tire shown at left 6 Lift display panel to the upright position 7 Push release levers down to disengage the upper transport plate 8 L...

Страница 90: ... until it locks in the closed position 13 Lower display panel to the operating position 14 Use a dry microfiber towel or vacuum to remove any remaining dust in the pocket 15 Use a dry microfiber towel to clean the pocket sensor lens located in the pocket between the two gray stacker wheels Next use a dry microfiber towel to clean the pocket mirror located directly across from the pocket sensor len...

Страница 91: ... direction as indicated by the numbers on the front of the thickness dial Condition Action The screen above left will appear when the piece count for day totals reaches 350 000 Press OK to return to the main screen Navigate to the MAIN SUB MENU press REPORT MENU and press DAY REPORT to prompt the DAY TOTALS screen Clear day totals The screen above left will continue to appear after each subsequent...

Страница 92: ...y Condition Action A denomination value key which is different from the target denomination was pressed to identify a no call Verification is needed to ensure the correct denomination value key was pressed There are three options Review the top note in the pocket and press the correct denomination value key The value will be added to totals and the machine automatically will continue processing Co...

Страница 93: ...ne behind the hopper extension Rotate in the negative direction as indicated by the numbers on the front of the thickness dial Condition Action The machine stopped on a non faced document To add the document to the total correctly face the document return it to the pocket and press ACCEPT To reject the document and not add it to the total remove the document from the pocket and press REJECT If des...

Страница 94: ...apture option NOTES CHECKS or TICKETS ON in the DOCUMENT CAPTURE SETUP MENU Low Memory Error Condition Action The data to be exported exceeds the memory limitations of the machine Press YES to export a non sorted version of the data that does not contain label information Press NO to cancel the file export operation ...

Страница 95: ...S NOT RESPONDING When these errors appear machine motors will not run until corrective action is taken OK can be pressed to remove the error screen and return to the main screen However if corrective action has not been taken and users try to operate the machine the MACHINE START ERROR screen will appear again and the machine s motors still will not run To resolve errors one and two Perform the re...

Страница 96: ...fy errors including DENSITY SENSOR IS DIRTY OR BLOCKED Corrective action should be taken If the error cannot be resolved call a Cummins Allison representative Press OK to return to the main screen and begin processing If the machine is turned OFF and then turned ON and corrective action has not been taken the MACHINE START WARNING screen will appear again ...

Страница 97: ...t or image of the MICR line as a reference press the appropriate numeric or MICR symbol button to make the correction Press to view additional numbers and symbols Press to view previous numbers and symbols Press to move the MICR snippet to the left Press to move the MICR snippet to the right To insert a character in the MICR line correction field press PREV or NEXT to move the cursor to the desire...

Страница 98: ...could not identify the check MICR line Do one of the following Press CHECK on the NO CALL screen to prompt the MICR LINE CORRECTION screen Red question marks denote all unidentified characters in the MICR line Follow the steps on the previous page to correct the MICR line Return the check to the hopper for reprocessing and press CONT ...

Страница 99: ...ed This NO CALL is the top note in the pocket and has not been included in the count Inspect the top note in the pocket Do not remove all notes from the pocket To count the note keep the note in the pocket and then enter its denomination using the correct denomination value key 1 5 10 etc The machine will start and this note will be added to the count To reject the note remove the note from the po...

Страница 100: ... ticket from the pocket Hold the ticket so that the validation number is visible 3 Press PREV or NEXT to select the character that will be corrected Using the validation number on the ticket as a reference enter the correct characters by pressing the appropriate numbers When all validation number characters have been entered press DONE to return to the main screen and continue processing These scr...

Страница 101: ...LACED IN THE HOPPER This ticket will not be included in the count Press ACCEPT to correct the error at a later time with the optional JetScan iFX Image Management Software IMS or a third party software provider The ticket will be included in the count Condition Action The machine stopped on a non oriented document To add the document to the total correctly orient the document return it to the pock...

Страница 102: ...ine automatically will continue processing if additional documents remain in the hopper Condition Action The machine detected a problem with the optional printer These screens identify errors including PRINTER IS NOT CONFIGURED PRINTER OFFLINE Corrective action should be taken If the error cannot be resolved call a Cummins Allison representative Press OK to return to the screen from which PRINT wa...

Страница 103: ...ference press the appropriate alpha or numeric button to make the correction If the character to be corrected only can be a letter then letters will appear on the buttons If the character to be corrected only can be a number then numbers will appear on the buttons Press to view additional letters numbers Press to view previous letters numbers When entering a 10 digit serial number for a note press...

Страница 104: ...n to prompt the SERIAL NUMBER IS INCOMPLETE screen 2 Acknowledge that the note was manually returned to the hopper for reprocessing by selecting NOTE PLACED IN THE HOPPER This note will not be included in the count Condition Action The machine detected an old or new series note while operating in the MIXED mode The separate series feature is available for USD notes and configured in SETUP The scre...

Страница 105: ...ly sounds adjust the gray thickness dial on top of the machine behind the hopper extension Rotate the dial in the negative direction indicated by numbers on the front of the dial Condition Action The machine detected a different document from those being counted and stopped This STRANGER is the top document in the pocket and has not been included in the count Remove the top document from the pocke...

Страница 106: ... All Models 104 Condition Action The number of documents in the pocket reached the preset strap limit Remove documents from the pocket The machine automatically continues processing if additional documents remain in the hopper ...

Страница 107: ... carefully examined S 1 S 2 S 3 S 5 S 8 S 9 S 10 S 11 S 12 Condition Action Sensors detected a possible counterfeit note The machine stopped with this note as the top note in the pocket This note has not been included in the count Inspect the top note in the pocket Next there are three options If the note is deemed genuine return it to the pocket and press ACCEPT The machine restarts and this note...

Страница 108: ...ow these procedures 1 Remove documents from the hopper and pocket The TRANSPORT JAM CLEAR ALL DOCUMENTS FROM MACHINE screen will appear as shown below 2 Press FLUSH to cycle the motor forward and help remove documents from the transport path When all jammed documents cannot be removed from the transport path by pressing FLUSH further action is necessary See How to Manually Remove Documents from th...

Страница 109: ...ly Remove Documents from the Transport Path 1 Lift display panel to the upright position 2 Push release levers down to disengage the upper transport plate 3 Lift upper transport plate to the locked position 4 Remove jammed documents 5 Press down on the release levers to unlock the upper transport plate from the open position Press down on the upper transport plate until it locks in the closed posi...

Страница 110: ... processing settings reactivate when a currency key is enabled on the SELECT NEW CURRENCY screen When processing checks in any order and check order integrity settings are not activated checks and notes can share the same pocket configuration for error recovery The following sections show two check order integrity process examples that are driven by the ORDERED RECOVERY settings in CHECK SETUP MEN...

Страница 111: ...ess so that the original item order is maintained To clear a MISS FEED DETECTED screen when ORDERED RECOVERY is ON follow these procedures 1 Empty the pocket as instructed on the screen Remove checks from the pocket and bank them 2 The machine feeds the error into the pocket 3 The screen displays the type of miss feed that was detected A PIGGYBACK DETECTED screen is shown in this example 4 Examine...

Страница 112: ...ace them to the side 6 When the machine senses that the hopper is empty a CONT key appears on the screen Press CONT to clear all documents remaining in the transport path 7 Follow the instructions on the screen and return flushed documents to the hopper Press CONT 8 The following screen appears As instructed checks that were moved in Step 5 must be returned to the hopper in the original orientatio...

Страница 113: ...ructions for maintaining the original item order are not provided on the screen To clear a MISS FEED DETECTED screen when ORDERED RECOVERY is OFF follow these procedures 1 Empty the pocket as instructed on the screen These checks have been counted 2 The screen displays the type of miss feed that was detected A PIGGYBACK DETECTED screen is shown in this example 3 Examine the piggyback document and ...

Страница 114: ...FF Continued 4 When REJECT is pressed the following screen appears Since ORDERED RECOVERY is OFF press CONT to eject the piggyback check s from the transport path 5 After the checks are ejected into the pocket return them to the stack in the hopper 6 Press CONT to continue processing the checks ...

Страница 115: ...es Pocket Capacity 200 150 and 100 documents selectable Document Size Height 2 41 to 3 8 length 4 5 to 8 75 Ticket Symbology Machines are only compatible with the interleaved 2 of 5 bar code symbology at this time Dimensions 13 5 W x 13 D x 9 5 H without hopper Weight 20 lbs with power supply 18 lbs without power supply Communication Ports One RS232 serial port two USB ports and one Ethernet conne...

Страница 116: ...rty damage Stop highlights a situation where an incorrect action or sequence of actions could lead to lost or inaccurate data operation in an incorrect mode or unintended outcomes in machine function Important highlights information that is necessary or useful to know prior to executing a procedure Note highlights information that is interesting or useful to know after completing a procedure Terms...

Страница 117: ...lts can be defined saved and retrieved by operators Doubles A condition that occurs when two stacked documents simultaneously pass through the reading mechanism The machine stops when this condition occurs Facing Documents When FACE is selected in addition to STRANGER MIXED or SORT mode the machine stops when it detects a non faced document The first document processed determines the facing Hopper...

Страница 118: ...ANGER RECORD is ON for STRANGER mode the machine records all stranger notes in the batch total and tracks them against their respective strap counts Strap The quantity of documents to be prepared for banding Sub Batch A sub batch is a deposit processed from one or several sources and treated as sub groups within a batch Sub batch tracks individual amounts and provides a total by category as well a...

Страница 119: ... work is the longer of ninety 90 days or the original parts warranty period The labor warranty for repair work is the longer of thirty 30 days or the original equipment labor warranty period This warranty does not cover software which is covered by a separate warranty Software Warranty SELLER warrants that it has the right to grant a license for use of the Software included in its Equipment SELLER...

Страница 120: ...repair whether used alone or with any third party products or software SELLER SHALL NOT BE LIABLE BY VIRTUE OF THIS WARRANTY OR OTHERWISE FOR ANY DAMAGES OR EXPENSES ASSOCIATED WITH ANY THEFT LOSS TRANSFER OR MISDISPENSING OF FUNDS OR PROPERTY LOSS OF DATA INTERRUPTION OF BUSINESS LOST PROFIT OR FOR ANY INCIDENTAL SPECIAL OR CONSEQUENTIAL DAMAGE RESULTING FROM THE USE OR OPERATION OF THE EQUIPMENT...

Страница 121: ......

Страница 122: ...ete but this information is subject to correction or change without prior notice This manual contains proprietary information of Cummins Allison Corp It is intended solely for the information and use of parties authorized by Cummins Allison to maintain the equipment described herein Such proprietary information may not be used reproduced or disclosed to any other parties for any other purpose with...

Отзывы: