APPLICATOR SETUP
Valve Bank
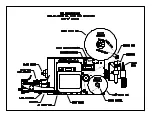
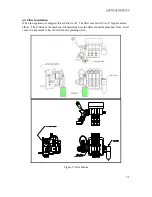
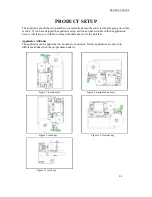
Figure 2 shows two types of valve bank assemblies. At the bottom is a Mac Type Valve assembly
which CTM started using in the Spring of 2007. If the valve bank was removed and needs to be
re-mounted, decide on which side of the applicator the valves should be mounted. Normally, the
valves are mounted on the opposite side from the applicator nose. In a nose up application, it
may be best to position the valves on the same side as the applicator nose. Mount the valve bank
by putting two ¼ shcs. through the two clearance holes on the side of the labeler housing. The
bolts then screw into the valve bank mounting plate. Run the air lines into the manifold below
the valve bank or directly into the applicator nose if the valves are mounted on the side as the
applicator nose.
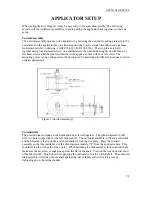
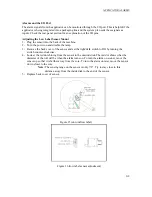
Standard Tamp Assembly
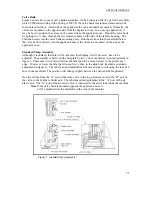
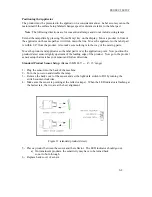
Although it is unlikely that this will be removed for shipping, it will, however, have to be
adjusted. The assembly is held onto the faceplate by two ¼ shcs. marked as in/out adjustment in
figure 3. These same two bolts will allow the label pad to be moved closer to the printer peel
edge. To raise or lower the label pad, loosen two ¼ shcs. in the slide body (marked as up/down
adjustment in figure 3). The label pad and manifold can be moved side to side using the four #10
shcs. in the manifold. The position will change slightly between the Sato and Zebra printers.
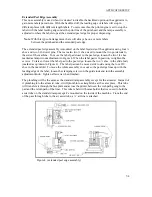
Run the air line from the “A” port of the tamp valve to the top cylinder port, and the “B” port of
the valve to the bottom cylinder port. The label manifold is plumbed to the “A” port of the air
blast valve. The “A” port of the air assist valve is connected to the assist tube inside the machine.
Note
: If the valve bank is mounted opposite the applicator nose, it
will be plumbed into the manifold on the side of the machine.
Figure 3 (standard tamp assembly)
7-3
Содержание 3600-PA
Страница 8: ......
Страница 9: ......
Страница 10: ......
Страница 11: ......
Страница 12: ......
Страница 13: ......
Страница 14: ......
Страница 15: ......
Страница 16: ......
Страница 17: ......
Страница 66: ......
Страница 67: ......
Страница 68: ......
Страница 69: ......
Страница 70: ......
Страница 71: ......
Страница 72: ......
Страница 73: ......
Страница 74: ......
Страница 75: ......
Страница 76: ......
Страница 77: ......
Страница 78: ......
Страница 79: ......
Страница 80: ......
Страница 81: ......
Страница 82: ......
Страница 83: ......
Страница 84: ......
Страница 85: ......
Страница 86: ......
Страница 87: ......
Страница 88: ......
Страница 89: ......
Страница 90: ......
Страница 91: ......
Страница 92: ......
Страница 93: ......
Страница 94: ......
Страница 95: ......
Страница 96: ......
Страница 97: ......
Страница 98: ......
Страница 99: ......
Страница 100: ......
Страница 101: ......
Страница 102: ......
Страница 103: ......
Страница 104: ......
Страница 105: ......
Страница 106: ......
Страница 107: ......
Страница 108: ......
Страница 109: ......
Страница 110: ......
Страница 111: ......
Страница 112: ......
Страница 113: ......
Страница 114: ......
Страница 115: ......
Страница 120: ......
Страница 121: ......
Страница 122: ......
Страница 123: ......
Страница 143: ......
Страница 144: ......
Страница 145: ......
Страница 146: ......
Страница 147: ......
Страница 148: ......
Страница 149: ......
Страница 150: ......
Страница 151: ......
Страница 152: ......
Страница 153: ......
Страница 154: ......
Страница 155: ......
Страница 163: ...APPLY SEQUENCE Figure 28 c3 4 ...
Страница 164: ......
Страница 165: ......
Страница 166: ......
Страница 167: ......
Страница 168: ......
Страница 169: ......
Страница 170: ......
Страница 177: ......
Страница 178: ......
Страница 179: ......
Страница 180: ......
Страница 181: ......
Страница 182: ......
Страница 183: ......
Страница 184: ......
Страница 185: ......
Страница 186: ......
Страница 187: ......


