INSTRUCTION MANUAL Digital Light Engraver
6
Operation and Cleaning
Effective date
30.09.2013
•
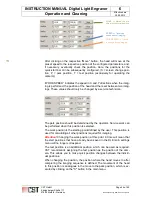
To close the window pictured below, click the “Cancel” button again.
You have now successfully set the new focus value and have returned to
the DLE imaging program. Now it is time to perform the test imaging with
the new focus values. To perform a series of tests with different focus val-
ue settings, start by changing the focus value again as in step 1.
After having performed the test runs with the different focus values, com-
pare the imaged areas and choose the focus value that provides the best
imaging results.
IMPORTANT:
Note down the current focus value for each imaged row.
We recommend performing a number of imaging passes with different fo-
cus values on one screen frame. In many cases, you will find that a num-
ber of pre-defined imaging sizes already exist in your screen size defini-
tion: these were saved during the installation of the machine.
You can then load one of the imaging samples recommended by CST
based on this size or try out one that you have created yourself.
The start position (work position) in the "Exposure" menu should be
changed after each imaging job and readjustment of the focus value for
the X axis by the imaging sample size.
It is also recommended to position the first imaging pass on the Y axis dif-
ferently to those to follow in order to facilitate verification of the proof after
it has been printed.
CST GmbH
Königsberger Straße 117
47809 Krefeld - Germany
Page 52 of 69
Betriebsanleitung DLE-AF 01.0 engl.docx


