Page 9
Installation and Wiring
Before starting the installation, please read this entire section first.
Finger tighten the screws that mount the instrument bracket - It is
not necessary or recommended to use tools.
!
Drill a 2-1/8" (55mm) mounting hole where you desire to mount
the instrument (Figure 1).
!
Remove the adhesive backing protection from the bulkhead
gasket and carefully align the waterproof bulkhead gasket on the back
of the instrument.
!
Connect the various wires as shown in Figures 2 and 3.
!
Carefully check all your wiring then mount the instrument in
the hole. Use only finger tension to tighten the bracket hold-down
nuts
Figure 1 - Mounting the Instrument
Содержание MaxVu110
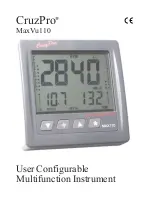
Страница 1: ...Page 1 CruzPro MaxVu110 User Configurable Multifunction Instrument...
Страница 10: ...Page 10 Figure 2 MaxVu110 Screw Terminal Connections...
Страница 12: ...Page 12...
Страница 35: ...Page 35...
Страница 46: ...Page 46 Appendix C Typical Setup...
Страница 47: ...Page 47...


