


- 14 -
4)
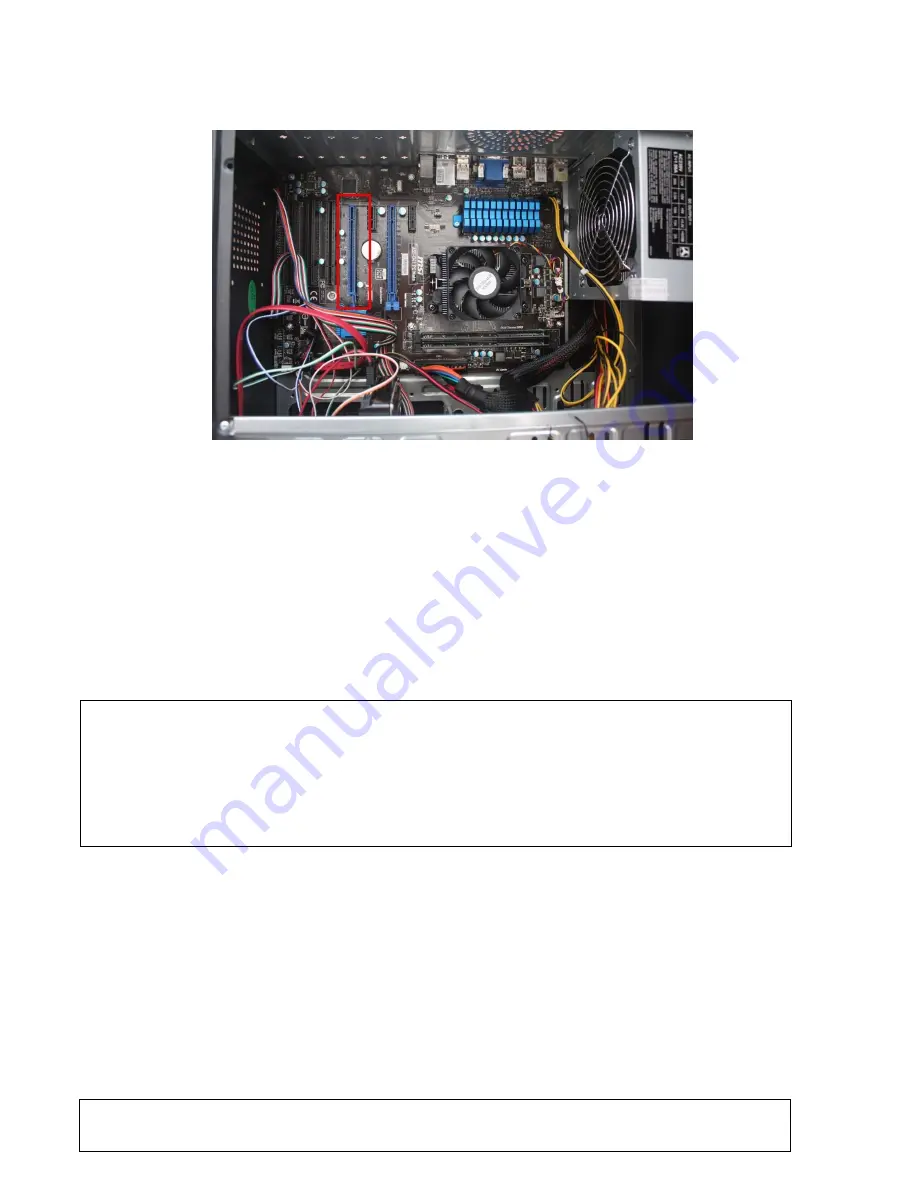
Plug the other side of the
PCIe extender cable
into a PCIe x4 (or higher) computer slot, as indicated
in Figure 12. Mount the computer cover back to close the computer box. Make sure the screws are
back on their place.
Figure 12: PCIe slot for the extender cable
5)
Mount the FMC masterFIP board on the FMC connector of the SPEC board.
6)
Plug the USB cable (connector A) into an available USB slot of the provided computer.
7)
Plug the
barcode-reader
into an available USB slot of the computer.
8)
Connect the
monitor, keyboard and mouse
to the computer.
9)
Start the PC.
10)
Install the FMC masterFIP test environment through the following commands. Please note that the
test environment may be installed in any path. The installation sequence then makes sure that the
top directory is called
fmcmasterfip.
# test environment may be installed in any path
cd
~
# clone pts repository
git clone
git://ohwr.org/cern-fip/masterfip/masterfip-tst.git fmcmasterfip
# enter in the directory
cd
fmcmasterfip
# run install script
sudo ./install.sh
The install.sh script:
o
makes sure that top directory is called
fmcmasterfip
o
installs all required linux packages
o
clones git submodules
o
builds software and kernel modules
o
verifies if modules may be correctly loaded
o
creates test shortcut on desktop
11)
Please make sure that the installation script ended with the following message:
Installation successful!
Creating desktop shortcut


