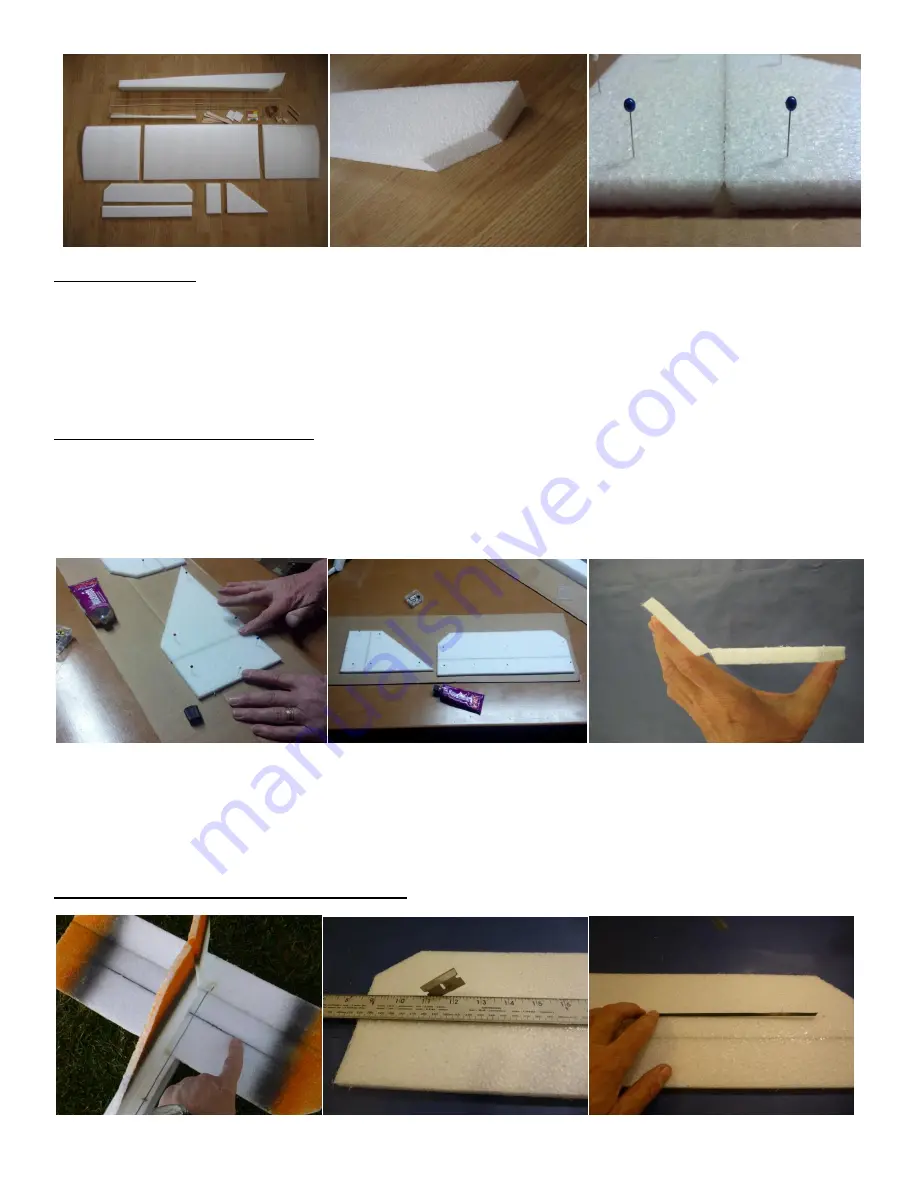
FOAM PREPARATION
1. Rub the EPP foam surfaces with another piece of EPP foam to get the melted fibers off. Use your fingernail to pick off any stubborn
fibers. You can also use a disposable razor and shave the EPP foam to get the fibers off.
2. Lay out the pieces and check the fit of the wing tips. Notice that the nose of the fuselage is cut at an angle, down and to the right.
When the motor is nose mounted this will help compensate for the torque of the motor, and the lift created upon acceleration. DO
NOT correct this angle, or cut the nose flat if you are mounting the motor on the nose. This angle is an important part of the self-
stabilizing Albatross design. If you use a pod mount, you can square the front of the fuselage as desired.
HINGING THE RUDDER AND ELEVATOR
The tail, the rudder, and the elevator are hin
ged with a thin layer of “Goop”, Shoe Goo or Quick Grip glue. Laminating the tail
adds a lot of weight behind the CG. We recommend you don’t laminate the tail surfaces so you can keep your Albatross light.
Pin the tail pieces (rudder, elevator) on a piece of cardboard, with a 1/32
” (1mm) space between the pieces where they will be hinged.
Make sure the pointed angle of the hinged part is on top on both pieces. Pin the parts onto the cardboard with push pins.
3. Quick Grip and Goop are fast drying glues. Use only in well ventilated areas. The glue will age in the tube once it is opened.
Apply it quickly and do not go back to touch it up or it will roll up in little glue balls and can ruin a hinge line.
4. Squeeze a small amount of glue onto the hinge line, and spread thinly with your finger or a flat tool. Make sure the glue is spread
very thin and is only on the top side of the hinge line or your hinge
won’t bend freely. Spread the glue ½” (1 cm) on either side of
the hinge line.
5. Allow to dry 4-6 hours, after which you can flex the hinges repeatedly to loosen them up, if needed.
REINFORCING THE TAIL WITH A FLAT CARBON SPAR


