16
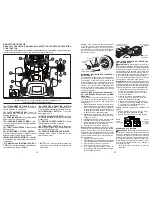
PRE-START
• Ensure freewheel control is in the trans-
mission en gaged position.
• Ensure transmission is in the neutral
position.
• Move attachment clutch control to the
“DISENGAGED” position.
• Sit on seat in operating position, depress
brake pedal and set parking brake.
S
MART
S
WITCH
IGNITION UNLOCK
1. Press the SmartSwitch Ignition (SSI) but-
ton (F) once (or sit on the seat). Ensure
the indicator is blinking blue.
2. Enter passcode and press the SSI but-
ton. If passcode is not accepted, the
SSI button will blink red. Wait until the
SSI button returns to blinking blue before
attempting to re-enter passcode. Once
accepted, the SSI button will flash green.
3. Ensure that the SmartSwitch Safety
System warning lights are not showing
any faults present. If any warning lights
do indicate faults present, resolve those
faults before continuing with STARTING.
STARTING
The Briggs & Stratton Endurance engine
equipped with your tractor features a Ready-
Start automatic choke system to provide
simplified starting in normal conditions.
Please read the following starting instruc-
tion carefully.
NOTE:
For the first time starting after your
tractor has sat for an extended period of time,
or after running out of gas, the engine may
require an extended start attempt to reprime
the fuel system. For an extended start, press
and hold SSI button for three seconds before
releasing. This will prompt the engine to at-
tempt starting for up to ten seconds (instead
of the normal five seconds), allowing time for
fuel to be pulled into the engine.
NORMAL STARTING (32°F/0°C and above)
1. Move throttle control to fast position
(
).
2. Perform procedures outlined in "Smart-
Switch IGNITION UNLOCK" as previ-
ously described.
3. While the SSI button (F) is flashing green,
press and release the SSI button once
more to start the engine.
• Once engine starts, the attachments
and ground drive can now be used.
If the engine does not accept the
load, restart the engine and allow it
to warm up for one minute.
• Leave throttle control in fast position
(
) while mowing.
COLD WEATHER STARTING (32°F/0°C
and below)
1. Move throttle control beyond fast posi-
tion (
) into the cold weather starting
position (
).
2. Perform procedures outlined in "Smart-
Switch IGNITION UNLOCK" as previ-
ously described.
3. While the SSI button is flashing green,
press the SSI button once more to start
the engine.
• Once engine starts, move the throttle
control back to the fast position
(
) to warm-up. The time required
for warm-up will vary from a few
seconds to a minute depending upon
conditions and temperature.
• Leave throttle control in fast position
(
) while mowing.
NOTE:
Failure to move throttle from cold
weather starting position (
) will result in
poor engine performance and spark plug
fouling.
AUTOMATIC TRANSMISSION WARM UP
• Before driving the unit in cold weather,
the trans mis sion should be warmed up
as follows:
• Ensure the tractor is on level ground.
• Release the parking brake and let
the brake slowly return to operating
position.
• Allow one minute for transmission to
warm up. This can be done during
the engine warm up period.
• The attachments can also be used dur-
ing the engine warm-up period after the
transmission has been warmed up.
PURGE TRANSMISSION
CAUTION:
Never engage or dis en gage
freewheel lever while the engine is run ning.
To ensure proper operation and per for mance,
it is rec om mend ed that the trans mis sion be
purged before operating trac tor for the first
time. This procedure will remove any trapped
air inside the trans mis sion which may have
de vel oped dur ing shipping of your tractor.
IMPORTANT:
Should your transmission
require removal for service or re place ment,
it should be purged after re in stal la tion before
operating the tractor.
61
INSTALE LA SEGADORA
1. ACCIONE LA PALANCA DEL FRENO
DE ESTACIONAMIENTO Y LA PALANCA
DE LEVANTAMIENTO DEL ACCESORIO
INFERIOR
• Presione el pedal de embrague/freno comple-
tamente hasta abajo y manténgalo apretado.
• Tire y mantenga la palanca del freno de esta-
cionamiento hacia arriba, libere la presión del
pedal de embrague/freno y, luego, suelte la
palanca del freno de estacionamiento. El pedal
debe permanecer en posición de frenado.
Asegúrese de que el freno de estacionamiento
mantendrá asegurado el tractor.
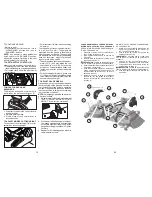
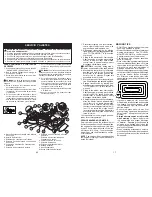
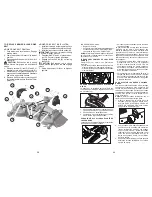
Palanca
Del Freno De
Estacionamiento
02965
Transeje
Parte Delantera
Parte Trasera
Motor
Q. Blindaje Deflector
Q
H. Escuadra De La Cortadora De Césped
Delantera
W. Rueda Calibradora Delantera
X. Perno Con Resalto
Y. Arandela De 1-1/4
Z. Tuerca De Seguridad De 3/8-16
Y
Z
W
H
X
2. ARME LA RUEDA CALIBRADORA DEL-
ANTERA (W) EN LA PARTE DELANTERA
DE LA CORTADORA DE CÉSPED
3. GIRE EL VOLANTE HACIA LA IZQUIERDA
Y UBIQUE LA CORTADORA DE CÉSPED
EN SU LUGAR
• Gire el volante completamente hacia la
izquierda y ubique la cortadora de césped
en el lado derecho del tractor con el blindaje
deflector (Q) a la derecha.
4. DESLICE LA CORTADORA DE CÉSPED
DEBAJO DEL TRACTOR
• Lleve la correa hacia adelante y verifique que
su trayectoria sea correcta en todos los surcos
de la polea de la cortadora de césped.
NOTA
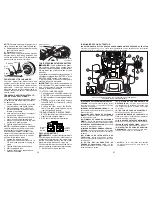
: Asegúrese de que los brazos de susp-
ensión lateral de la cortadora de césped (A) estén
orientados hacia adelante antes de deslizar la
cortadora de césped debajo del tractor.
• Deslice la cortadora de césped debajo del
tractor hasta que se encuentre centrada
debajo del tractor.
• Interruptor de levantamiento del accesorio - se
usa para levantar y bajar el conjunto segador o
los demás ac ce so rios montados en su tractor.
Interruptor de ignición debe ser en la posición
“ON”.
• Haga segadora descender a su posición más
baja.
PRECAUCIÓN
: Si se sigue presionando el
interruptor eléctrico de elevación después de
que la plataforma segadora ha alcanzado la
posición mínima o máxima pueden producirse
daños en el mecanismo eléctrico de elevación.
Ese mecanismo está equipado con un sistema de
protección térmica. Si el sistema se sobrecalienta
o no funciona, deje enfriar el sistema antes de
intentar hacerlo funcionar nuevamente.
02965
A. Brazos De Suspensión Lateral De La
Cortadora De Césped
Q. Blindaje Deflector
Q
A

