


11
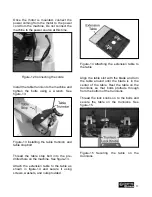
Once the motor is mounted, connect the
power coming from the motor to the power
cord from the machine. Do not connect the
machine to the power source at this time.
Figure-12 Connecting the cords
Install the table trunnion to the machine and
tighten the bolts using a wrench. See
figure-13.
Figure-13 Installing the table trunnion and
table stop bolt
Thread the table stop bolt into the pre-
drilled hole on the machine. See figure-13.
Attach the extension table to the table as
shown in figure-14 and secure it using
screws, washers, and nuts provided.
Figure-14 Attaching the extension table to
the table
Align the table slot with the blade and turn
the table around until the blade is in the
center of the table. Rest the table on the
trunnions so that bolts protrude through
from the bottom of the trunnions.
Thread the lock knobs on to the bolts and
secure the table on the trunnions. See
figure-15.
Figure-15 Securing the table on the
trunnions
Содержание CX104
Страница 1: ...CX104 14 WOOD BAND SAW User Manual ...
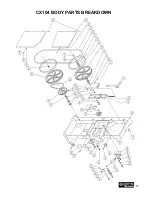
Страница 25: ...25 CX104 BODY PARTS BREAKDOWN ...
Страница 27: ...27 CX104 STAND MOTOR PARTS BREAKDOWN ...
Страница 29: ...29 CX104 TABLE PARTS BREAKDOWN ...