


10
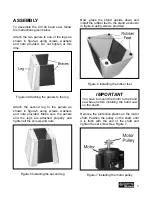
Now, take the band saw out of the box and
lay it on its side on the floor with the motor
mounting side up as shown in fingure-8.
You can place the carton on the floor under
the band saw preventing it from getting
scratched.
Figure-8 Band saw on the floor
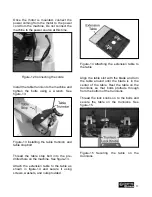
Position the motor on the band saw and
carefully insert the motor pulley through the
hole as shown in figure-9. Align the holes
on the motor mounting bracket with the
holes on the band saw base. Insert the
carriage bolts from under the base through
the holes, place washers, and tighten the
nuts provided onto the carriage bolts. Do
not fully tighten the nuts at this time.
Figure-9 Mounting the motor
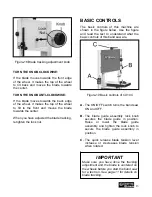
Place the stand and the band saw upright.
Get the help of a friend or assistant and lift
the machine and place it on the stand. Align
the mounting holes on the machine with the
holes on the stand and secure the machine
on to the stand using washers and bolts
provided. See figure-10.
Figure-10 Securing the machine onto the
stand
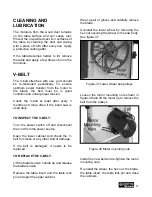
Open the lower cabinet door and position
the V-belt onto one of the grooves on the
idler pulley.
Figure-11 Installing the V-belt
Now pull the V-belt and position it onto the
aligned groove on the motor pulley and
tighten the motor mounting nuts shown in
figure-9.
Содержание CX104
Страница 1: ...CX104 14 WOOD BAND SAW User Manual ...
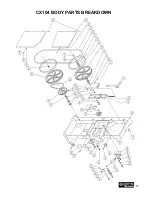
Страница 25: ...25 CX104 BODY PARTS BREAKDOWN ...
Страница 27: ...27 CX104 STAND MOTOR PARTS BREAKDOWN ...
Страница 29: ...29 CX104 TABLE PARTS BREAKDOWN ...