


2-1
Installation Instructions
2
Before you start
You will need:
• D-Stand components (see page 2-3)
• 3 or 4 J-Bolts with matching nuts and washers:
½
” (12.7 mm) thread diameter, length must
comply with local codes (see page 2-2)
• Plastic conduit, minimum ¾” (19 mm)
diameter (must comply with local codes)
• #2 Phillips screwdriver
• #3 Phillips screwdriver
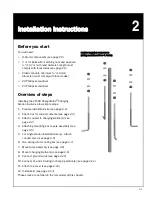
Overview of steps
Installing the CT500 ChargePoint
®
Charging
Station involves a few simple steps:
1. Prepare installation site
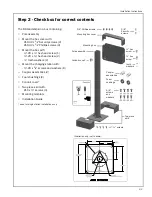
2. Check box for correct contents
3. Attach coupler to charging station(s)
(see
4. Attaching mounting box to pole assembly
(see
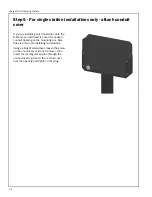
5.
For single station installations only
- attach
conduit cover
(see page 2-6)
6. Run wiring into mounting box
7. Mount pole assembly
8. Mount charging station(s)
(see page 2-9)
9. Connect ground wires
10. Connect L1 and L2 wiring to charging station(s)
11. Attach top cover
(see page 2-12)
12. Install skirt
These steps are detailed in the remainder of this chapter.
Installer-supplied components
(wiring conduit and 3 or 4 J-bolts):