37
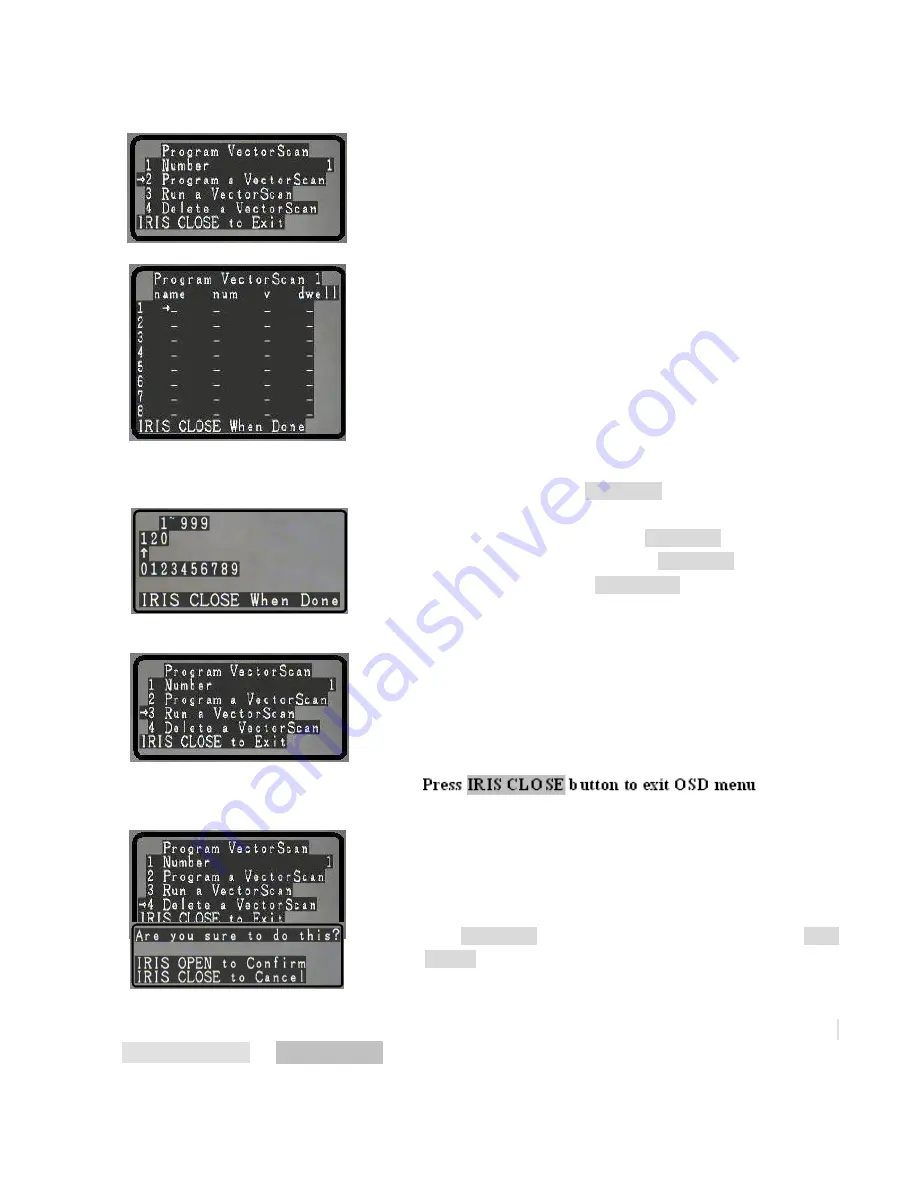
5.2.6.2 Program a Vector Scan
Move the joystick up or down to the desired selection.
Move the joystick Left or Right to make your selection.
The submenu displayed below allows the user to select up to 16
preset positions 1- 8 on the first page and 9-16 on the second page
(move joystick down to access the second page)
Under “name” you can select “P” or “V” indicating a preset or a
vector as your selection
Under “num” you can select any of the 128 preset positions
available as you selection.
Under “V” you can select a speed for the PTZ motion 1 - 9
Under “dwell” you can select a time delay from 1 – 99
Move the joystick Left or Right to make selection.
Move the joystick left or right to position the cursor under the
desired numeral and press
IRIS OPEN
button to move the cursor on
the second numeral line (0~9). Move the Joystick left or right again
under the desired numeral and press
IRIS OPEN
button again to
select the desired number (0~9). Press
IRIS OPEN
button again to
confirm the selection. Press
IRIS CLOSE
button to finalize your
selection and return to the previous menu level.
5.2.6.3 Run a Vector Scan
Move the joystick up or down to the desired selection.
Move the joystick Left or Right to execute the command and run the
selected tour.
Move the joystick in any direction to cancel the tour and display the
menu again.
5.2.6.4 Delete a Vector Scan
Move the joystick up or down to the desired selection.
Move the joystick Left or Right to make your selection.
A confirmation dialog appears confirming your selection.
Press
IRIS OPEN
button again to confirm the selection. Press
IRIS
CLOSE
button to finalize your selection and return to the previous
menu level.
This concludes the available selections (menus and sub menus) under the keyboard command
90+SHOT+ACK or 90 + PRESET for the OSD main configuration menu of the dome.
Содержание CDC2040MI
Страница 2: ...2 THIS PAGE IS INTENTIONALLY LEFT BLANK ...
Страница 52: ...52 Printed in the USA Rev M0807415 ...


