5
GETTING STARTED
PleASe noTe: All neceSSARy connecTIonS mUST be mADe beFoRe APPlyInG PoweR To THe VXH264D!
THe VXH264D IS PRe-conFIGUReD wITH THe FollowInG SeTTInGS:
25FPS continuous recording rate per channel at D1 (704 x 576) resolution and standard image quality.
•
Time and date set to correct local time
•
Audio inputs 1-4 assigned to video channels 1-4 respectively
•
Telemetry devices set to Pelco-D, 2400 baud
•
based on average image recording, the above settings will provide around 11 days recording on a 2Tb drive
before the footage starts to be overwritten.
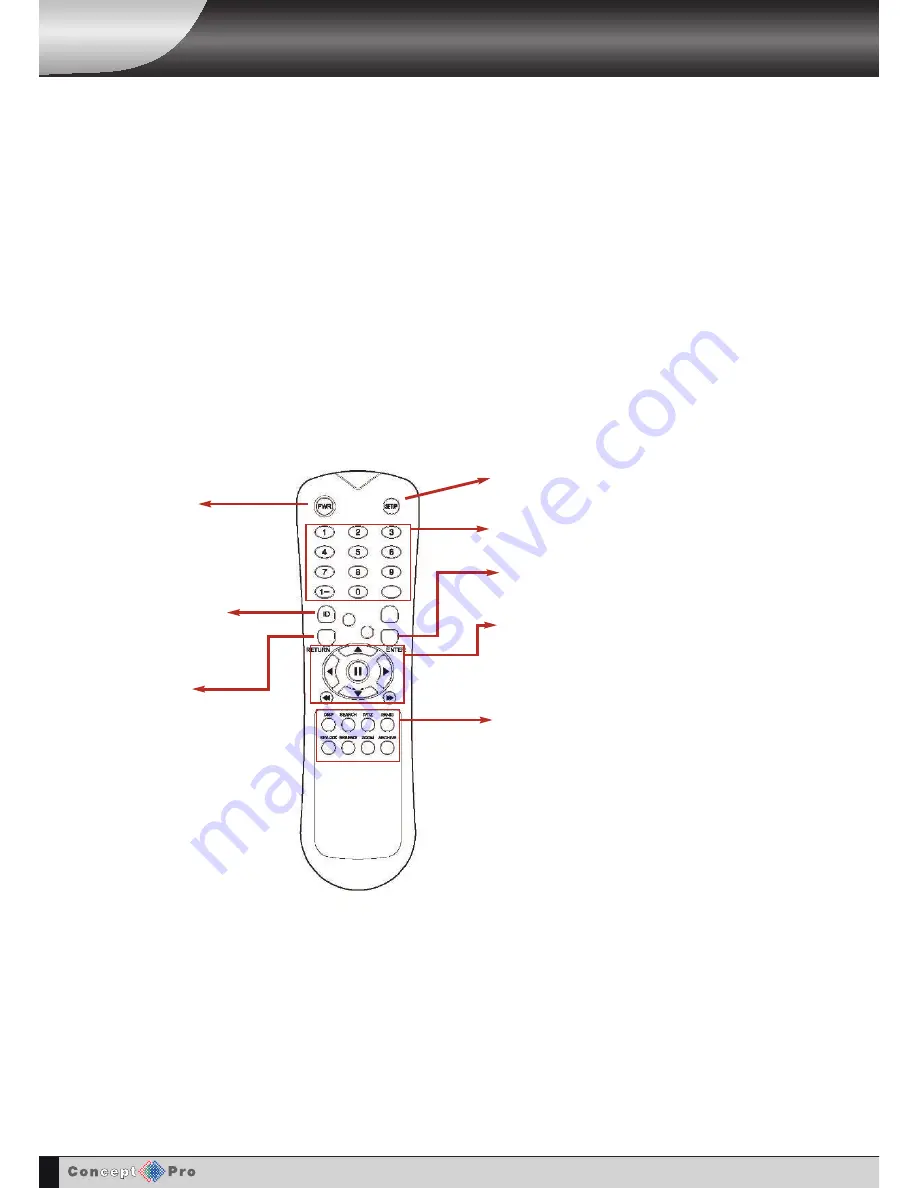
PoweR
System on/oFF
ID bUTTon
Select DVR ID
ReTURn
cancel / Deselect
Previous Screen
SeTUP:
open system setup menu
channel Selection buttons
enTeR:
Apply / Select / Go to next screen
DISP:
change display screen
SeARcH:
Go to search mode
PTZ:
Go to PTZ menu
PAnIc:
Record by panic setting
keylock:
lock the keys (Remote / Front)
SeQUence:
change to sequence screen
Zoom:
Go to zoom mode
ARcHIVe:
Go to back-up menu
*
If there are multiple DVRs used in a system, each DVR can be set with a different ID. The remote controller sets each ID per DVR. This allows
all the DVRs to be controlled with one remote controller by selecting the appropriate ID.
HOw TO SET THE ID ON THE REmOTE CONTROLLER
Program each DVR accordingly to system ID (see page 26 )
Press the
ID
button, this will display “
INPUT ID
” on screen.
Using the channel selection buttons, input the system ID, press “
ENTER
” then the “
RETURN
” button
To reset the ID to factory default, press the ID button and input ID 255 and press the “
ENTER”
button followed by pressing the
“
RETURN
” button.
Please note your VXH264D can be controlled via the front panel buttons, IR remote control or a USb mouse.
when a USb mouse is installed an on-screen pointer will appear. This can be used to navigate the system.
nAVIGATIon bUTTonS:
Used for Playback
control, menu naviagtion, and PTZ/Focus
control


