


8
BACK PANEL
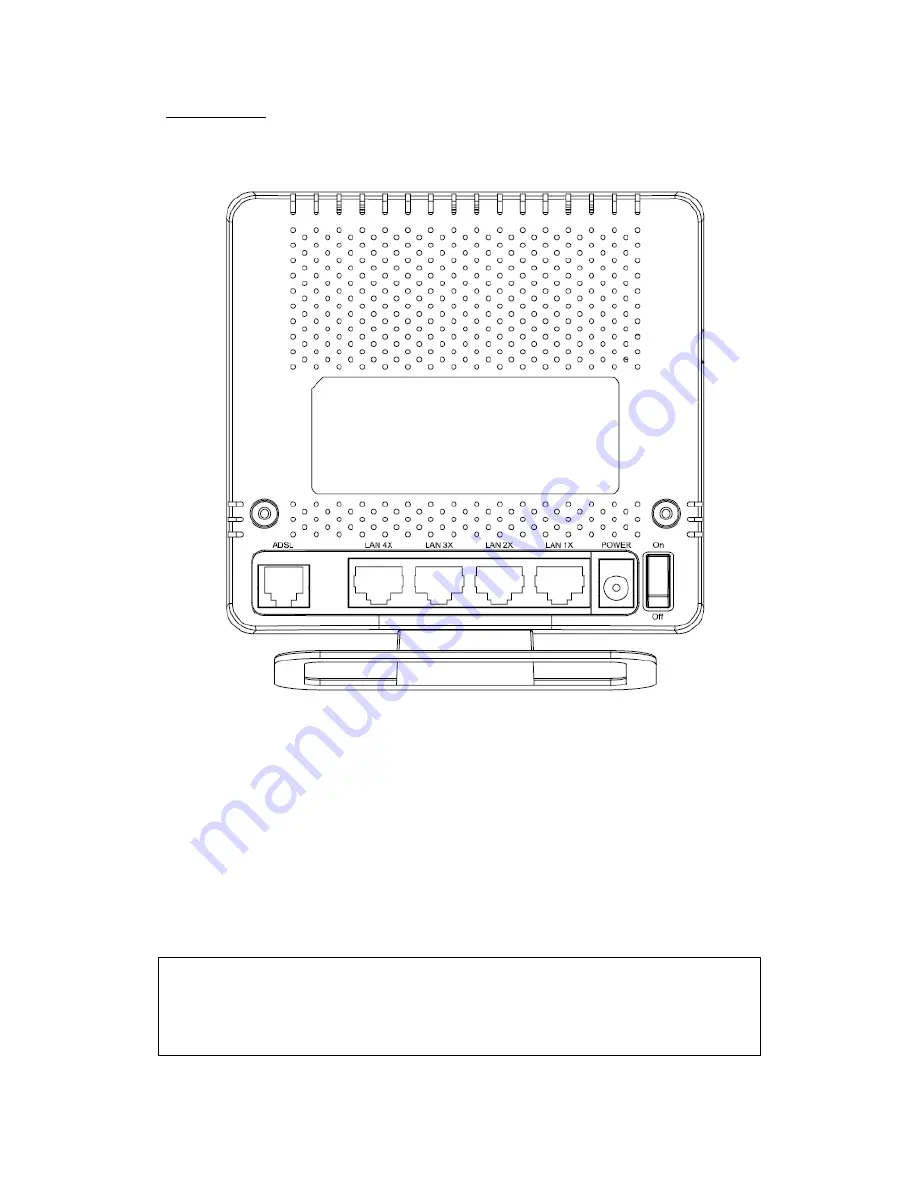
The figure below shows the back panel of the device.
ADSL
Connect to the ADSL port with the ADSL RJ11 cable.
LAN (Ethernet) Ports
You can connect the router to up to four LAN devices using RJ45 cables. The ports
are auto-sensing MDI/X and either straight-through or crossover cable can be used.
Power ON
Press the power button to the OFF position (OUT). Connect the power adapter to the
power port. Attach the power adapter to a wall outlet or other AC source. Press the
power button to the ON position (IN). If the Power LED displays as expected then
the device is ready for setup (see section
2.2 LED
Indicators).
Caution 1:
If the device fails to power up, or it malfunctions, first verify that the
power cords are connected securely and then power it on again. If the
problem persists, contact technical support.
Caution 2:
Before servicing or disassembling this equipment, disconnect all power
cords and telephone lines from their outlets.
Содержание AR-5382u
Страница 1: ...AR 5382u ADSL2 WLAN Router User Manual Version A1 0 June 11 2010 261056 049...
Страница 7: ...6 1 2 Application The following diagrams depict typical applications of the AR 5382u...
Страница 8: ...7 Chapter 2 Installation 2 1 Hardware Setup BASE STAND ATTACHMENT...
Страница 17: ...16 STEP 3 After successfully logging in for the first time you will reach this screen...
Страница 23: ...22 4 2 4 xDSL Statistics The xDSL Statistics screen displays information corresponding to the xDSL type...
Страница 56: ...55 5 11 UPnP Select the checkbox provided and click Apply Save to enable UPnP protocol...
Страница 57: ...56 5 12 DNS Proxy...
Страница 106: ...105 STEP 9 Choose Yes or No for default printer setting and click Next STEP 10 Click Finish...
Страница 107: ...106 STEP 11 Check the status of printer from Windows Control Panel printer window Status should show as Ready...


