D
ATA
M
AXX
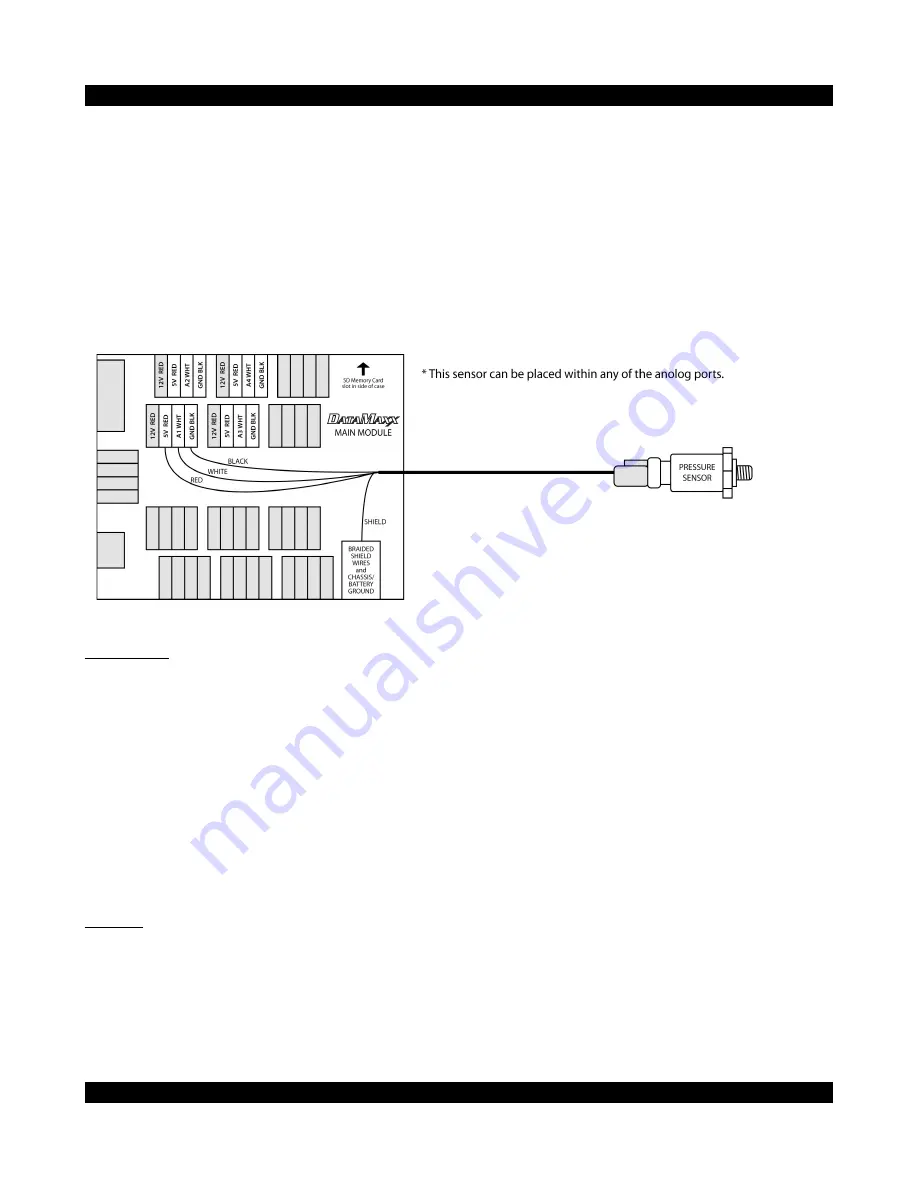
This wire will be plugged into an “A- WHT” terminal and will not need a ground wire connected as the
sensor housing itself acts as the connection to chassis ground.
Note:
When using the economy sensor, you must make a change to the dip switch settings. Both
the “RTD” and “GND” dip switches must be in the ON position for the specific channel that
you installed the economy sensor on. Failure to do so will result in erratic readings.
If using any different pressure sensor, refer to the sensor’s manufacturer to determine the reference
voltage range. If the range is higher than 5V then the 12V reference voltage needs to be used. Note that
this sensor will also require a custom calibration.
Calibration
After installing your pressure sensor you will need to tell the computer and the
D
ATA
M
AXX
what type of
sensor it is. You will also need to know which Module and analog channel that you have plugged it
into.
To configure, open the Calibration/Configuration window, and click on the “configure” button for the
specific channel that you have plugged the sensor into. You can now change the type of the pressure
sensor by choosing the correct range from “Type of Sensor” drop down menu.
Note:
If using the economy pressure sensor, the name listed in the type of sensor drop down
menu is “Autometer Oil”
Testing:
All pressure sensors should read approximately zero when there is no pressure applied. The only way
to truly test a pressure sensor is to apply pressure to it and watch for a reaction.
If for some reason a sensor is consistently reading a value other than zero at rest, you can add a line to
the calibration to get it closer, but this requires slightly more expertise than the standard configuration.
For more information go to “Custom Calibrations” in the Additional Information section.
Copyright c 2008 Computech Systems Inc. 22


