15
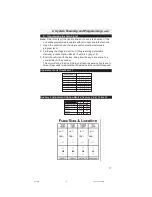
A. System Power-Up
1. All connections must be secure and well insulated.
2. Insert fuses inside of the control module in their respective slots.
3. Replace fuse cover on top of the control module.
4. Turn vehicle ignition on.
5. Plug in 24-pin Basic Harness followed by the 16-pin Advanced
Harness and 10-pin Car Start Harness.
6. Turn vehicle ignition off.
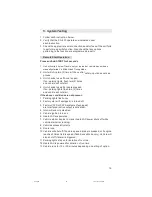
B. Remote Transmitter Programming
Note:
Each system module has eight “slots”, or memory locations, to
store transmitter codes, giving it the ability to operate from up to
eight transmitters. For proper operation, a transmitter code must be
stored into each memory slot. When using less than eight
transmitters, follow the suggested programming parameters:
• One Remote Transmitter -
Program eight (8) times
• Two Remote Transmitters -
Program each transmitter four
(4) times
• Three Remote Transmitters -
Program two transmitters
three (3) times, and the remaining transmitter twice.
1. Open the driver’s door.
1.a. The 20/B wire must initially see a ground to access
programming.
2. Turn vehicle ignition on.
3. Press and hold emergency override button.
After 10 seconds, the siren or horn will sound three (3) times. This
indicates that the unit has entered the transmitter programming mode.
4. Release the button.
5. Press the LOCK button on the remote transmitter to be programmed.
The siren or horn will sound once, indicating that the system has
“learned” that remote transmitter.
6. Repeat step 5 for any additional transmitters or transmitter codes.
7.
To continue to the Options Programming mode
, go to step 2 of
Programming Selectable Options
(next page). Otherwise, turn
the vehicle ignition off to exit the programming mode. Test all
remote transmitters to ensure that they work properly by toggling
the LOCK and UNLOCK buttons. Do not press the START button until
programming the tach signal (page 17).
4. System Power-Up and Programming
630.p65
10/17/03, 7:29 PM
15
Содержание CA-630
Страница 24: ...24 630 p65 10 17 03 7 29 PM 24 ...


