P1798E 04/06
9
15STH.C
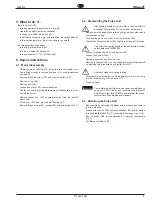
5. What to do, if...
...there is no shut-off?
- Is the dynamic air pressure too low or high?
- Has torque adjustment been checked?
- Is enough oil inside the pulse unit?
- Is it a floating connection (e.g. with extension, reduced shaft bolt)?
- Is the inside diameter of the air connectors too small?
...the torque scatter is too wide?
- Is the flow pressure too high?
- Is there air inside the pulse unit?
- Is the exhaust air <113> throttle open?
6. Repair instructions
6.1 Motor disassembly
-
Clamp the motor housing <31> of the tool in a soft-jawed vise.
-
Use a strap wrench to remove housing <94> counterclockwise
and pull off.
-
Remove flat head screw <30> and reverse button <29>.
-
Remove o-ring <60>.
-
Remove ball <59>.
-
Loosen end plate <58> counterclockwise.
-
Use the hex of the rotor spindle to clamp unit horizontally in a vise.
-
Pull off the motor.
-
Remove faucet bolt <43> counterclockwise from the shut-off
piston <39>.
-
Press rotor <53> from grooved ball bearing <47>.
-
Remove threaded ring <49>, spring <50> and actuating bolt <51>.
6.2 Dismounting the Pulse Unit
Disassembly should only occur if the oil filler unit
<A>
is
available! Pulse unit has to be at room temperature.
-
Remove quick change chuck retaining rings, washer, sleeve and
compression spring.
-
Dismounting pulse unit <102> from the housing <94>.
-
Clamp the hydraulic cylinder <89> slightly in a vise with flat chops.
To avoid endangering health or the environment, follow
safety data sheet DIN52900.
-
Loosen threaded ring <63> with device
<C>
.
-
Loosen lock screw <90>.
-
Unclamp hydarulic unit from the vise.
-
Remove lock screw <90> over an oil pan and dismount pulse unit
by applying light pressure on hydraulic rotor <79>.
Hydraulic blades are spring loaded!
-
Disassemble remaining parts of the hydraulic rotor by removing
the two retaining ring <72> and pin <77>.
-
Clean all parts.
Caution!
Caution!
To maintain tool performance and minimise maintenance
costs use CLECO parts and recommended lubricants
only. Use of other than CLECO parts releases the manu-
facturer from all guarantee and warranty.
6.3 Mounting the Pulse Unit
-
Reassemble by reversing the disassembly process as shown in
the part drawing.
-
Please note position of the hydraulic cylinder <89> and its relation
to the hydraulic blade <81> (7. Assembly Instructions, figs. 1 to 5).
-
Use of device
<D>
is recommended to simplify reassemble
(fig. 2).
-
Oil filling according to 6.4.
Содержание 15STH C Series
Страница 27: ......


