


(see chart on page 21), and switch ON using the switch mounted on the rear
panel. The green light on the front panel will glow.
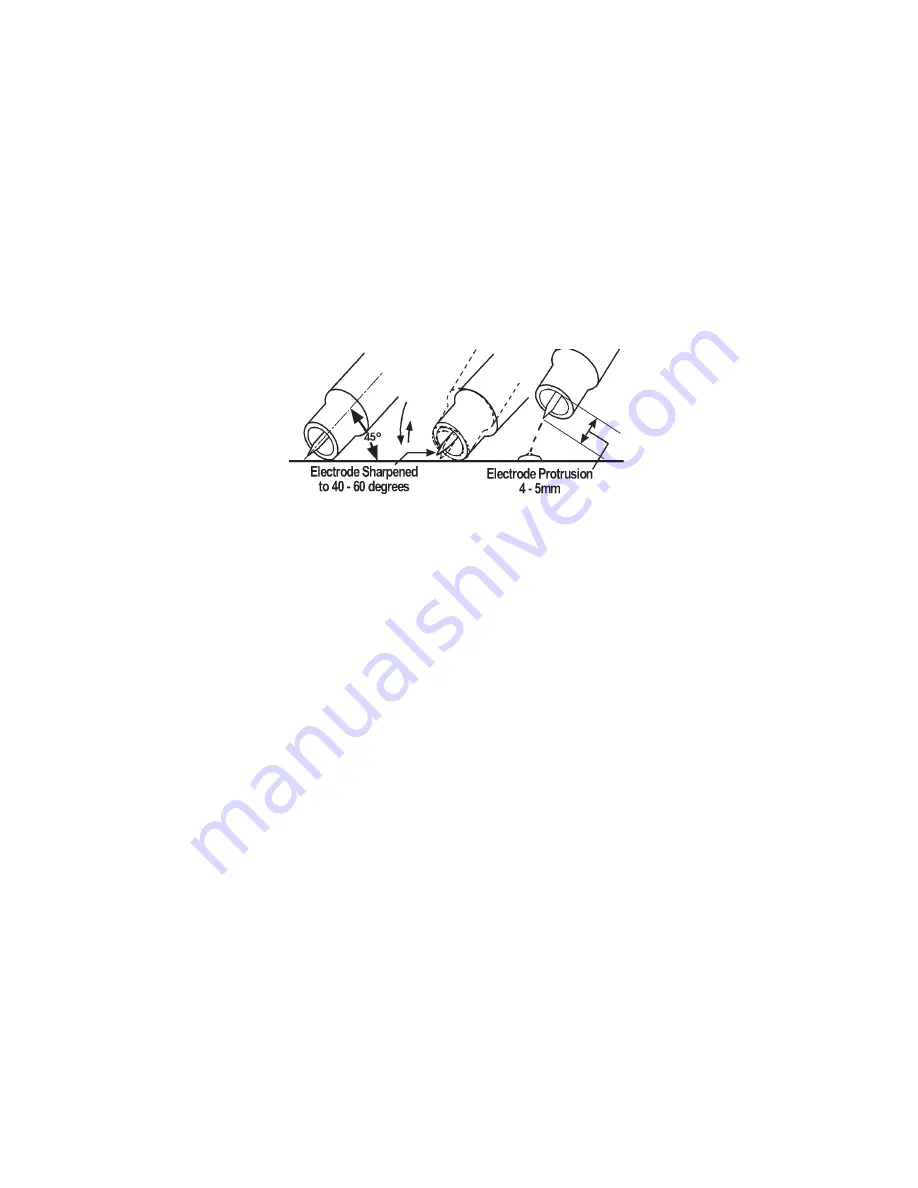
6. Open the gas valve on the torch handle, allowing gas to flow from the torch
nozzle. Cover your face with the head shield, bring the torch to within 3- 4mm
of the work, and at an angle of 45
°
, so that the ceramic nozzle gently touches
the work surface. See fig. 3.
Fig 3
Scratch the tip of the electrode on soon as an arc develops, quickly withdraw
the electrode to maintain a gap of approx. 3-4 mm, and proceed to weld.
(See notes below).
To stop welding, simply remove the torch from the workpiece.
This method is referred to as ‘Scratch Arc’.
REMEMBER to turn OFF the gas immediately you finish welding.
NOTES:
a) To avoid a visible strike mark on the surface of the workpiece, it is advisable to
strike the arc in the joint, where the mark will be concealed by the weld.
b) Thin sheet and stainless steel may be welded with or without filler, similar to
gas welding.
The filler is fed in at the edge of the pool. The rod must not touch the tip of the
electrode or enter the arc. The end of the rod must always be shielded by the
argon atmosphere to prevent as far as possible the formation of oxides of its
surface. When welding stainless steel and copper, it is often possible to feed
in the filler continuously at the edge of the pool.
c) The arc length generally varies between 3 and 6mm. depending on the type
of joint, type and thickness of material, and so on.
d) The torch is advanced in the direction of welding, without lateral movement,
maintaining the torch angle of 45
0
to the workpiece.
Guidelines for the TIG welding current needed and recommended electrode sizes
etc. for different gauges of material are shown in the chart on the following page:
20
Содержание 6012200
Страница 23: ...PARTS DIAGRAM ARC TIG 85 110 23...
Страница 24: ...PARTS DIAGRAM ARC TIG155 24...
Страница 25: ...25 WIRING DIAGRAM ARC TIG155 ARC TIG 85 110...
Страница 28: ......


