


Step 2
Open the craft panel and rotate it.
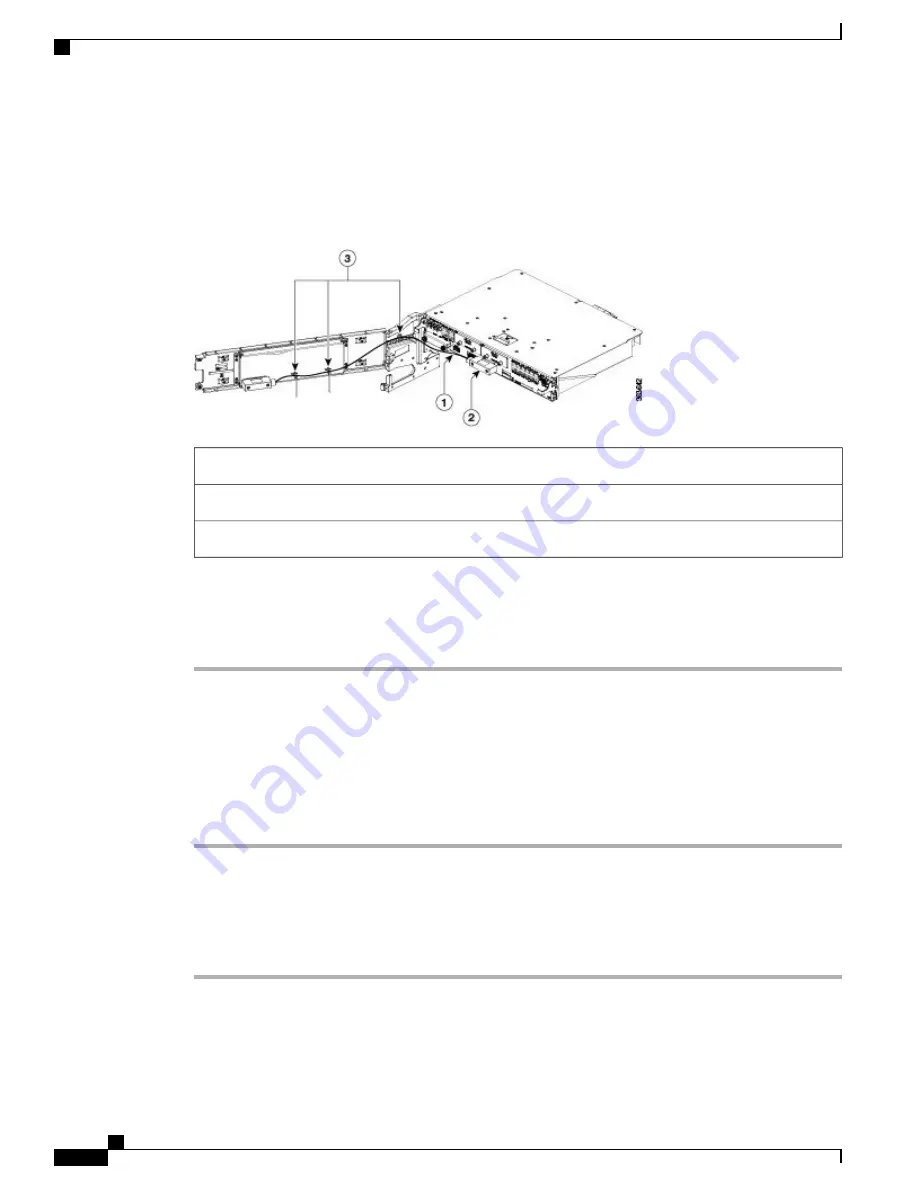
Figure 71: Opening the Craft Panel
1 - Craft cable
2 - Connector
3- Three cable ties to hold the LCD cables
Step 3
Disconnect the craft cable from the ECU faceplate.
Step 4
Loosen the two connector screws and remove the connector.
Step 5
Remove the craft panel. Lift up the panel to disengage the hinge pins on the left side from the chassis.
Replacing the Craft Panel
To replace the craft panel:
Procedure
Step 1
Engage the hinge pins on the left side of the chassis.
Step 2
Connect the craft cable to the ECU faceplate.
Step 3
Tighten the two connector screws to a torque value of 4.4lbs.
Step 4
Close the craft panel and rotate it.
Step 5
Tighten the two wing-head screws on the right side.
Hardware Installation Guide for Cisco NCS 4000 Series
134
Removing and Replacing Chassis Components
Replacing the Craft Panel
Содержание NCS 4000 Series
Страница 10: ...Hardware Installation Guide for Cisco NCS 4000 Series x Contents ...
Страница 70: ...Hardware Installation Guide for Cisco NCS 4000 Series 50 Installing Power Components Powering On the Chassis ...
Страница 162: ...Hardware Installation Guide for Cisco NCS 4000 Series 142 System Product IDs Accessory Product IDs ...
Страница 168: ...Hardware Installation Guide for Cisco NCS 4000 Series 148 Installation Roadmap for NCS 4009 Installation Roadmap ...
Страница 292: ...Hardware Installation Guide for Cisco NCS 4000 Series 272 System Product IDs Accessory Product IDs ...


