21
Chapter 3: Configuring the Network Storage System
(NSS)
Getting Started Guide
Chapter
3
3. From the
RAID Level
drop-down menu, click the RAID level of the RAID array you want to create.
4. Click
Add
.
The RAID creation can take some time to complete (depending on the size of the disks and the
selected RAID level). You can monitor the progress of the RAID build from the
Storage Status
page. When the build is finished, the array appears in the
RAID Arrays
table. The disks used in
the array are no longer available for creating additional arrays.
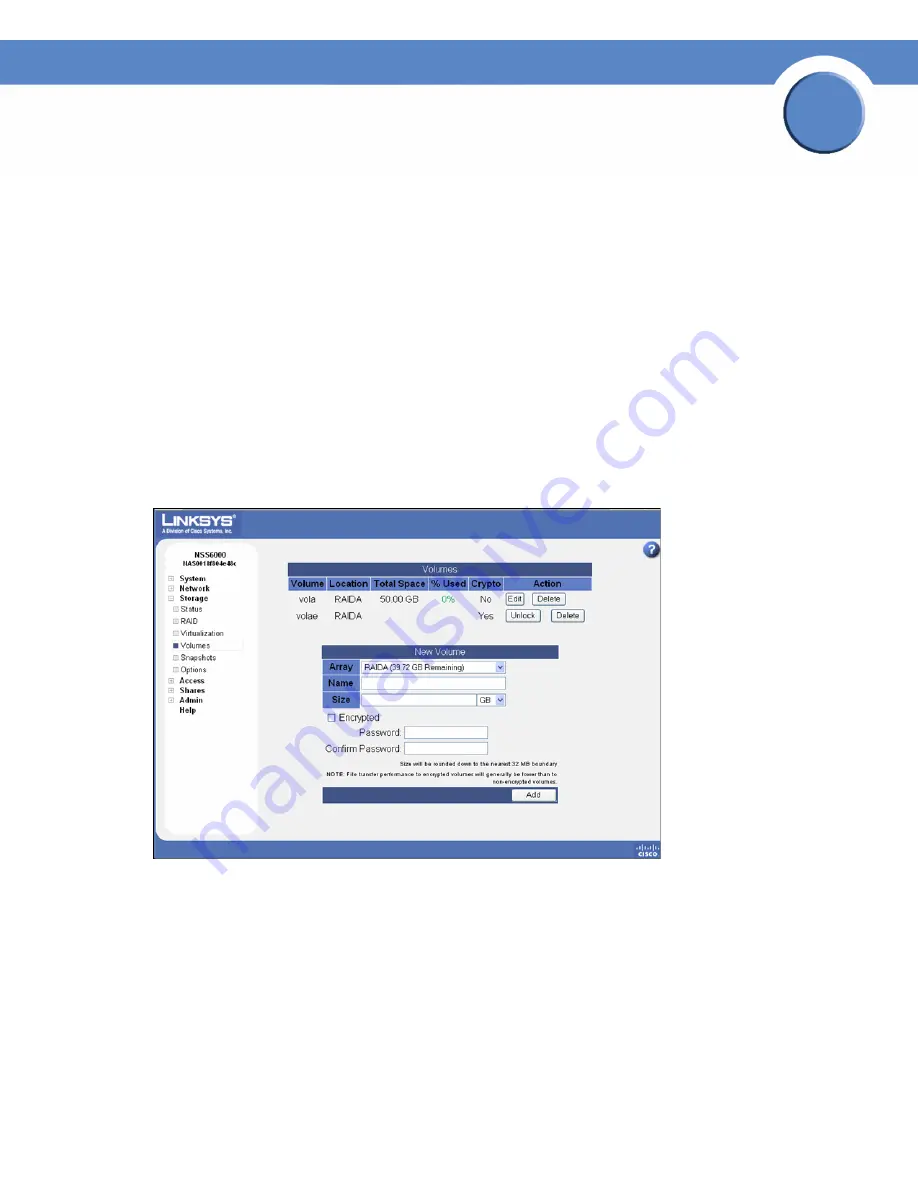
Step 5: Create a Volume
After you define at least one RAID array, you can create a volume. You need to create at least one
volume before you can create users, groups, or shares.
To create a volume:
1. From the
Manager Menu
, click
Storage
Volumes.
The
Storage Volumes
page appears.
2. From the
New Volume
area, set up the following fields:
•
Array:
Click the drop-down menu to select the array on which you want to create the volume.
•
Name:
Enter the name you want to give the volume. The volume name must consist of at least
one alphanumeric character, must begin with a letter, but cannot contain any spaces.


