12-2
BWX 110 Desktop Modem User Guide
OL-16307-03
Chapter 12 Installing the BWX Modem Diagnostics Tool
Step
Action
Illustration
Step 1
Before installing the BWX Modem
Diagnostics Tool software, shut
down all programs, including
anti-virus software programs.
Step 2
Insert the Installation CD into the
CD-ROM drive.
Step 3
Open the CD by clicking on the My
Computer icon. Double-click the
folder named NavDiag or
Navini_Diagnostics. The system
responds by opening the folder.
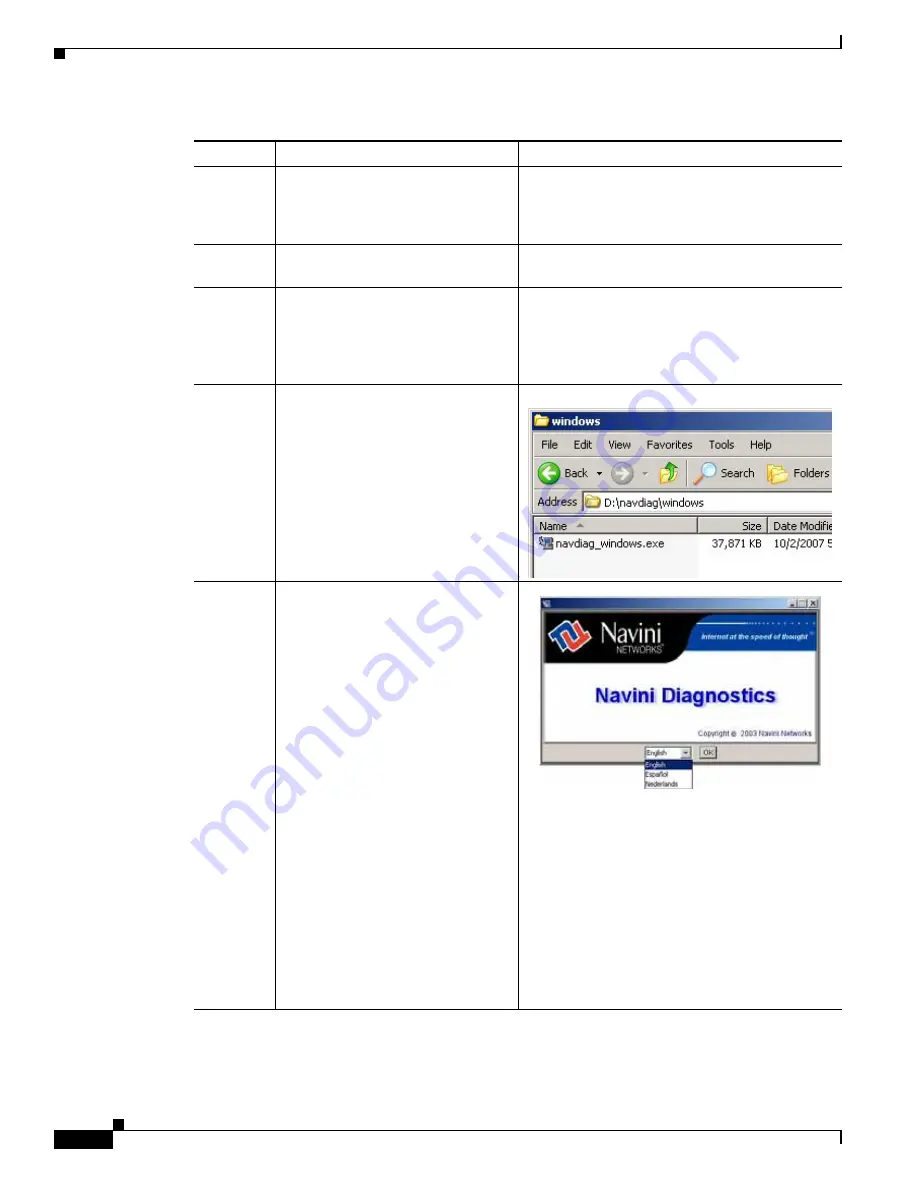
Step 4
Double-click the Windows folder,
then on the file
navdiag_windows.exe*.
The system automatically starts the
installation of BWX Modem
Diagnostics Tool and displays the
Navini Diagnostics Language
window.
Example
Step 5
Select a language, and click OK to
continue. The system responds by
displaying the License Agreement
window.
Note
BWX Modem Diagnostics
Tool may automatically
attempt to match the
language set on your PC
under Regional Options. The
language selection affects
how the BWX Modem
Diagnostics Tool displays its
screens. If you receive an
error message concerning the
language, click OK and the
BWX Modem Diagnostics
Tool defaults to English. At
this time, the BWX Modem
Diagnostics Tool supports
three options:
1. English (U.S.),
2. Español (Spain), and
3. Nederlands (Holland).


