


A-5
Cisco Unified IP Phone 7906G and 7911G for Cisco Unified Communications Manager 6.0
OL11954-01
Appendix A Providing Information to Users
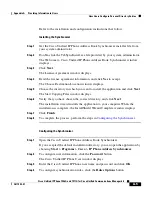
How Users Configure Personal Directory Entries
Refer to the installation and configuration instructions that follow.
Installing the Synchronizer
Step 1
Get the Cisco Unified IP Phone Address Book Synchronizer installer file from
your system administrator.
Step 2
Double-click the TabSyncInstall.exe file provided by your system administrator.
The Welcome to Cisco Unified IP Phone Address Book Synchronizer window
displays.
Step 3
Click
Next
.
The License Agreement window displays.
Step 4
Read the license agreement information, and click
Yes
to accept.
The Choose Destination Location window displays.
Step 5
Choose the directory in which you want to install the application and click
Next
.
The Start Copying Files window displays.
Step 6
Verify that you have chosen the correct directory, and click
Next
.
The installation wizard installs the application to your computer. When the
installation is complete, the InstallShield Wizard Complete window displays.
Step 7
Click
Finish
.
Step 8
To complete the process, perform the steps in
Configuring the Synchronizer
.
Configuring the Synchronizer
Step 1
Open the Cisco Unified IP Phone Address Book Synchronizer.
If you accepted the default installation directory, you can open the application by
choosing
Start > Programs > Cisco > IP Phone Address Synchronizer
.
Step 2
To configure user information, click the
Password
button.
The Cisco Unified IP Phone User window displays.
Step 3
Enter the Cisco Unified IP Phone user name and password and click
OK
.
Step 4
To configure synchronization rules, click the
Rules Options
button.
Содержание 7906G - Unified IP Phone VoIP
Страница 4: ......


