


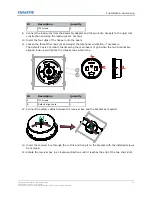


ID
Description
Quantity
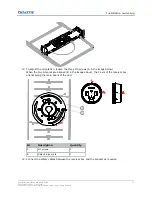
C
M3 screws
4
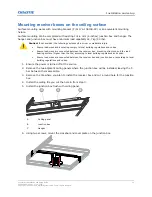
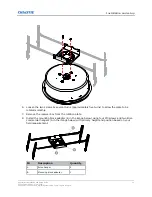
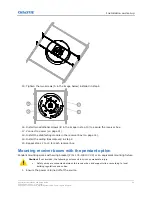
9. Connect the load wires from the assembly adapter and the two Erico hangers to the rigid roof
construction ensuring the load wires are not taut.
10. Insert the four clips of the hanger onto the beam.
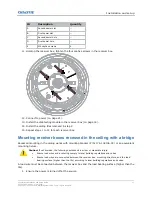
11. Loosen the three M3 screws (A) and adjust the rotational orientation, if necessary.
The default Y axis of product orients along the main beam of grid when the two Δ marks are
aligned. Ensure you tighten the three screws when done.
ID
Description
Quantity
A
M3 screws
3
B
Default align mark
1
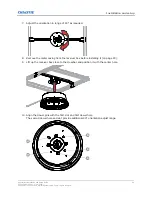
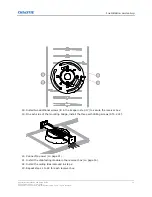
12. Connect the safety cables between the receiver box and the bracket as required.
13. Insert the receiver box through the cut tile and hang it on the bracket with the installed screws
from step 8.
14. Rotate the receiver box in a clockwise directions until it reaches the end of the two short slots.
Installation and setup
CounterAct Installation and Setup Guide
35
020-103456-01 Rev. 1 (09-2021)
Copyright
©
2021 Christie Digital Systems USA, Inc. All rights reserved.
Содержание 174-005106-XX
Страница 1: ...Installation and Setup Guide 020 103456 01 CounterAct ...
Страница 49: ......


