Chapter
3Operation
CMN023-005
原本
(original instructions)
47
E
nglis
h
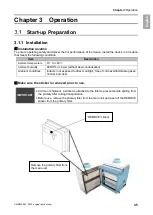
3.1.2
Wiring and Piping
■
Wiring
WARNING
•
Perform wiring firmly, without bending or pulling cables with excessive
force.
Fire or electric shock may result.
•
Ensure that the power supply conforms to the specifications of the device.
•
Be sure to connect the ground wire.
CAUTION
•
Avoid multiple connections as they can cause voltage reduction.
At reduced voltage, the device may fail to operate normally, resulting in
failure.
The device is powered by a single-phase supply.
The tolerance of the supply voltage is
10%.
1.
Connect the device attachment plug of the power cord to the power connector on the device.
2.
Connect the power supply end of the power cord to the power outlet.
■
Piping
Connect the intake piping (separately prepared)
to the inlet flange.
IMPORTANT
•
Ensure appropriate piping during operation.
The piping should be as short as practicable, with the piping port diameter not too
small.
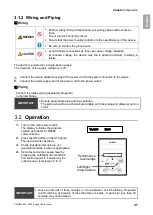
Operation
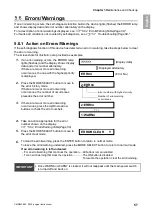
1.
Turn on the main power switch.
The display indicates the program
version and the ID for RS485
communication.
2.
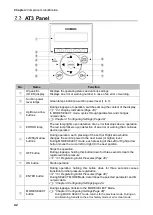
Press the ON button on the AT3 panel.
The device starts operation.
3.
Check that abnormal noise is not
generated and the suction is appropriate.
4.
Set a desired suction power level by
pressing the Left/Right arrow buttons.
The suction power is indicated by the
suction power level lamps (1 to 7).
IMPORTANT
•
Leave an interval of three minutes or more between on/off switching. Repeated
on/off switching at intervals of less than three minutes, in particular less than 30
seconds, may cause failure.
Ver*.** ID.**
Left/Right
arrow buttons
Performance
level lamps
Содержание CBA-1500AT3-HC-DSA-V1
Страница 5: ...1 CMN023 005 Translation of the original instructions 3 1 1 1 1 2 10 60 80 1 3 0 40 80 100 1 000...
Страница 6: ...1 4 1 4 2 OFF 1 5...
Страница 7: ...1 CMN023 005 Translation of the original instructions 5 1 6...
Страница 8: ...2 6 2 2 1 200V 220 230V CE 1 1 2 1 1 HEPA 1 3m 200V 1 220 230V CE 1 1...
Страница 10: ...2 8 2 3 AT3 EL OLED No 1 7 2 4 9 4 15 1 1 1 1 OFF 3 3 3 14 ON ENTER 3 3 3 14 4 15 MODE SELECT 4 15...
Страница 12: ...2 10 2 4 3 OP kPa SP kPa DP kPa EP kPa Blower Runtime h 18 Total h Moter...
Страница 13: ...3 CMN023 005 Translation of the original instructions 11 3 3 1 3 1 1 0 40 80 RH REMOVE 1 1 1...
Страница 14: ...3 12 1 2 2 3 4 OFF ON 1 A OFF 40 50 A 2...
Страница 22: ...5 20 5 5 1 WARN2 1 5 1 1 1 1 1 2 2 1 3 1 4 2 1...
Страница 24: ...5 22 3 ACC 4 5 6 5 2 1 Littell fuse 218 250V 15A 1 2 3 ACC...
Страница 25: ...5 CMN023 005 Translation of the original instructions 23 5 3 CR2477 CR2477 1 2 3 2 4 5 6 7 5 4 1 1 1 1 5 5...
Страница 28: ...5 26 5 7 EL ON ON 5 2 22 1 2 3 4 1 4 ON OFF 30 1 2 1 2 5 1 20 5 1 20 5 1 20 5 1 20...
Страница 29: ...6 CMN023 005 Translation of the original instructions 27 6 6 1 6 1 1...
Страница 30: ...6 28 1 5V 0 2V LOW DC 1 2...
Страница 34: ...7 32 7 3 7 3 1 CBA 1500AT3 HC DSA V1...
Страница 35: ...CMN023 005 Translation of the original instructions 33 12 7 2 7 2 31...
Страница 36: ...34...
Страница 67: ...Chapter 7Appendix CMN023 005 original instructions 65 English Electrical Diagram 7 3 1 CBA 1500AT3 HC DSA V1...
Страница 69: ...MEMO...


