Models: MSP-TDKCG110 & MSP-TDKCY220
Installation Instructions
10
MOUNTS NOT REQUIRING SPACERS
IMPORTANT ! :
If your display has a recessed mounting
hole cavity, and the Centris bracket will not fit into that
cavity (See Figure 11), then follow the "MOUNTS
REQUIRING SPACERS" procedure.
CAUTION:
Using screws of improper size may
damage your display! Proper screws will easily and
completely thread into display mounting holes.
CAUTION:
Inadequate thread engagement in display
may cause display to fall! Back out screws ONLY as
necessary to allow installation of Centris bracket!
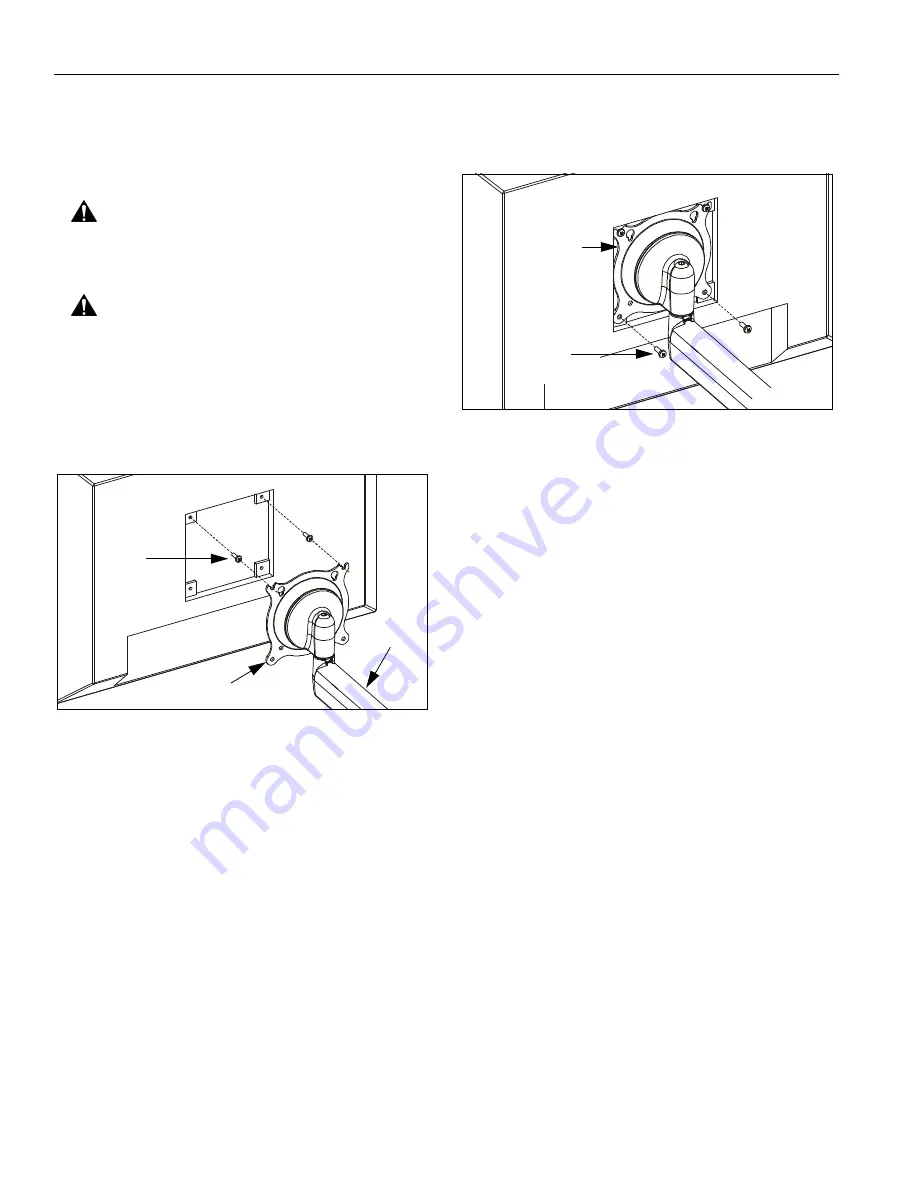
1.
Using Phillips screwdriver, carefully install two screws
(130) into the
upper
mounting holes on the display
(See Figure 12). Thread screws completely into
display, then back out 3-1/2 turns.
Figure 12: Install Upper Screws and Display
2.
Pick up and align display so that screws (130)
(installed in previous step) fit into the
upper
100mm x
100mm mounting cutouts, or
upper
75mm x 75mm
mounting holes (as applicable) in Centris bracket
(See Figure 12). Lower display firmly into place.
NOTE:
Display will be hanging on upper two screws
(130).
3.
Using Phillips screwdriver, install two remaining
screws (130) through the
lower
mounting holes in
Centris bracket into the display (See Figure 13).
Figure 13: Install Lower Screws
4.
Tighten all four screws (130). Do not overtighten!
5.
For MSP-TDKCY220 Only: Repeat Steps 1-4 for
second display.
6.
Proceed to "CABLE MANAGEMENT."
10 or 30
130
(2 places)
Centris Bracket
130
(2 places)
Centris
Bracket


