


HOTKEY SUMARY COMANDS
Note: 1. Where X = Port 01~16, Y= Bank 00~15
2. The [SCROLL LOCK] key must be pressed within 2 seconds.
3. The “Shift” key can be another Hot Key choice.
4. You will find that after the KVM unit switches to another computer, there is a mouse
keyboard delay of 1-2 seconds. This is normal and ensures re-synchronization of the
console and connected computers.
CV17116-C5 CV17116-C5
21
10
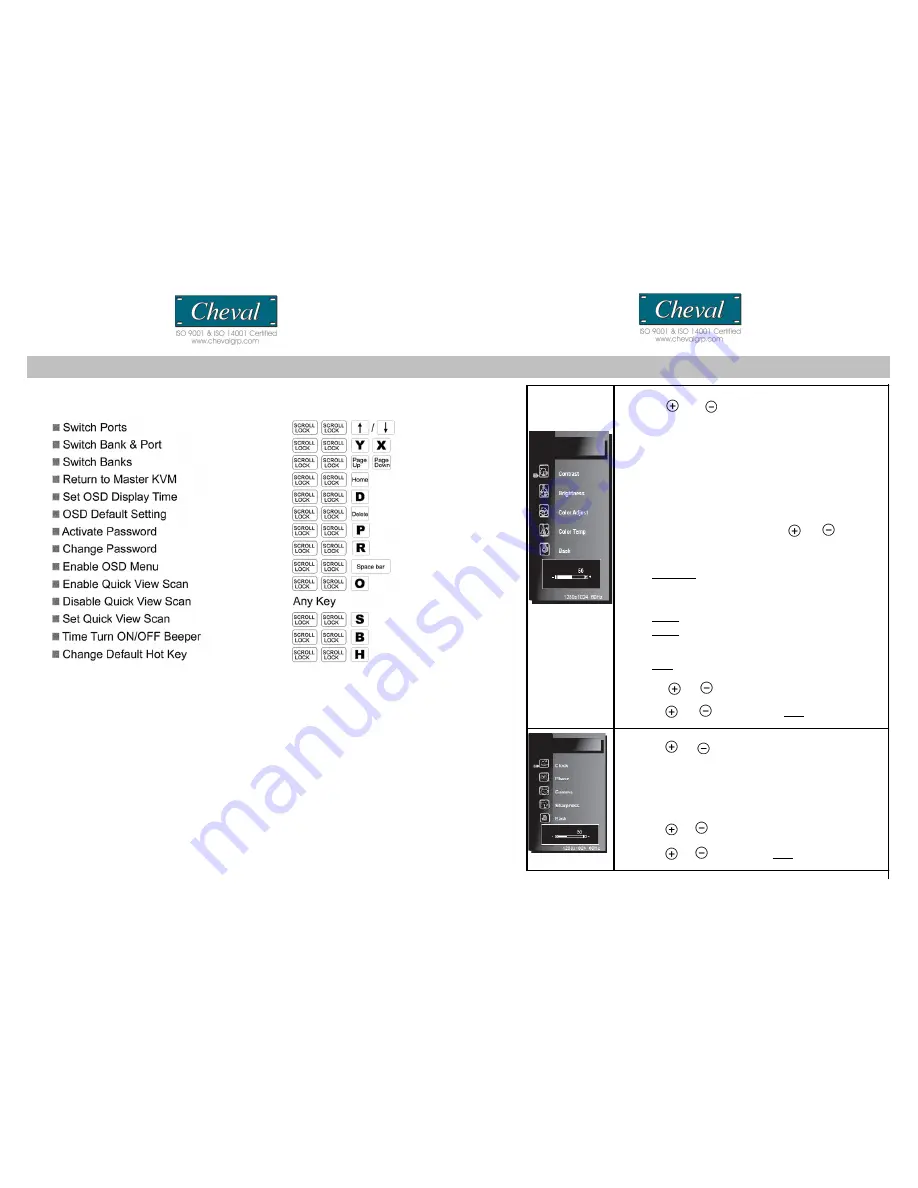
Color
1. Use the and buttons to scroll to the desired selection from
the list below:
Contrast -
adjusts LCD Contrast level (0~100)
Brightness -
adjusts LCD Brightness level (0~255)
Color Adjust –
this option is disabled by default, as the
monitor is factory set to default color temp of 9300K. To enable
this feature and be able to manually adjust the R,G or B values,
you would need to first go to the Color Temp sub menu and
change to USER option. After that, you can custom adjust LCD
RGB Color level as indicated below:
Red (0~255) Green (0~255) Blue (0~255)
Once you enter the RGB sub menu, use
and
buttons to
change the respective values, SEL to confirm and exit back to
RGB sub menu, and press
MENU
to exit back to the
Color
sub
menu. Then please skip to step 6.
Color Temp
-
adjusts LCD Color Temp level
9300K: Default Color Temp
6500K: Default Color Temp
5500K: Default Color Temp
sRGB
:
Default Color Temp
USER
:
Default Color Temp (only with this setting you can
manually adjust the RGB levels in the
Color Adjust
sub menu.)
Back
-
returns to the main OSD menu
2. Press the
SEL
button to enter/confirm selection.
3. Use the
and
buttons to adjust the values.
4. Press the
SEL
button to execute the settings in the menu.
5. Use the
and buttons to select to
Back
.
6. Press the
SEL
button to confirm and go back to the main OSD menu
Image Setting
1. Use the and
buttons to scroll to the
desired selection from the list below:
Clock -
adjusts LCD display width level (0~100)
Phase -
adjust LCD display Phase level (0~63)
Gamma -
adjust LCD display Gamma level (0~3)
Sharpness -
adjust LCD display Sharpness level (0~4)
Back -
returns to the main OSD menu
2. Press the
SEL
button to enter/confirm selection.
3. Use the
and
buttons to adjust the values.
4. Press the
SEL
button to execute the settings in the menu.
5. Use the
and
buttons to select
Back.
6. Press the
SEL
button to confirm and go back to the main OSD menu


