Chassis Plans CPX1-241 Technical Reference
Appendix F – Network Connection
Page 57
Appendix F – Ethernet Network Connection
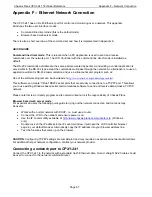
The CPX1-241 has an RJ-45 Ethernet port for control and monitoring over a network. This appendix
introduces the two user interface modes:
Command line direct mode (this is the default mode)
Browser based web server mode
There is also a short overview of the command set and how it is implemented in Appendix A.
QUICK GUIDE
Command line direct mode
: This is relevant when a PC application is used to send and receive
commands over the network port. The LCD Controller with the command line direct mode is installed as
default.
The RS-232 commands available are the same as documented Appendix A and writing a control application is
very similar to the RS-232 type except the commands must pass through the network. An alternative is to use an
application written for RS-232 communication and use a virtual serial port program such as:
One of the software program can be download at
http://www.taltech.com/products/tcpcom.html
.
This software can create “Virtual” RS232 serial ports that are actually connections to a TCP/IP port. This allows
you to use existing Windows based serial communications software to send and receive data across a TCP/IP
network.
Please note this is a 3rd party program and is not warranted nor is it the responsibility of Chassis Plans.
Browser based web server mode :
For experienced users the following quick guide to trying out the network connection and functions may
be useful.
Works with a normal network with DHCP, i.e. must use a router.
Connect the LCD to the network and ensure power is on.
Use the IP Locator utility available at
http://www.chassis-plans.com/ip-locator.zip
(Windows
only)
Double click on the IP address in the IP Locator window, it will open the LCD Controller browser
page in your default browser. Alternatively copy the IP address into your browser address line.
Test the functions that come up on the browser.
CAUTION
: Configuring TCP/IP settings are complicated and may require an experienced network administrator.
For additional help or network configuration, contract your network provider.
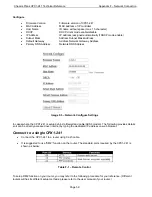
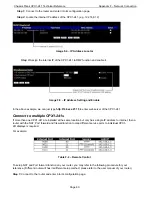
Connecting a network port to CPX1-241
Connect the CPX1-241 to the network with a standard Cat-5 Ethernet cable.
Note: A straight RJ-45 cable should
be used to connect to the network switch/hub/router.
Содержание CPX1-241
Страница 2: ...This Page Intentionally Blank ...
Страница 8: ...This Page Intentionally Blank ...
Страница 13: ...Chassis Plans CPX1 241 Technical Reference Chapter 1 Introduction Page 5 Photo 6 I O Connections ...
Страница 17: ...Chassis Plans CPX1 241 Technical Reference Chapter 1 Introduction Page 9 Figure 1 CPX1 241 Customer Drawing ...
Страница 28: ...Chassis Plans CPX1 241 Technical Reference Chapter 5 Package Contents Page 20 This Page Intentionally Blank ...
Страница 58: ...Chassis Plans CPX1 241 Technical Reference Appendix B Auto Color Gain Page 50 This Page Intentionally Blank ...
Страница 62: ...Chassis Plans CPX1 241 Technical Reference Appendix E PIP Mix Table Page 54 This Page Intentionally Blank ...
Страница 64: ...Chassis Plans CPX1 241 Technical Reference Appendix E PIP Mix Table Page 56 This Page Intentionally Blank ...
Страница 70: ...Chassis Plans CPX1 241 Technical Reference Appendix F Network Connection Page 62 This Page Intentionally Blank ...
Страница 72: ...Chassis Plans CPX1 241 Technical Reference Appendix G DVI D versus DVI I Page 64 This Page Intentionally Blank ...


