F.200/TITAN 200/MAR 97
14
retaining screws.
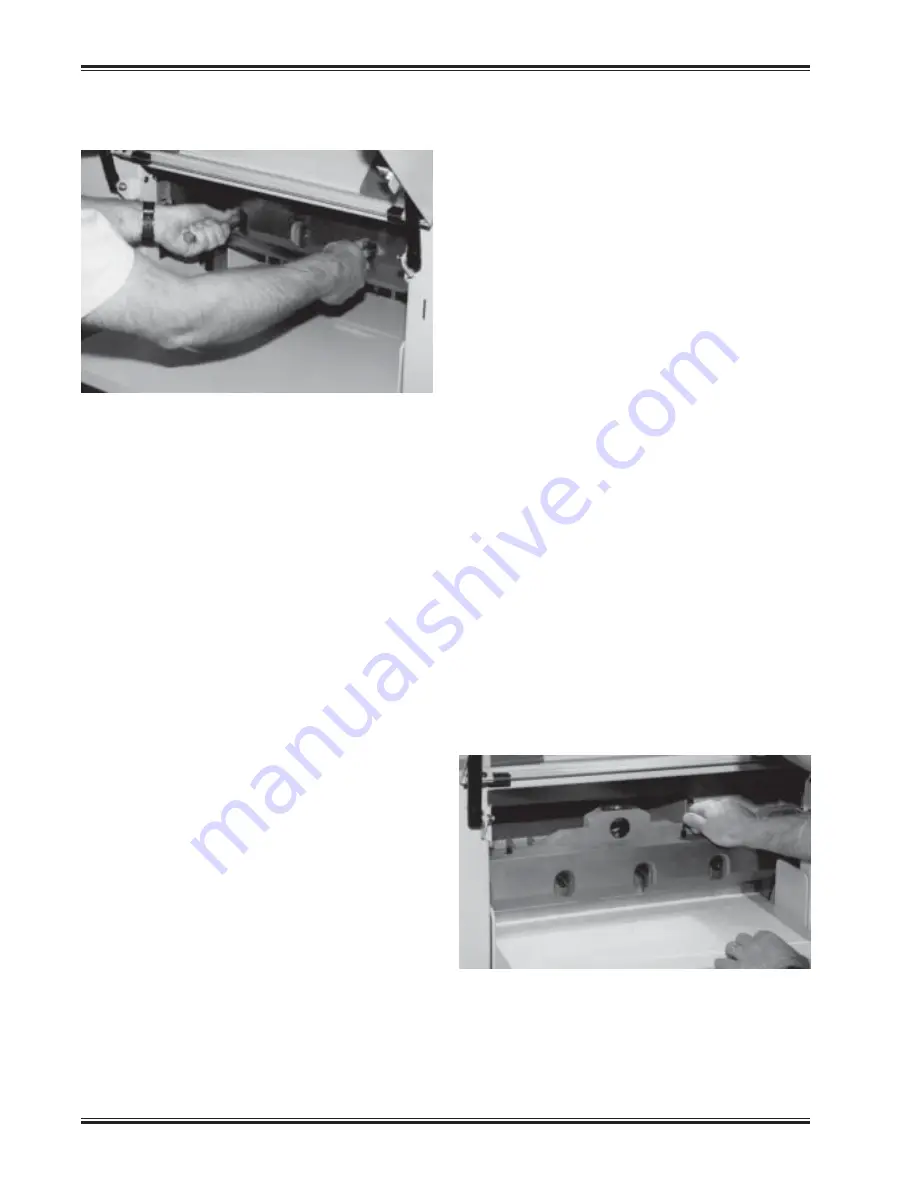
5. Grasp the knife lifters firmly and, at the same time,
turn them counterclockwise to release the knife from
the knife bar (fig. 15). Lower the left end first, then lower
the right end as you shift the knife sideways to the left.
Bring the right end of the knife around the knife bar guide
frame. Maneuver the right end into the space between
the guide frame and the shroud as the left end is brought
clear of the left guide frame. Move the knife to the right
then bring the knife out of the cutter, left end first. Put
the blade in the scabbard immediately and secure the
knife retainer screws.
Knife Installation
1. Make sure the knife and clamp are in the up position.
If they are not, turn on the power using the red and
yellow main power switch, close the front guard, and
press the CLEAR button. This will preset the backgauge
and send the knife and clamp up.
2. Turn off the machine and unplug the power cord.
3. Pull out the cutting stick using the cut stick removal
tool and turn it to a new surface. If the cutting stick is
not level or flush with the table, 1/2” strips of paper can
be placed in the table slot under the cutting stick to
shim it.
4. Remove the left retainer screw from the new blade
and screw the knife lifters into the new blade. Screw
the lifters all the way in and then back them out 3/4
turn).
5. Remove the other scabbard retainer screw.
6. Double check to make sure the knife adjusting
screws have been backed out all the way (step #2,
Knife removal). Lift the blade and insert it into the knife
bar slot. Guide the blade, right edge first, into the space
between the shroud and the knife bar guide frames.
Tip to clear the table side guides, then move the left
end of the blade into the knife bar slot dropping the left
end as the right end is brought around the right knife
bar guide frame and up into the knife bar slot. Raise
the knife into the knife bar slot as high as it will go and
tighten the lifters.
NOTE: If the blade will not go in, either the lifters are
screwed into the blade too far, or the end of the blade
is hitting the cylinder bracket at the right end of the
knife slot. In this case, drop the left end when inserting
the knife.
7. Insert the knife bolts with washers and snug to hold
the knife, but don’t tighten them yet.
8. Remove the knife lifters one at a time and replace
with bolts and washers.
9. Place a few sheets of paper over the cut stick,
covering the stick end-to-end.
10. Plug in the power cord and turn the power on.
11. Go to the MAINTENANCE screen and choose
KNIFE ADJUST. Choose KNIFE DOWN, close the
guard, and press the cut button to send the knife to the
down position (for more details on how to do this, see
the “Operator Controls/Maintenance/Knife Adjust”
section, pg. 21).
12. Turn the power off and disconnect the machine
power cord.
13. Turn the knife adjusters down evenly, a little at a
time, until the knife cuts through the bottom sheet of
paper the entire length of the cutting stick (fig. 16).
Turning the screws down evenly prevents uneven wear
on the knife and cutting stick.
14. Plug in the power cord and turn the power on.
(fig. 16)
(fig. 15)
NOTICE: UNSUPPORTED PRODUCT!
NO TECHNICAL SUPPORT AVAILABLE!
NO REPAIR PARTS AVAILABLE!


