


CenterVue
DRS Operating Manual
Pg. 15 of 59
The START button is only enabled if the chin rest is engaged. If the patient is
not properly positioned on the chin rest, the START button will not be enabled
and it will not be possible to start the acquisition process.
9.4 Automated acquisition
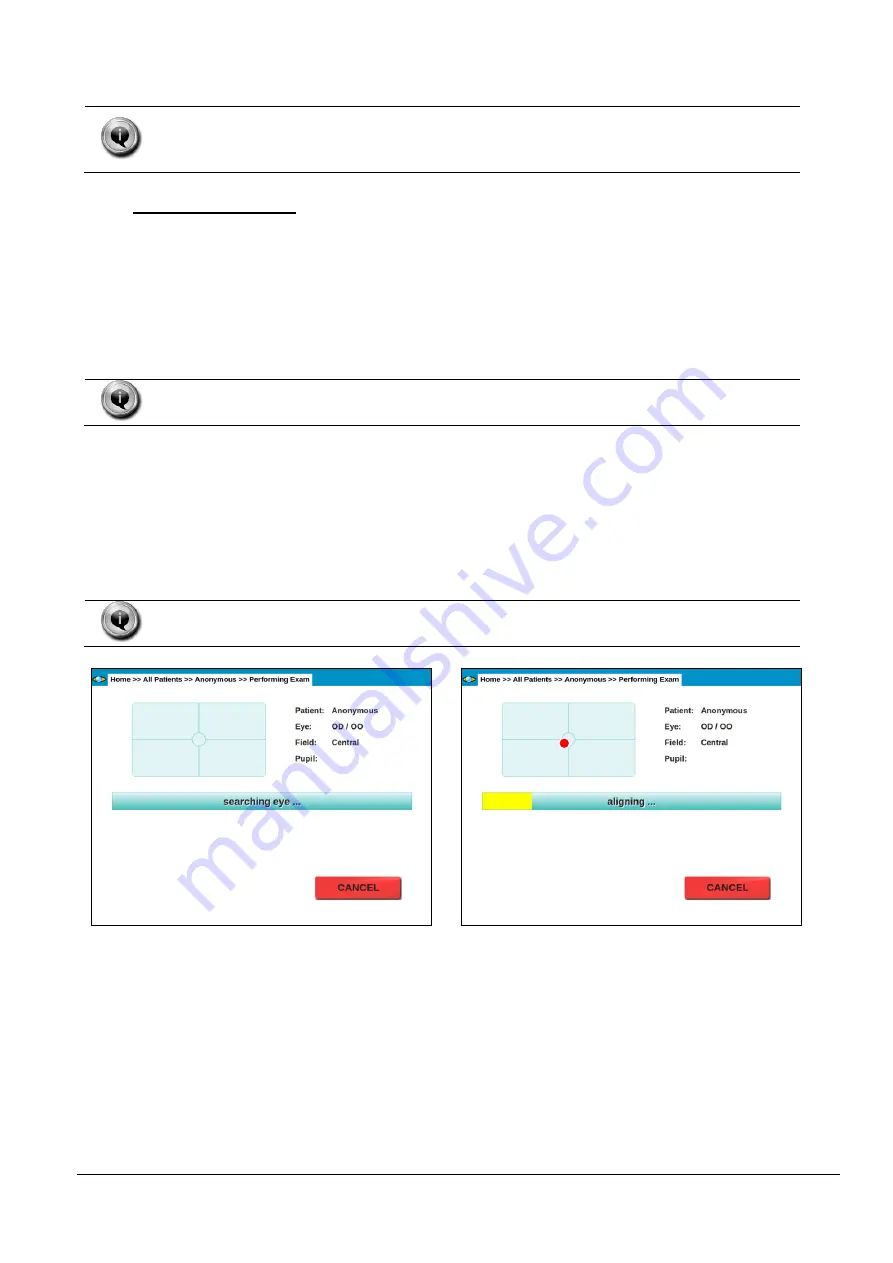
Once the START button is pressed, the DRS will automatically perform the following steps:
a. Move the optical head
to locate the patient’s pupil (see Figure 7);
b. Move the optical head to center
the patient’s pupil to the front lens (see Figure 8); the
system will also display the pupil current diameter and which eye is being acquired; the red
circle in Figure 8 represents the pupil and becomes green when proper centering is
achieved.
In case the auto-alignment module fails, manual alignment is possible: see par. 9.5
below for details.
c. Perform auto-focus (see Figure 9);
d. Capture an image, by flashing the retina. This step involves also automatic tuning of the
flash level;
e. Store the image in the local hard drive (see Figure 10);
f. In case of acquisition of both eyes and/or multiple fields, the acquired images can be
displayed before proceeding to the next one, depending on the settings (see par. 14.2).
At any time during the above sequence it is possible to stop the acquisition process
by pressing the CANCEL button.
Figure 7 - Automatic eye search in progress
Figure 8 - Automatic alignment in progress


