15
cdvi.com
cdvigroup.com
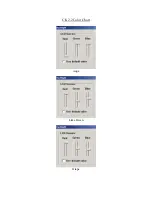
Without jumper :
without clock
With jumper :
with clock
To other door controllers
(INTBUSW)
6] CONNECTIONS:
CONNECTION WITH THE (INTBUSW) DOOR CONTROLLER
INTBUSW
STAND ALONE MODE
TELACCESS
- Dipswitch address set up
- Dip4 = ON
DIP SWITCH adressing
1
2
3
4
Mode
ON
ON
ON
ON
Front plate
OFF
ON
ON
ON
Reader 1
ON
OFF
ON
ON
Reader 2
OFF
OFF
ON
ON
Reader 3
ON
ON
OFF
ON
Reader 4
ST1 (Programming jumper)
: Normal
CENTRALIZED MODE
- TERENA
- Address programming during installation
- Dip4 = OFF
ST1 (Programming jumper)
Normal (As standard)
Installation
INTBUSW (Door controller)
Terminal block :
Motherboard
V
Input voltage -
12
Input v
1
Data O
2
Clock
3
Data 1
Terminal block :
Motherboard
R
N/C contact eletromagnetic lock (+)
C
Common contact power supply (+)
T
N/O contact electric release
R
N/C contact alarm
C
Common
T
N/O contact alarm
+ ~ -
Input voltage DC or AC, 12V or 24V
P1
Request-to-enter input
M
Common ( P1 et P2 )
P2
Request-to-enter input
E
Door contact, N/C (Door closed) and N/O (Door open)
L
Reader activation imput (N/O) reader enabled and (N/C) reader disabled
M
Common ( E and M ) or (E and L)
A
RS485 Bus (All the A must be connected together in daisy chain)
B
RS485 Bus (All the B must be connected together in daisy chain)
Terminal block - 3 points :
Piggyback board
7
LED > Red color
8
LED > Green color
9
Buzzer
EN
EN
GALEOW
Illuminated keypad - Wiegand
GALEOW
Illuminated keypad - Wiegand
INSTALLATION MANUAL
EXE-CDVI_IM GALEOW CMYK A5 EN-FR 07.indd 15
12/07/13 11:32