


FaxPress Xerox Interface Guide
3—6
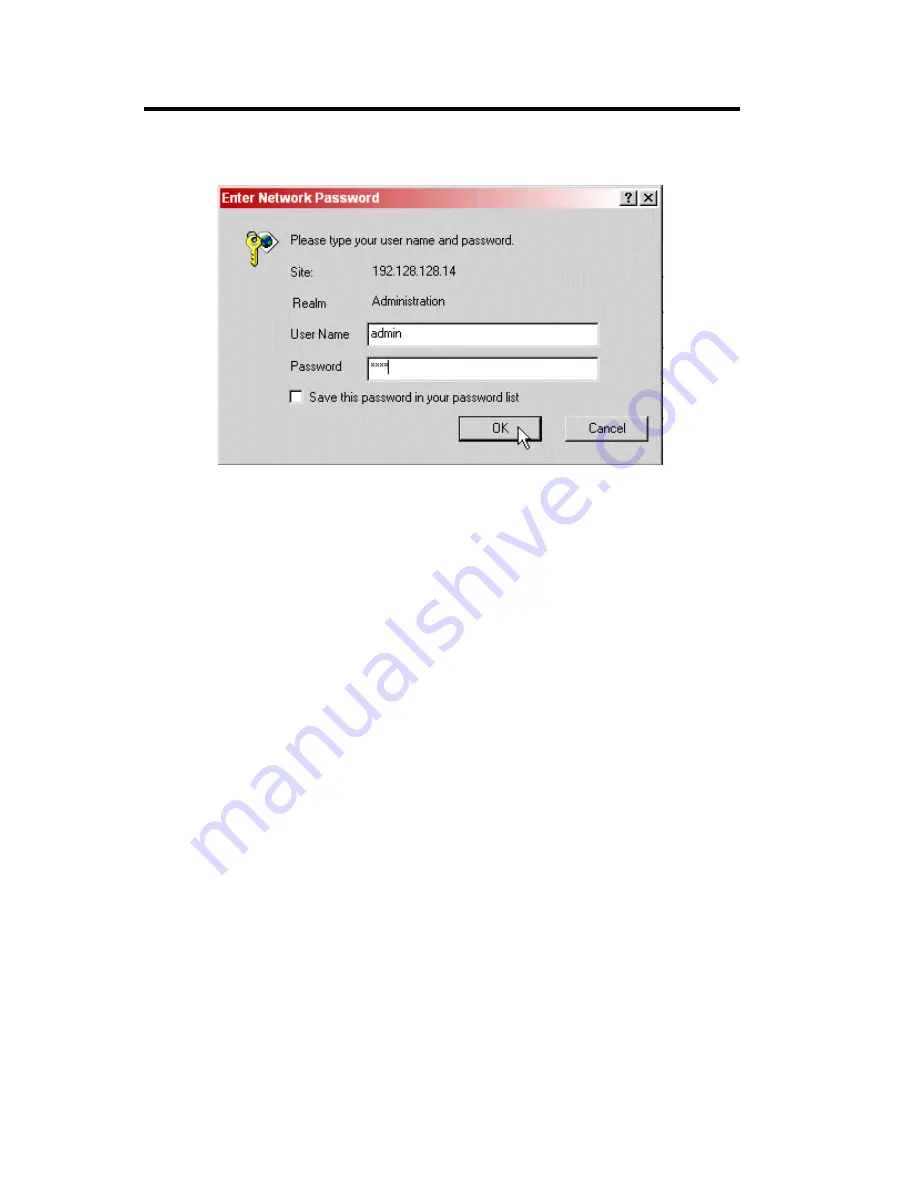
10. Click
Apply
. A login dialog box appears.
11. The User Name and Password of the account required for the
Xerox system are entered in the appropriate text fields. By
default, the User Name is
admin
and the password is
1111
. Leave
these fields at their default settings and click
OK
.
After you have made these settings and installed and configured the
FaxPress Xerox Interface as described in the next chapter, faxes will be
routed to the fax repository folder. When you send a fax from the Xerox
system, a ****.XSM folder will appear in the repository folder. the ****
will be a number starting with 0001.XSM and incrementing as you send
more faxes.
Содержание 61-1273-001
Страница 1: ...FaxPress The Integrated Network Fax Server FaxPress Xerox Interface Guide...
Страница 4: ...iv Index ____________________________ IX 1...
Страница 16: ...FaxPress Xerox Interface Guide 2 6...
Страница 27: ...Xerox Print Driver Setup 4 5 5 A set of Print and Fax options appear 6 Click Install Your Windows Print Driver...
Страница 38: ...FaxPress Xerox Interface Guide 4 16...
Страница 50: ...FaxPress Xerox Interface Guide 5 12 7 Click the Repository tab 8 Click Add to specify a fax repository folder...
Страница 60: ...FaxPress Xerox Interface Guide 5 22...


