Chapter 3
42
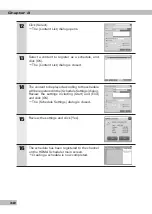
12
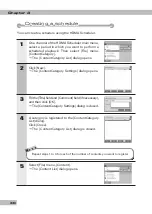
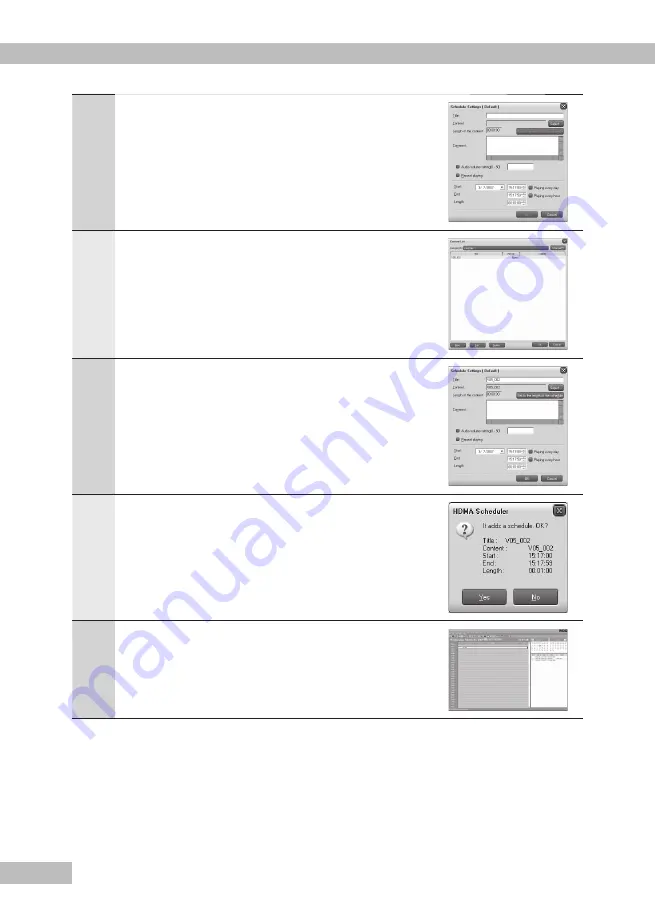
Click [Select].
The [Content List] dialog opens.
13
Select a content to register as a schedule, and
click [OK].
The [Content List] dialog is closed.
14
The content to be played according to the schedule
will be registered in the [Schedule Settings] dialog.
Review the settings including [Start] and [End]
and click [OK].
The [Schedule Settings] dialog is closed.
15
Review the settings and click [Yes].
16
The schedule has been registered to the channel
on the HDMA Scheduler main screen.
Creating a schedule is now completed.
Содержание HDMA-4000
Страница 1: ...HDMA 4000 User Guide Engineered by Canopus Co Ltd...
Страница 16: ...Chapter 1 16...
Страница 32: ...Chapter 3 32 6 Click X Uninstallation is completed...
Страница 39: ...39 Chapter 3 Using HDMA Scheduler Help menu Help menu 1 1 About Scheduler Displays the HDMA Scheduler version...
Страница 51: ...HDMA 4000 Contents update Contents update Reference 1 Reference 1...
Страница 71: ...HDMA 4000 Serial control Serial control Reference 3 Reference 3...
Страница 88: ...Reference 3 88...
Страница 106: ...Reference 4 106 Status Status The Internal status and the operation log of the HDMA 4000 are displayed...
Страница 124: ...Reference 4 124...
Страница 125: ...HDMA 4000 Sync playback using the HDMA 4000Sync Sync playback using the HDMA 4000Sync Reference 5 Reference 5...
Страница 130: ...Reference 5 130...
Страница 131: ...HDMA 4000 Appendix Appendix...


