5
-10
[Spot]
The center of the screen is metered.
An appropriate exposure can be achieved for the
subject at the center of the screen regardless of the
brightness/darkness on the periphery of the screen.
Use this mode if you want to adjust the exposure to
the center of the screen because the subject is
receiving a spotlight or backlight, etc.
4
[
S
mart
S
hade Control]
Select [Disable] or one of the 7 levels from 1 (weak) to
7 (strong) for smart shade control at the camera
startup.
5
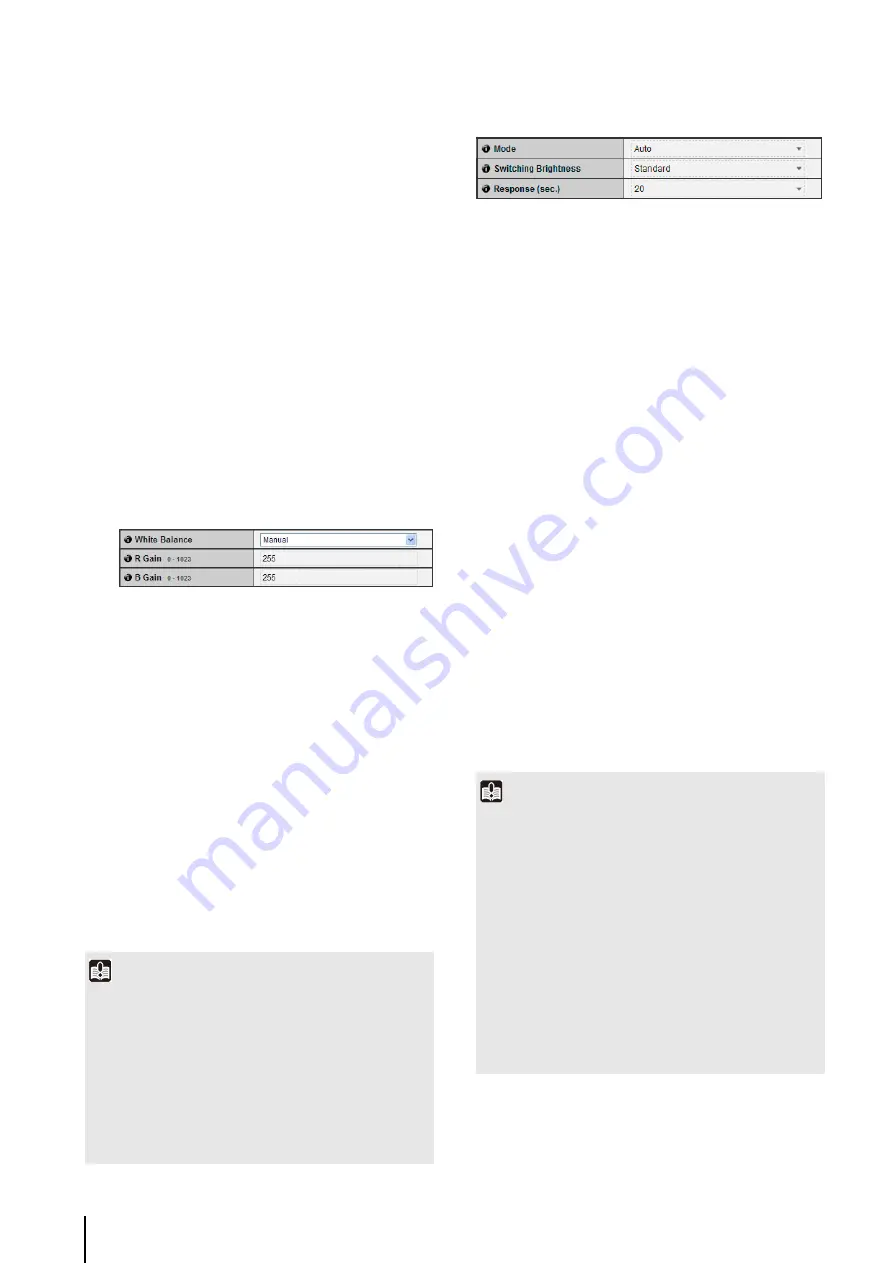
[White Balance]
Select the white balance according to the light source
to achieve natural color in the image.
[Auto]
The white balance is adjusted automatically.
[Manual]
Set the values of red and blue gain according to the
light source. Enter a value from 0 to 1023 for both
the [R Gain] and [B Gain].
[Daylight Fluorescent]
Select this option to capture video under daylight
fluorescent lighting.
[White Fluorescent]
Select this option to capture video under daylight
fluorescent or white fluorescent lighting.
[Warm Fluorescent]
Select this option to capture video under warm
fluorescent lighting.
[Mercury Lamp]
Select this option to capture video under mercury
lamps.
[Sodium Lamp]
Select this option to capture video under orange
sodium lamps.
[Halogen Lamp]
Select this option to capture video under halogen
bulbs or incandescent bulbs.
Day/Night
1
[Mode]
Set Day/Night mode to [Manual] or [Auto].
If [Manual] is selected, it is possible to switch manually
between [Day Mode] and [Night Mode] using Admin
Viewer Night Mode function (P. 7-14).
If you have selected [Auto], set [Switching Brightness]
and [Response (sec.)] according to the environment in
which the camera is installed as well as the desired
switching conditions.
2
[
S
witching Brightness]
Set the brightness at which [Day Mode] and [Night
Mode] will be switched. Select [Darker], [Slightly
Darker], [Standard], [Slightly Brighter] or [Brighter].
Select [Darker] if you want to capture video in color as
much as possible.
Select [Brighter] to reduce noise. Note that this mode
switches to black & white sooner.
3
[Response (sec.)]
Set the time in seconds needed for judgment on
switching between [Day Mode] and [Night Mode].
Select [5], [10], [20], [30] or [60].
The mode will switch between [Day Mode] and [Night
Mode] if brightness remains above or below the level
set in
2
for the number of seconds specified.
Select [30] or [60] if brightness changes frequently,
such as when a light source passes in front of the
camera. Select [5] or [10] if change in brightness is
minimal.
Important
• The initial camera settings
1
to
5
define the defaults that
apply when the camera is started. Setting changes will be
reflected only after the camera is reconnected or rebooted.
Specify the settings used in the actual operating environment
from the Admin Viewer (P. 7-10).
• If the subject is a traffic signal or electronic scoreboard, etc.,
the captured image may flicker.
In this case, try changing the [AE mode] setting to [Auto
(Shutter-priority AE)] and selecting a shutter speed lower
than 1/100 to see if the problem improves.
Important
• If [Auto] is selected for [Day/Night], conduct a thorough
operation test to check the effectiveness of the setting
beforehand.
• If [Auto] is selected for [Day/Night], set [AE Mode] and the
Admin Viewer to [Auto], [Auto (Flickerless)] or [Auto (Shutter-
priority AE)] (P. 7-12).
• To use with infrared illumination, set [Day/Night] to [Manual].
Infrared illumination cannot be used with [Auto].
• When [Day Mode] and [Night Mode] are switched, the image
may not focus correctly depending on the brightness.
• If [Day/Night] is set to [Auto], the infrared cutoff filter may
move several times while the mode is switching between
[Day Mode] and [Night Mode]. Pan, tilt, zoom and manual
focus will not work during this period.
Содержание VB-M700F
Страница 12: ...xii...
Страница 13: ...Chapter 1 Before Use Camera Features Software Information Operating Environment and Precautions...
Страница 24: ...1 12...
Страница 25: ...Chapter 2 Initial Settings Preparing the Camera for Use Initial Setting Tool Installation Initial Settings...
Страница 40: ...3 10...
Страница 41: ...Chapter 4 Top Page of the Camera Accessing the Setting Page Admin Tools and Viewer Certificate Registration...
Страница 77: ...Chapter 6 Admin Tools Privacy Mask Setting Intelligent Function Setting Viewing Logs...
Страница 94: ...6 18...
Страница 110: ...7 16...


