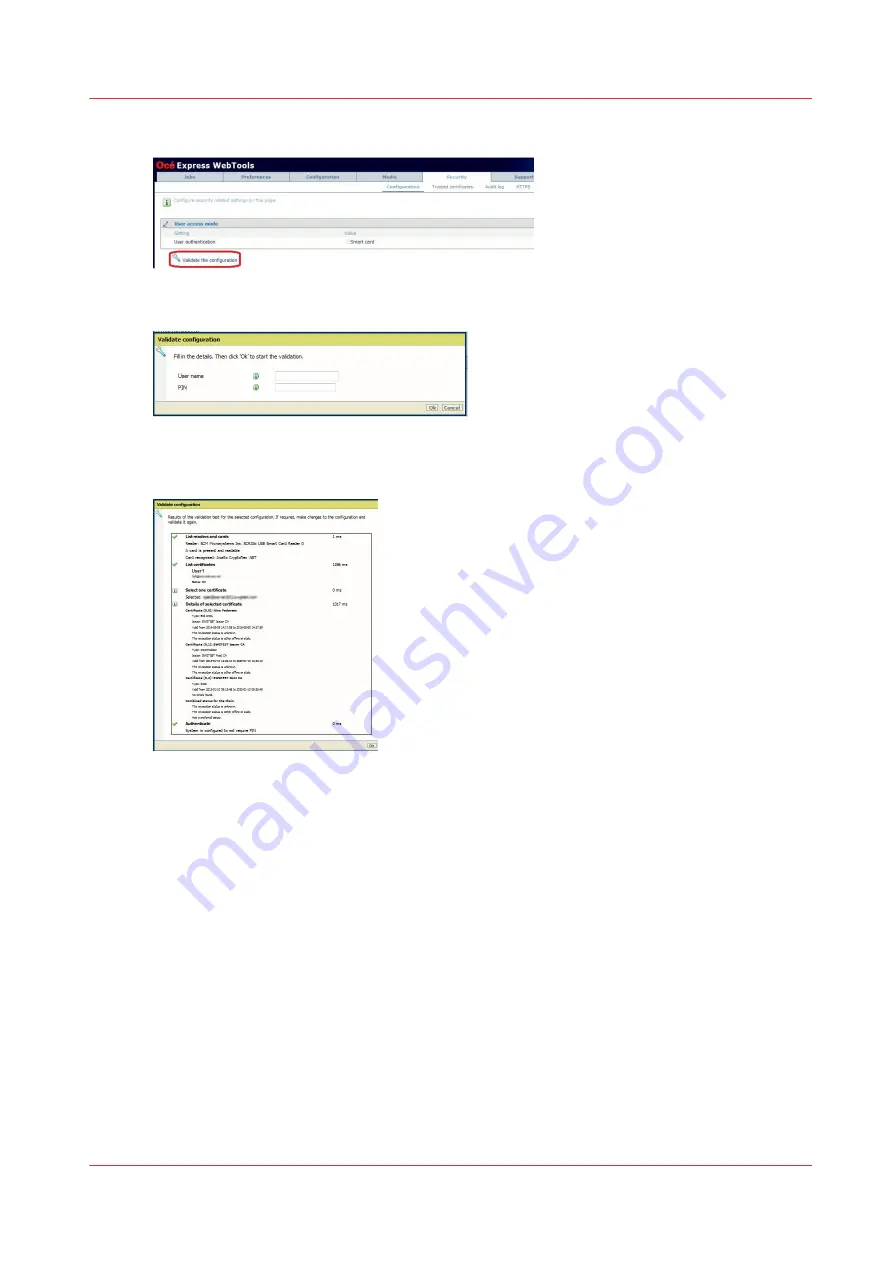
2.
Below the 'User access mode' section, click 'Validate the configuration'.
3.
Leave the 'User name' field empty and enter the PIN if it is required in the user access settings.
4.
Click 'OK'.
A report is generated:
5.
Check there is no red cross icon in the report.
If there is a red cross, solve the issue or check the solutions in the troubleshooting section, see
Troubleshooting of authentication by smart card on page 180
Authentication on the user panel
Introduction
Insert the smart card into the card reader.
• The authentication is automatic when the smart card contains a valid user name (and no
password is needed).
• A login window is displayed when the authentication with the smart card requires a PIN. Enter
the PIN in the password field.
• A login window is displayed when there is more than one user registered into the smart card.
Select the user name and enter the PIN in the password field
Authentication on the user panel
Chapter 4 - Security on Océ PlotWave 345/365 and Océ PlotWave 450/550
179
Содержание Oce PlotWave 750
Страница 1: ...Administration guide PlotWave ColorWave Systems Security information ...
Страница 8: ...Contents 8 ...
Страница 9: ...Chapter 1 Océ Security policy ...
Страница 18: ...Overview of the security features available per Océ System 18 Chapter 1 Océ Security policy ...
Страница 19: ...Chapter 2 Security on Océ PlotWave 300 350 PlotWave 750 PlotWave 900 and ColorWave 300 ...
Страница 97: ...Chapter 3 Security on Océ PlotWave 500 and PlotWave 340 360 ...
Страница 147: ...Chapter 4 Security on Océ PlotWave 345 365 and Océ PlotWave 450 550 ...
Страница 235: ...Chapter 5 Security on Océ ColorWave 550 600 650 and Poster Printer ...
Страница 299: ...Chapter 6 Security on Océ ColorWave 500 and Océ ColorWave 700 ...
Страница 382: ...Smart Inbox management and job management 382 Chapter 6 Security on Océ ColorWave 500 and Océ ColorWave 700 ...
Страница 383: ...Chapter 7 Security on Océ ColorWave 810 Océ ColorWave 900 and Océ ColorWave 910 ...
Страница 409: ......


